CATIA geometry exports can preserve face and body selections so that they appear as ready-to-use Named Selections in SimScale after import, removing the need to manually reselect surfaces or volumes. Two export routes are available, each suited to a different scope and file format.
Export Options
The table below summarizes the two supported routes and when to use each:
| Route | CATIA file type | Scope | Imported into SimScale as |
|---|---|---|---|
| Option A (recommended) | .CATPart | Parts only – not assemblies | Publications |
| Option B | .STEP | Parts and assemblies | Groups |
Option A: .CATPart with Publications (Recommended)
This route uses CATIA’s Publication mechanism to tag faces or bodies. SimScale reads those publications on import and creates a corresponding Named Selection (Saved Selection) for each one. It is the preferred method for single-part files because it preserves geometric intent without modifying the underlying model.
Step 1: Create an Extraction
- In CATIA, open the .CATPart file.
- Select the faces or bodies to include in the named selection.
- Use Insert → Surface-based Features → Extract (or the equivalent command in your CATIA version) to create an Extraction containing the selected geometry.
Important
Before exporting the .CATPart, hide the Extraction in the specification tree, do not delete it. If the Extraction is visible at export time, CATIA includes it as additional geometry in the file, which will cause duplicate surfaces in SimScale.
Step 2: Create a Publication
- Navigate to Tools → Publication.
- Click New Publication and give it a descriptive name; this name becomes the Named Selection label in SimScale.
- Select the Extraction created in Step 1 as the published element.
- Confirm the publication. SimScale supports publications of type Face, Body, and Surface.
Step 3: Export and Import
- Hide the Extraction in the specification tree (right-click → Hide/Show).
- Save or export the file as a .CATPart.
- Upload the .CATPart to SimScale. The published faces or bodies appear automatically as Named Selections in the geometry panel, ready to assign to boundary conditions or mesh refinements.
Option B: STEP with Selection Sets
This route uses CATIA’s Selection Sets to group faces or bodies, then exports the geometry to STEP format. SimScale reads the selection set data embedded in the STEP file and creates a Named Selection for each group. Use this route when working with assemblies or when a STEP export is required.
- In CATIA, open the part or assembly.
- Navigate to Edit → Selection Sets and create a new set.
- Give the set a descriptive name; this name becomes the Named Selection label in SimScale.
- Add the relevant faces or bodies to the set.
- Export the file using File → Save As and select STEP as the format. Ensure that the STEP export settings include selection set data.
- Upload the .STEP file to SimScale. The selection sets appear as Named Selections in the geometry panel.
Verifying Named Selections in SimScale
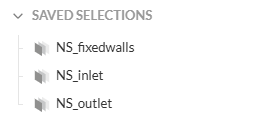
After uploading the file, navigate to the Geometry panel in the SimScale workbench and expand the Saved Selections section. All expected groups should appear with the correct names. If a saved selection is missing, confirm that the Publication or Selection Set was saved before export and that the Extraction (Option A) was hidden rather than deleted.
Limitations
- Option A (.CATPart with Publications) supports parts only; it cannot be used for assemblies.
- SimScale supports publications of type Face, Body, and Surface. Other publication types are ignored on import.
- If the Extraction is not hidden before exporting a .CATPart, duplicate surfaces appear in the imported geometry.
- Selection Sets in STEP files depend on the CATIA export configuration; check that the STEP export dialog includes group or selection set data before exporting.