This article will teach you how you can upload a STAT file as wind data for a Pedestrian Wind Comfort (PWC) analysis in SimScale.
Best Practices
A pedestrian wind comfort (PWC) analysis needs the wind data of the interested area to evaluate the pedestrian comfort according to different criteria. You can use the wind data that is provided by SimScale’s partner meteoblue® or you can upload your own wind data into the platform.
STAT File Preparation
To upload the wind data, the file would need to have a .stat file extension. This file contains the wind directions and the proportion of each prevailing wind speed interval. Figure 1 is an example of a .stat file that is ready for upload:
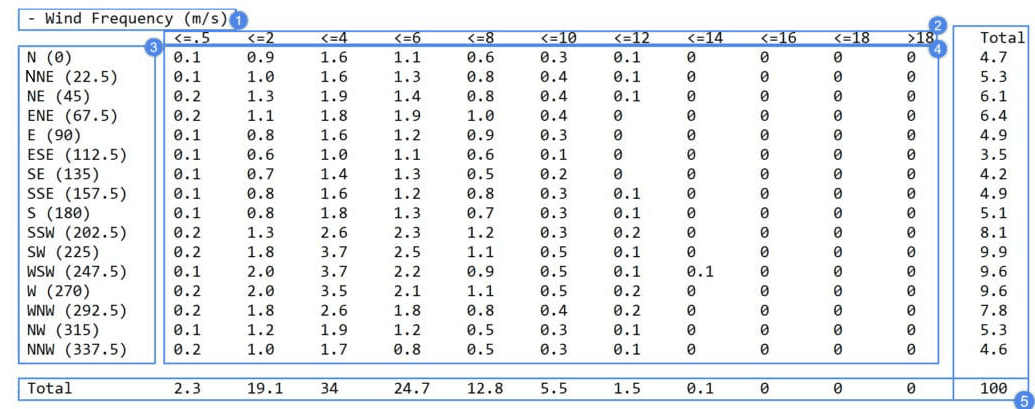
- The first line: It is essential to include the following first line in the .stat file:
- Wind Frequency (m/s). There should not be an empty line bewteen the first line and the wind vel buckets. - The speed range: In this example, wind speeds have an interval of 2 \(m/s\). However, it is possible to use different intervals too. The wind speed interval will need to start with a <= symbol which means less or equal than. For instance, the second column is <=.5 which means this column contains the proportion of wind speed that is less or equal than 0.5 \(m/s\) for each wind direction.
- The wind direction: The wind directions in this example have an interval of 22.5°. However, it is possible to use a different interval too. In creating this file, a naming convention will also need to be followed, so that the file can be read properly. The prevailing wind direction consists of just letters. For example, NNE means North North East which is the wind coming from a (22.5° angle) and followed by the angle in parentheses.
- The frequency distribution: The wind frequencies should respect the velocity range per wind direction.
- The total: The total proportion of each wind speed interval and the total proportion of wind coming from each direction is also necessary.
- Make sure to add a new line at the end.
Keep in mind!
- Ensure that every data point has a value. If there is no data, assign a zero. Otherwise, you will get NaN (Not a Number) error.
- Ideally, the sum of frequencies (∑f) should be 100%. If this is not equal or close to 100% (+/- 1%), calculate the deviation (100-∑f), then distribute the deviation to the non-zero frequency values.
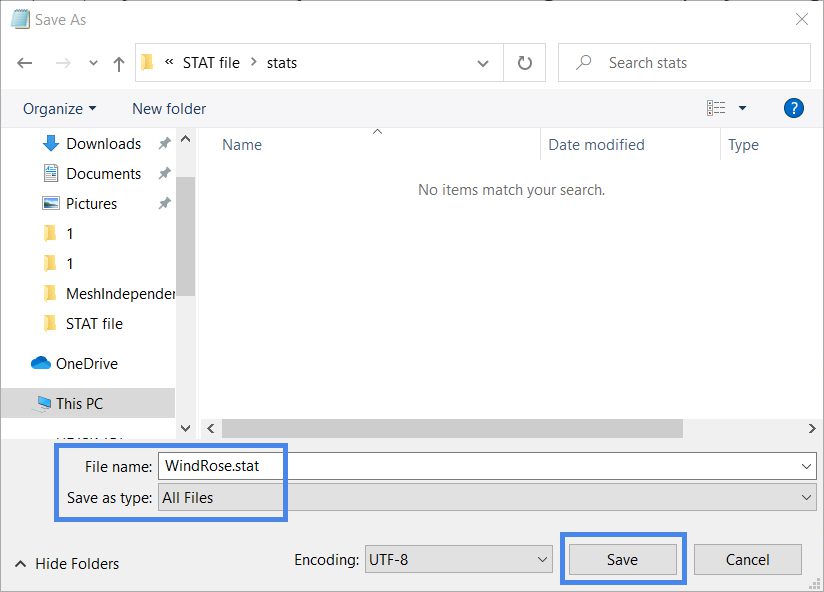
After arranging your data with respect to the SimScale format, you can now save it as a .stat file. For instance, you can do this in Windows text editor as follows:
- Open a text editor and paste the data there.
- Save the file by adding “.stat” at the end of the file name.
STAT File Upload
After the file is ready, it can be uploaded to the SimScale platform as follows:
- Click on ‘Browse files‘ to chose the file containing the wind data.
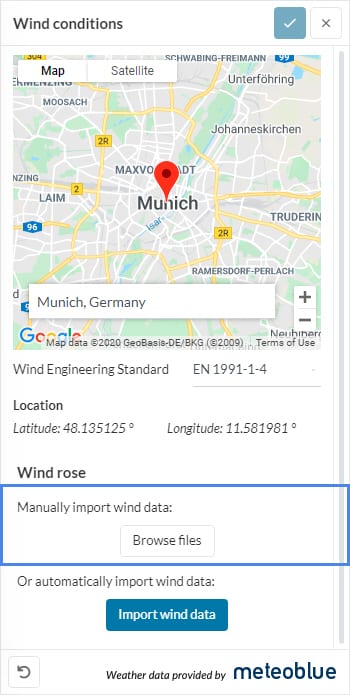
- After you have chosen the file for upload, the wind rose according to your data should appear, like in the figure below:
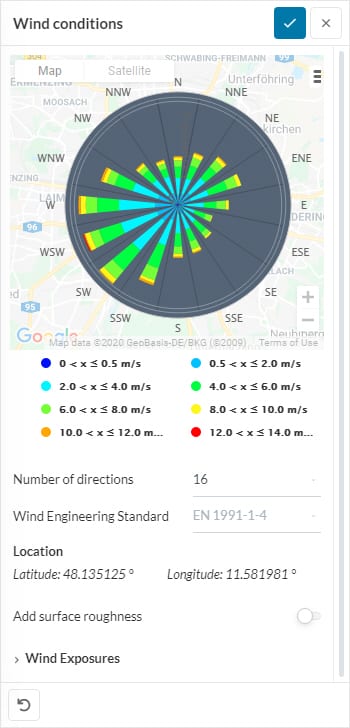
In conclusion, you are ready to move on to the next steps of your simulation setup.
Note
If none of the above suggestions solved your problem, then please post the issue on our forum or contact us.
References