Documentation
SnappyHexMesh, which the Hex-dominant meshing algorithm type is based on, is a mesh generation tool in the OPENFOAM® open-source software.
This tool generates three-dimensional unstructured or hybrid meshes consisting of hexahedral (hex) and split-hexahedra (split-hex) elements. Besides the Standard automatic meshing tool, which generates a hybrid mesh of both tetrahedral (tet) and hexahedral elements, the SimScale platform also houses the snappyHexMesh meshing algorithm. The method iteratively performs the steps detailed below to obtain the final mesh.
The advantage of working with hexahedral and split-hex elements using the Hex-dominant meshing method is that the elements can be subdivided to a very fine scale without losing too much mesh quality, thus improving potential simulation speed and accuracy. This is in contrast to working with tetrahedral elements, which can be more robustly automated to fit complex geometries, but may face more mesh quality issues for certain geometry features without additional manual refinement.
Generally, a reference base mesh composed of hex cell elements is used to project and snap cells onto the geometry. Mesh refinements can flexibly be specified on edges, surfaces, and inside or outside volumes to obtain optimum geometry feature resolution and final mesh quality. Parallel computing is fully supported with load balancing at every iteration.
The basic Hex-dominant methodology, using the snappyHexMesh algorithm, consists of 4 main steps:
These four steps are described and illustrated in brief detail below:
In the castellated mesh step, the base mesh is created inside the bounds of the Base Mesh Box.
The Base Mesh Box or the Background Mesh Box serves as the domain for the base mesh in the meshing process. This mesh purely contains hexahedral elements whose number is defined by the user. It is important to note that for any direction, the number of cells must be larger than 1, resulting in a 3-D mesh.
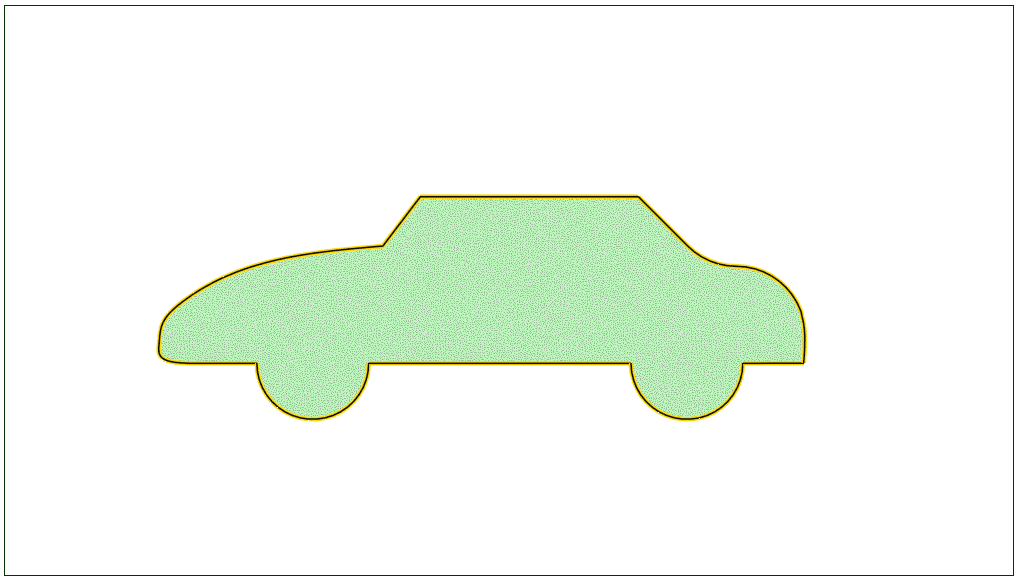
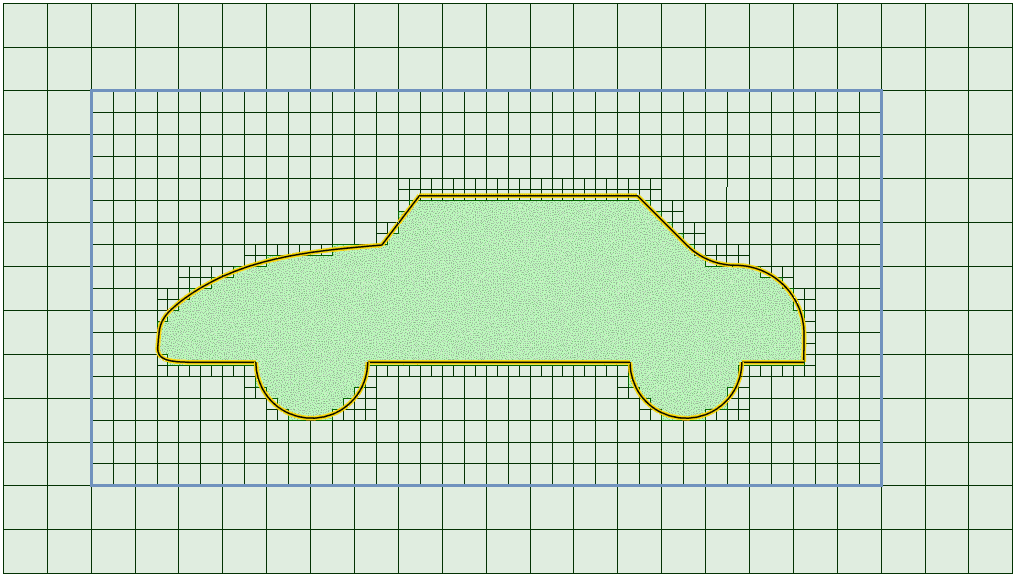
In the following figure, an example of an external mesh around a vehicle body is used to explain the meshing process. The first image below shows the Base Mesh Box around the object.
The Base Mesh is then generated inside the entire space bounded by the Base Mesh Box, as shown in the figure below.

Before removing the mesh cells inside the body, this base mesh is then refined based on the specified edge and surface refinements and then split in the vicinity of the body surfaces.
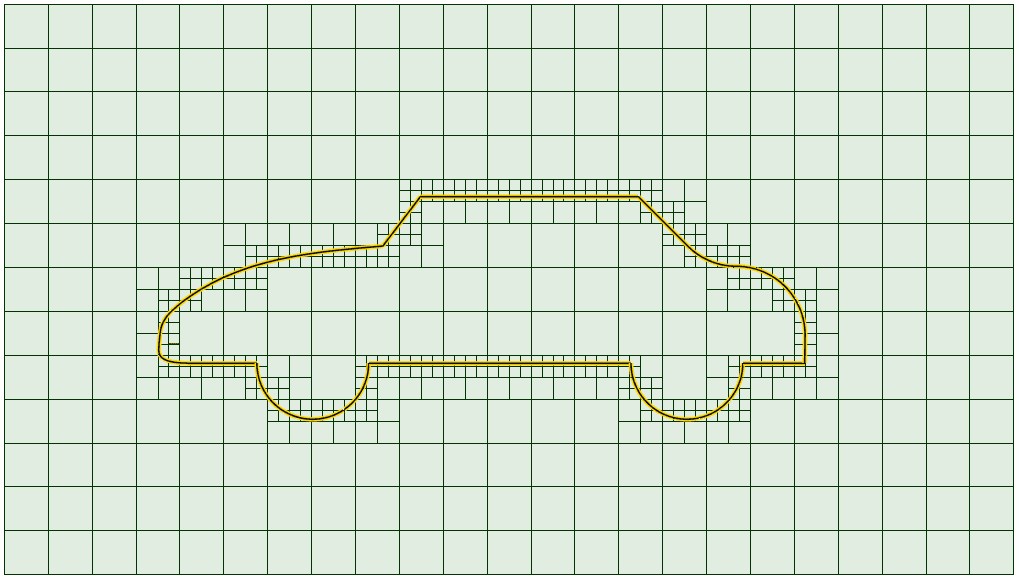
After the mesh in the locality of the body is refined and split, cells are removed based on the specification of the material point (see the Hex-dominant Main Settings page for details).
This requires at least one region to be bounded by a surface inside the domain. The mesh space where the material point is located is kept while cells are removed in the other space(s). So in this case, the material point can be anywhere in the space between the bounds of the base Mesh Box and the surface of the body.

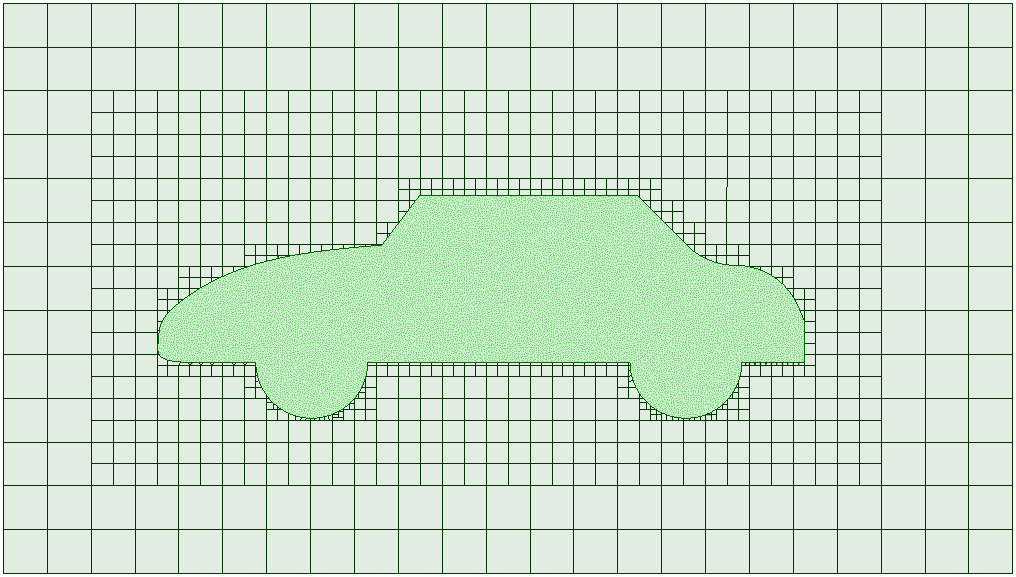
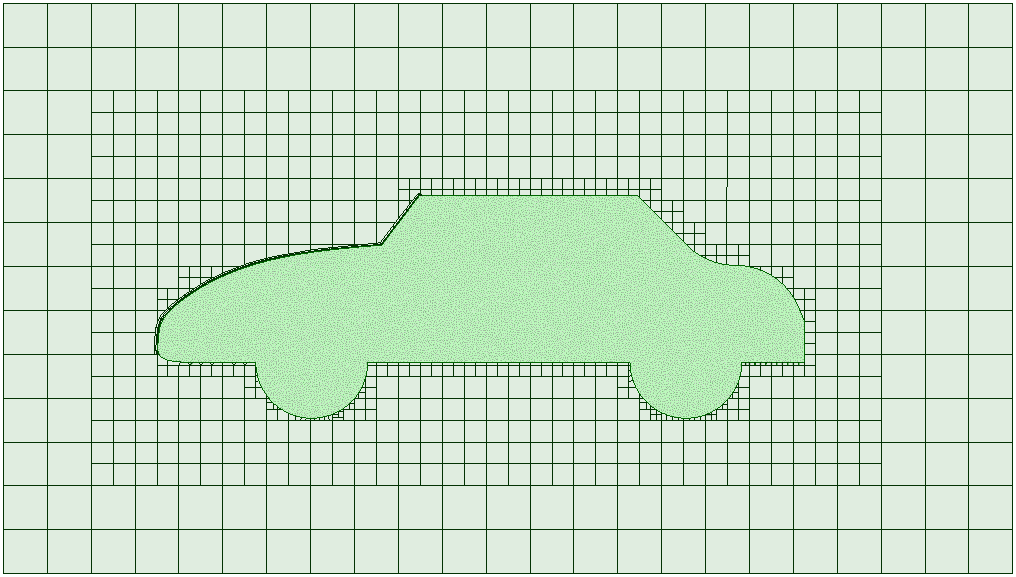
Lastly, the mesh space is refined further based on the specified region refinements and the refinement level (detailed in Main Settings > Region refinements). After this, the castellated mesh looks similar to the one shown below.
The next step in the snappyHexMesh algorithm is snapping or projecting the castellated mesh (staircase-type mesh) to the object surface. This process is accomplished by the following algorithm:
The internal mesh after the snapping process is depicted in the figure below:
Depending upon the mesh setting specifications, a layered mesh consisting of hexahedral cells that are aligned to the surface may be generated on selected or all surfaces.
This process is also done iteratively and involves a number of steps to generate the required mesh. Here only the methodology is discussed, while the settings are further detailed in Main Settings > Layer Refinements.
The main steps are highlighted as follows:
As a final step, the mesh is checked for quality criterion and the meshing process looped until all checks are passed or the overall iteration limit is reached.
In the case of reaching the iteration limit with failed checks, the resulting mesh might contain bad elements or cells.
Become a SimScale member!
Try out SimScale’s hex-dominant mesher today! Join SimScale today and experience cloud-based simulation within minutes!
References
Last updated: August 11th, 2023
We appreciate and value your feedback.
Sign up for SimScale
and start simulating now