This article shows how to use the mesh clip to visualize the internal mesh in SimScale.
Workflow
Whenever a mesh is successfully generated, by default SimScale viewer displays the external mesh. In order to check the internal mesh, its size and quality visually, the mesh clip feature can be used.

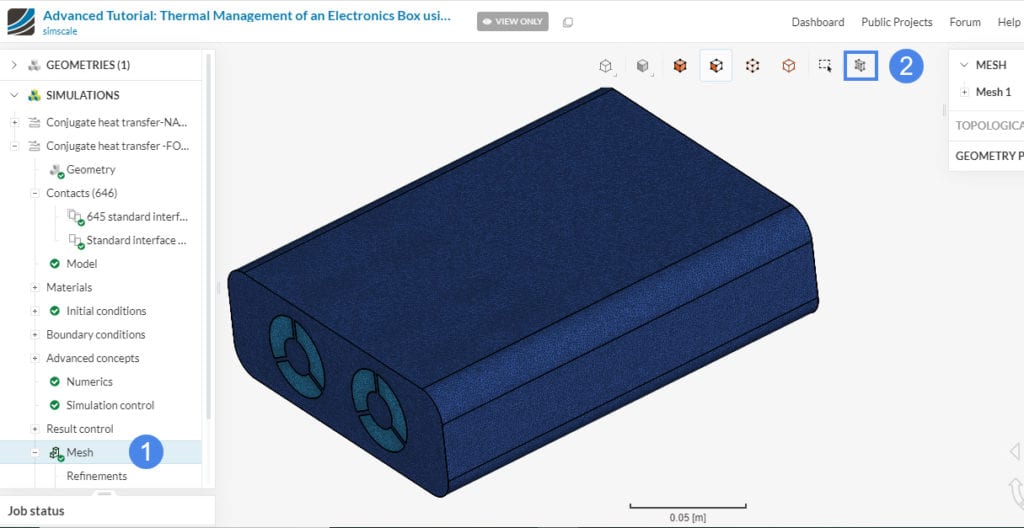
To visualize a mesh clip, users can select any successful mesh from the simulation. After selecting the mesh, click on the Mesh clip button as shown in the image above. This will pop up the mesh clip options on the screen.

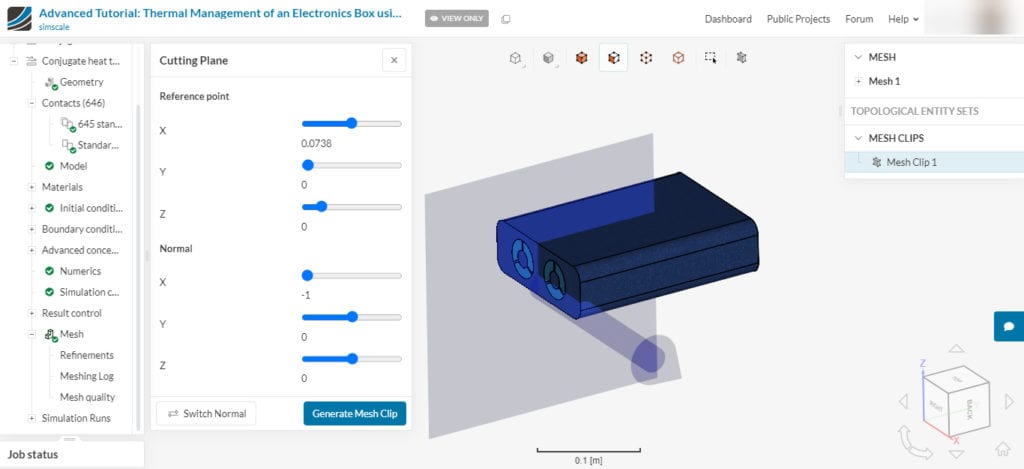
Here you can select the direction of the cutting plane to clip accordingly. Using the slider against the Reference point and Normal the plane can be appropriately positioned. To precisely control the settings keep the cursor over the slider and use the left and right arrows on your keyboard.
Once the cutting plane is positioned as per requirements, click on the ‘Generate Mesh Clip’ button.
Note
Mesh clip would take from few seconds to minutes depending upon the size of the mesh to be generated. Users can still work around the project until the clip is generated.
The loading symbol ![]() on the bottom right of the Cutting Plane panel signifies that the mesh clip generation is still in progress.
on the bottom right of the Cutting Plane panel signifies that the mesh clip generation is still in progress.

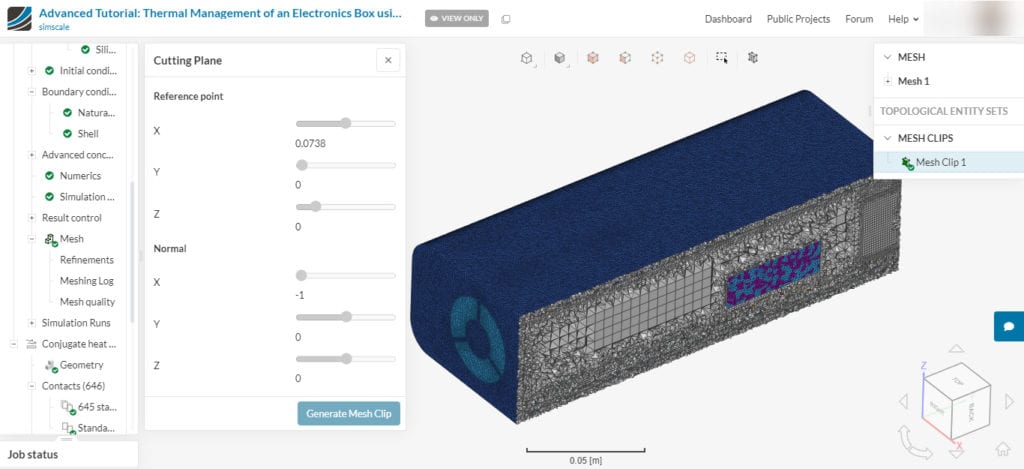
Using the generated mesh clip one can analyze the cell size, distribution and make quantitative judgments. More than one clip can be generated at different orientations and locations. All the successful mesh clips will be listed under MESH CLIPS in the MESH tree (top right).
Qualitative mesh assessment can be also done using mesh quality parameters. Find out more about how to Check the Mesh Quality Using the Meshing Log?