The objective of this article is to highlight two workflows for closing holes in terrains used for Pedestrian Wind Comfort or Incompressible LBM analyses in Rhino.
Background
When running PWC or incompressible LBM analyses with uneven terrains, it is important to be careful with the continuity of the terrain, since larger holes may cause the mesh to extend underneath the terrain, causing unphysical results and simulation errors.
Overview
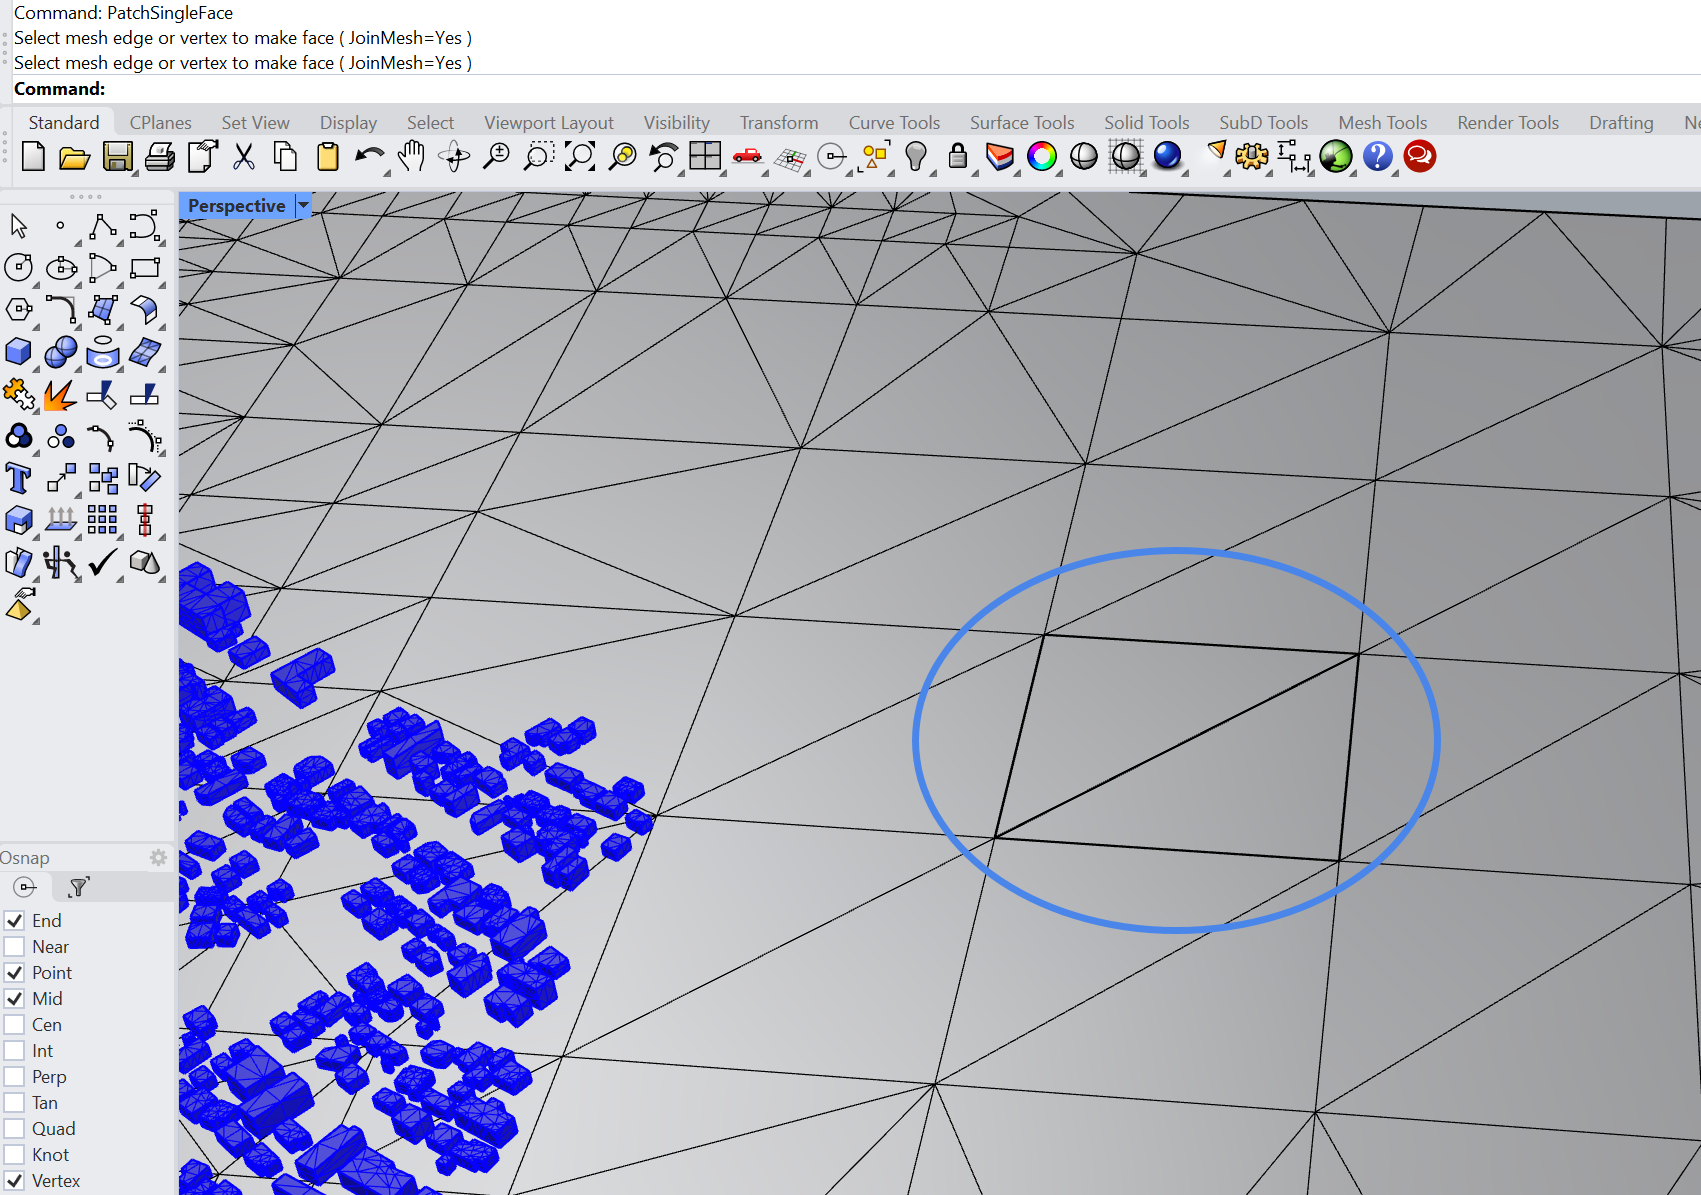
When preparing geometry for the PWC analysis, it is important that the combination of the terrain and the buildings is continuous. If there are holes large enough in the geometry for the local mesh cells to fit, the mesh may extend through the hole. For demonstration purposes, the hole highlighted by the blue circle below would cause meshing problems:
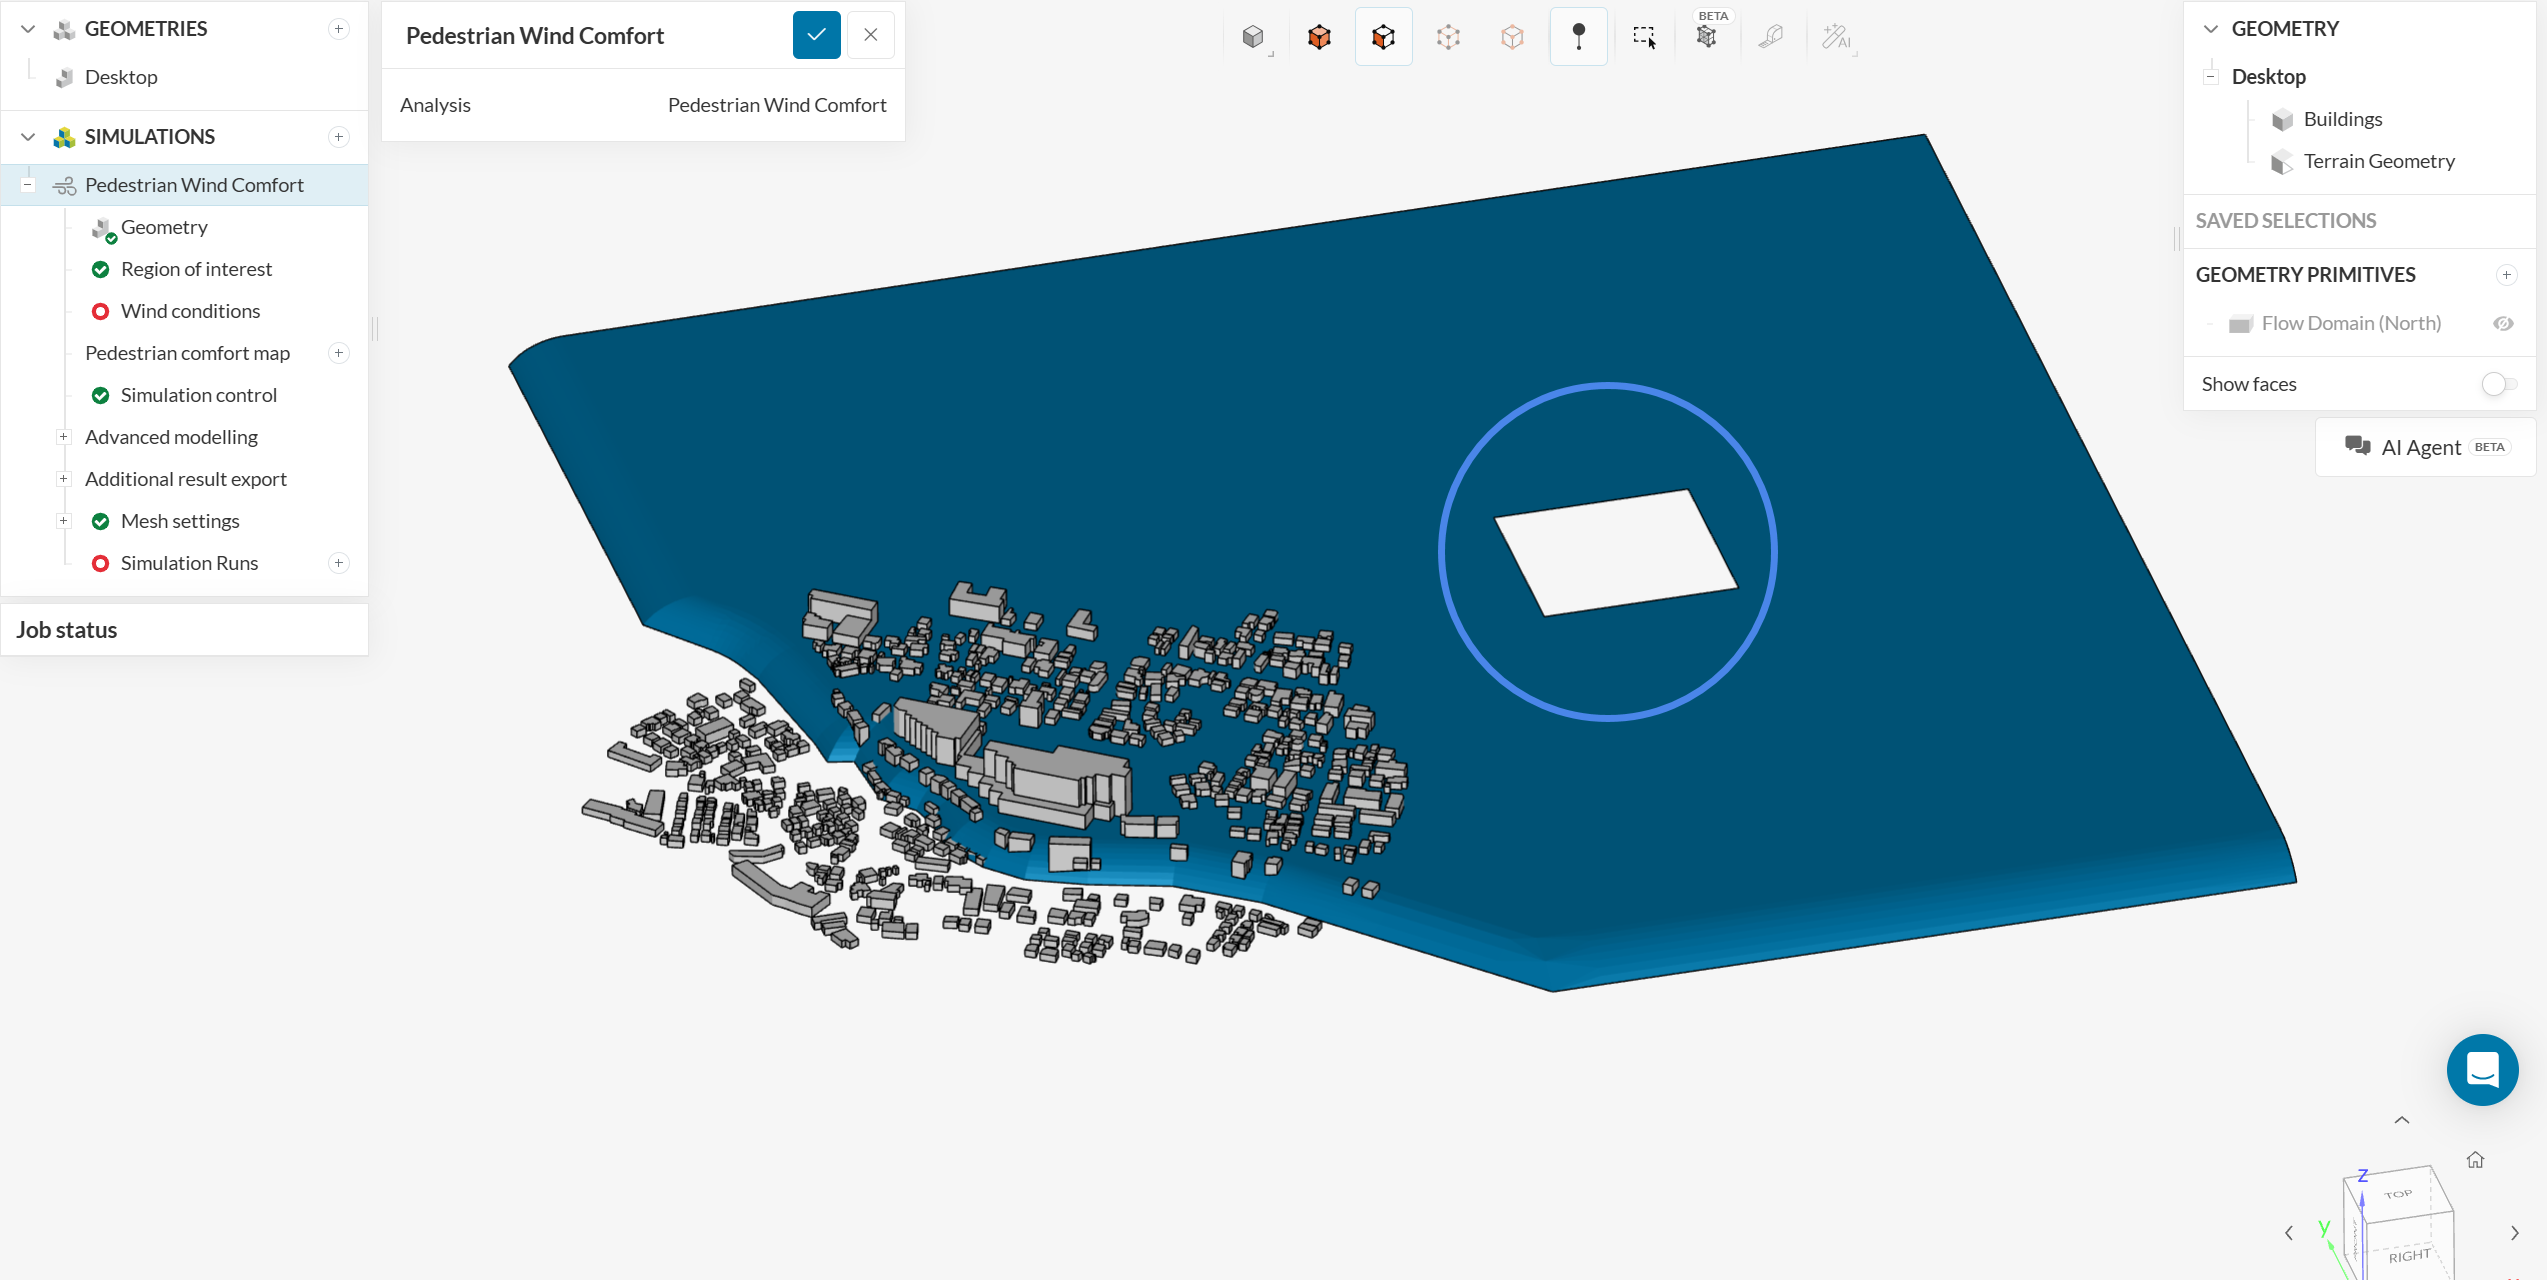
As a rule of thumb, the LBM solver will calculate a solution anywhere that a mesh is generated, which will lead into unphysical results due to air flow underneath the terrain.
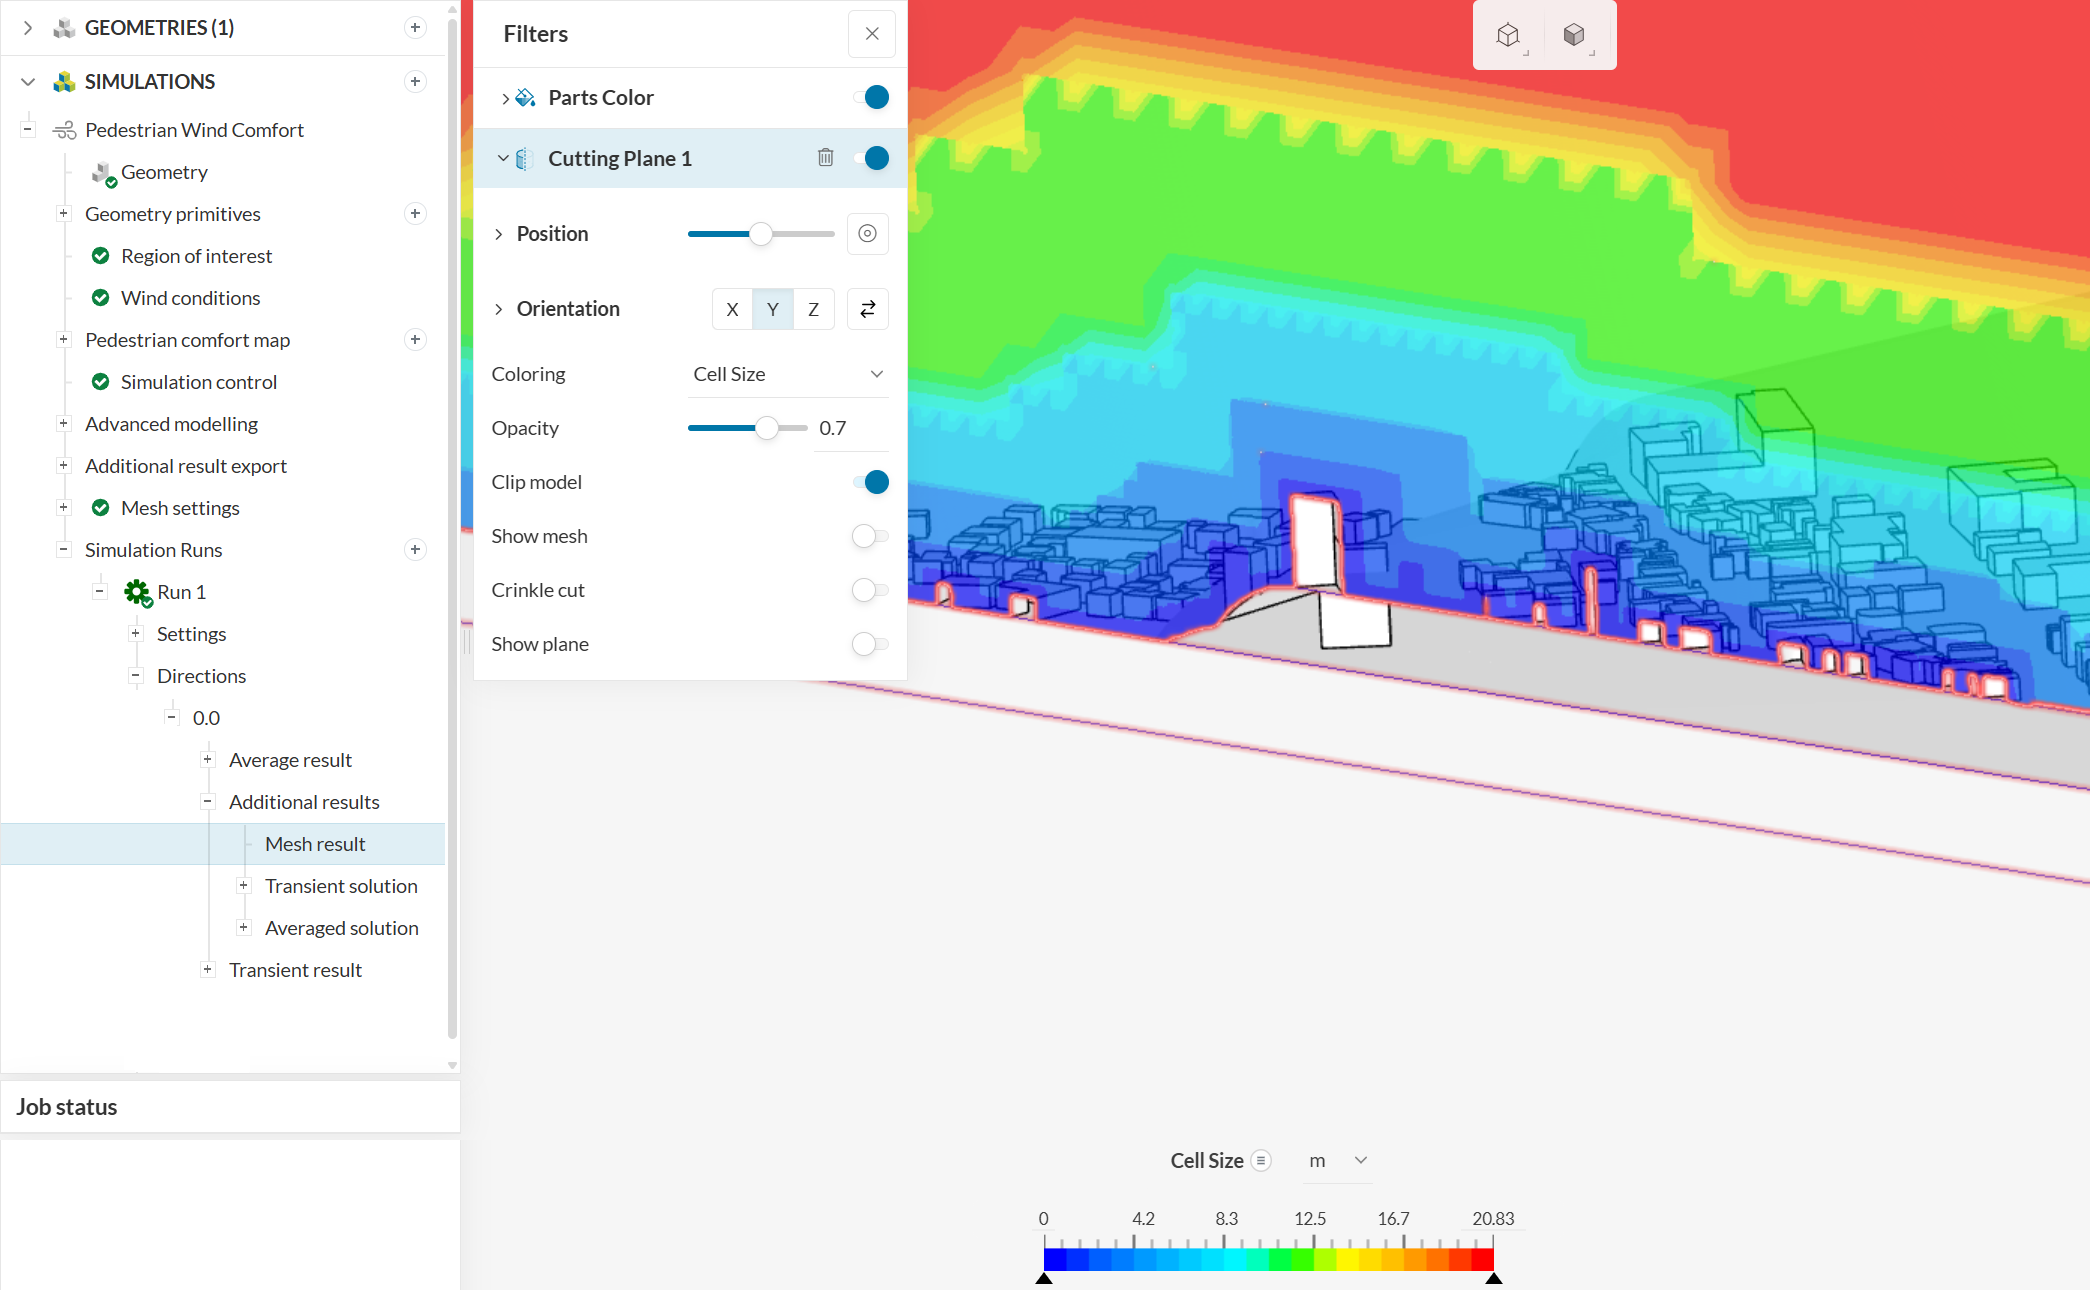
Especially for uneven terrains, when holes exist you may find mesh cells generated underneath the terrain by inspecting the Mesh result from a PWC simulation, or the simulation results from an incompressible LBM run. The best way to find out if cells are generated underneath the terrain is with a cutting plane filter.
Find below two meshes for a PWC simulation. The first mesh was created with the terrain from Figure 1, causing the mesh cells to extend underneath the terrain:

Here is a mesh from the same geometry, but this time with a continuous terrain, which shows no cells underneath the terrain:
Although the hole highlighted in Figure 1 is very large, the smallest cell size in PWC simulations is usually in the range of 0.2 to 1 meter (see how to calculate cell size here), so holes in this order of size may still cause mesh problems.
Solution
If you spot cells underneath the terrain, the two main reasons are due to the terrain being too short or due to holes in the terrain. You can evaluate whether or not your terrain is too short by ensuring that the terrain extends further than the Flow Domain.
If your terrain is properly sized, then it is very likely that you have holes in the terrain, and a visual inspection is required, carefully looking for small openings on the terrain. Holes are often found in terrain discontinuities, such as regions where the terrain connects with buildings.
Depending on whether you are able to spot the holes or not, and on how many holes the terrain has, there are different workflows that can be used. For exemplification purposes, we will highlight two workflows below using Rhino.
Worked Example with Patch Commands
Taking the geometry from Figure 1, if we know where the hole is, there are several workflows in Rhino that allow you to close it. Here we will discuss a couple of patch commands.
Patch
Using the Patch command, you can press control + shift and double click on one of the edges of the hole. This will select all edges in the open loop:
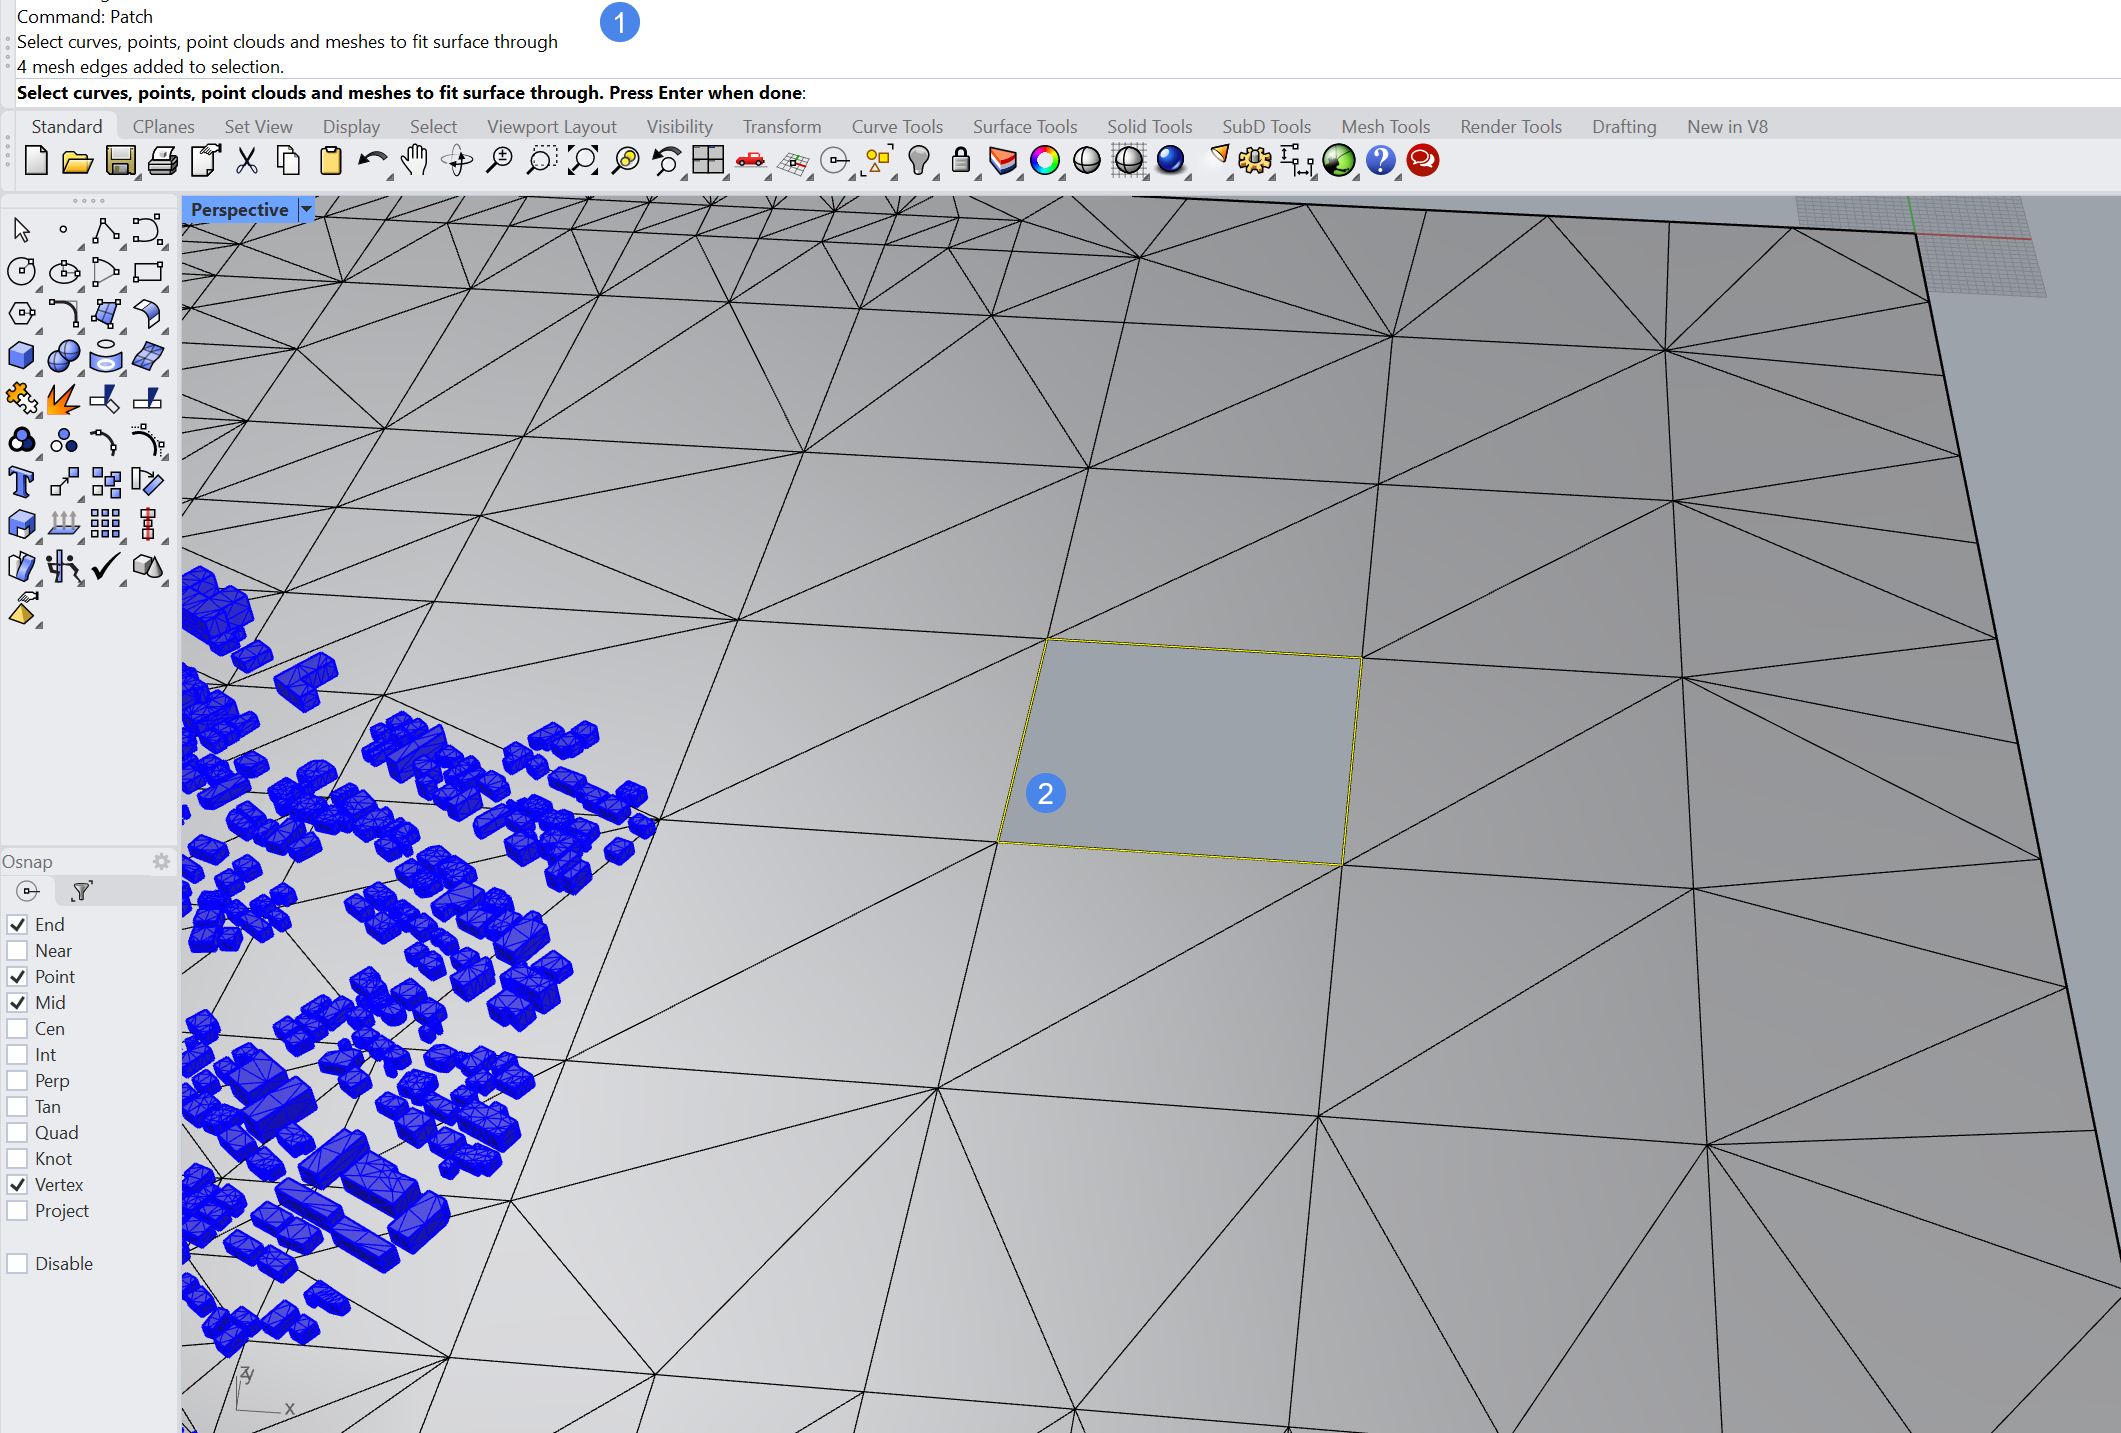
After selecting the closed loop of edges, press enter to apply the patch:
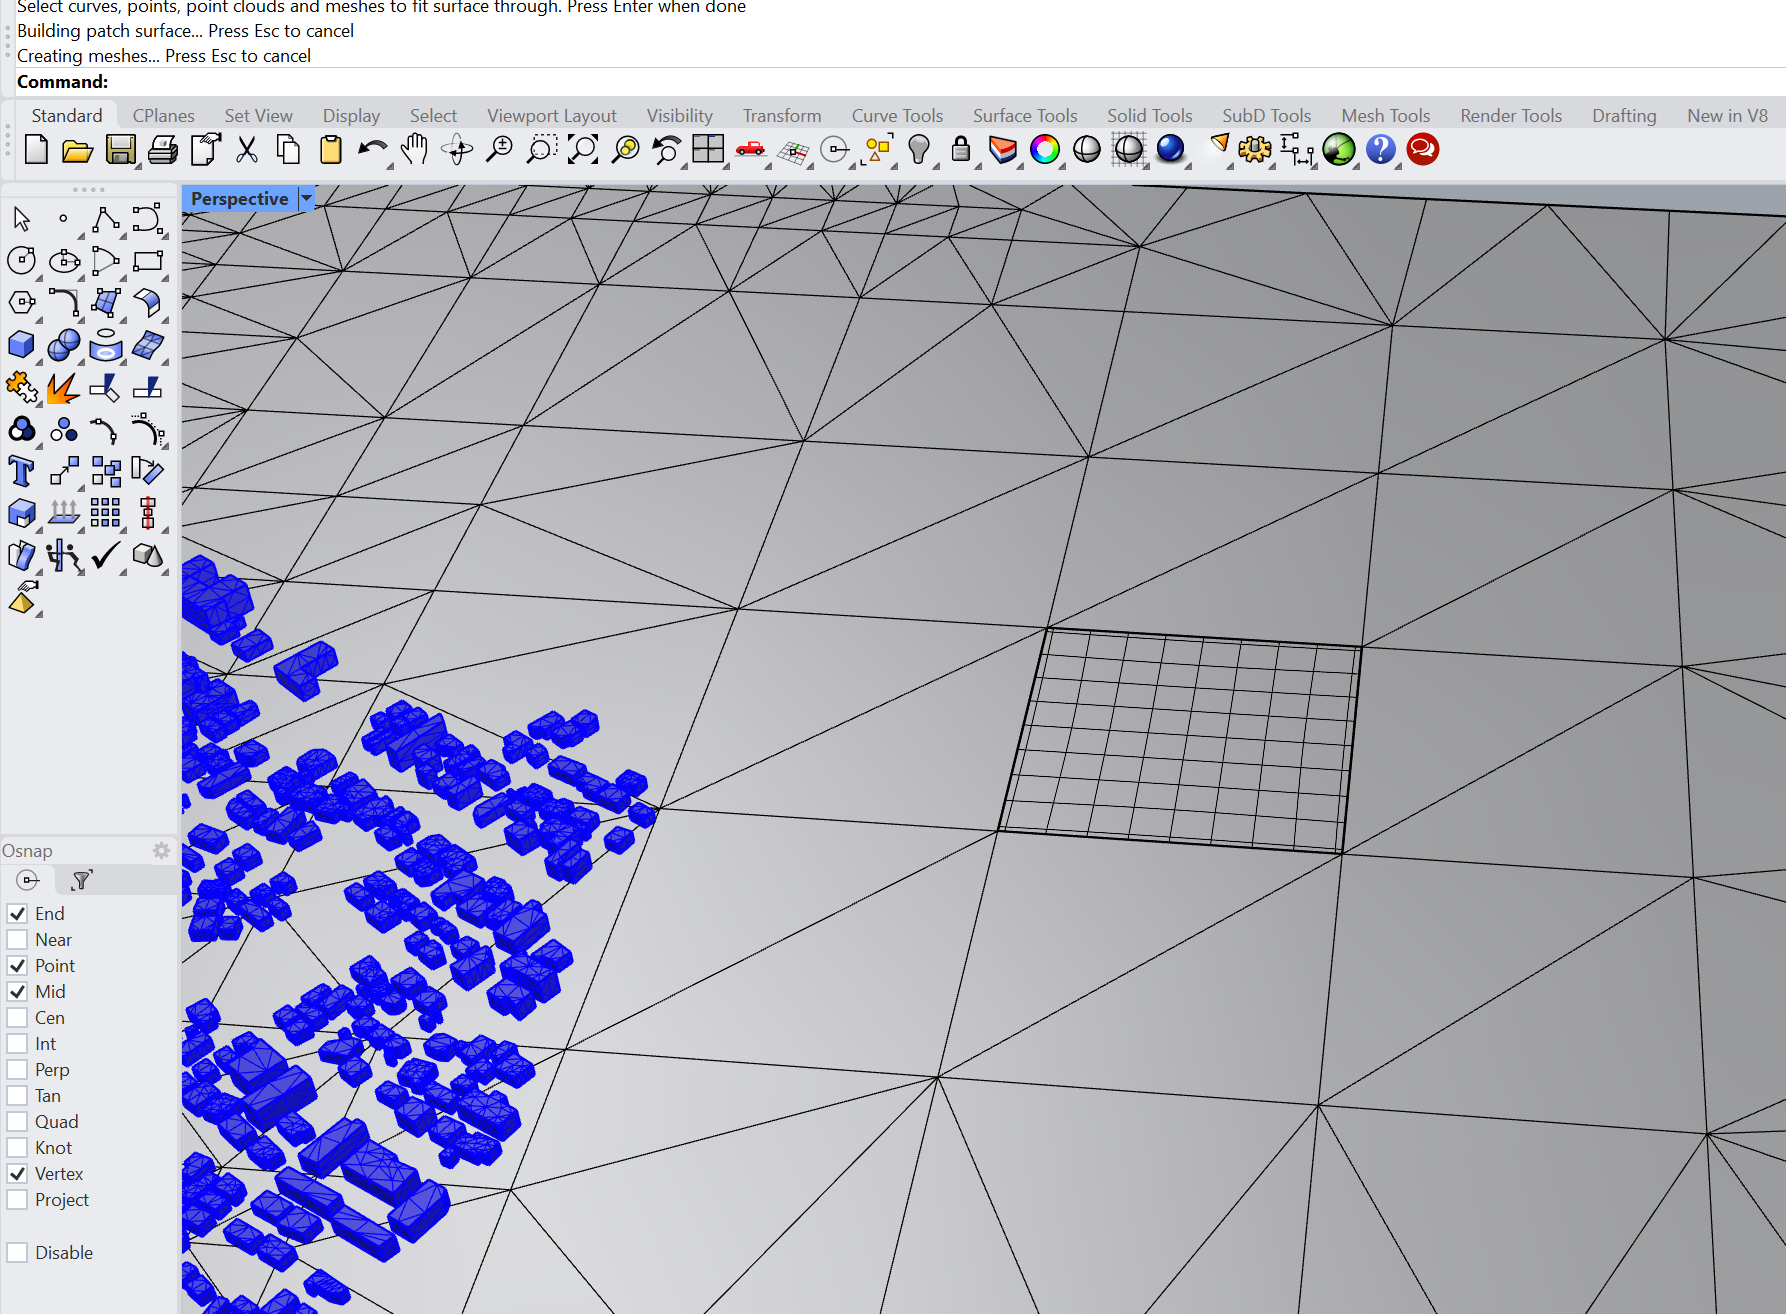
PatchSingleFace
The PatchSingleFace command is similar to Patch, however it creates one triangle at a time. After entering the command in Rhino, you can shift-select two edges from the hole, and a new triangle is created. Still using the Figure 1 geometry, since the hole is a square, we would need to use PatchSingleFace twice to fully close it:
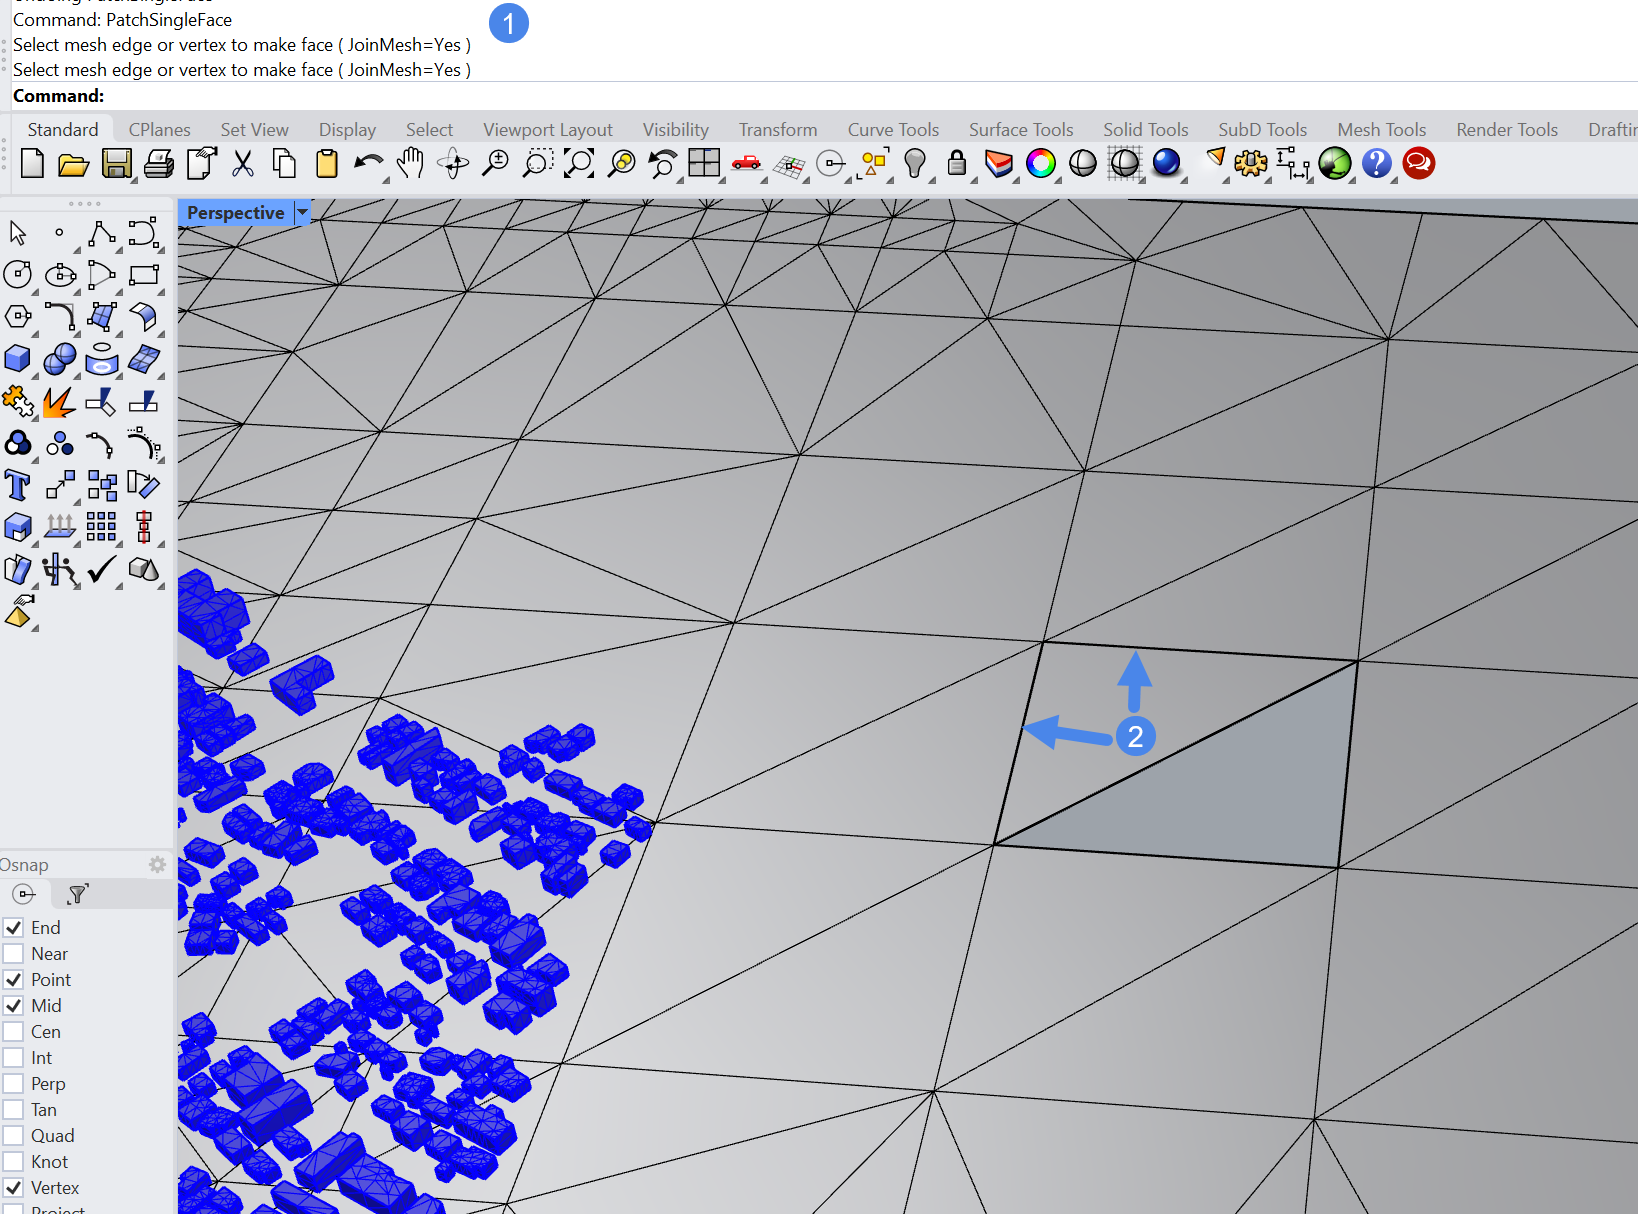
After running the second PatchSingleFace command, the hole is fully closed.
Worked Example with Drape
Although practical, the Patch workflows require you to find the holes in the geometry, so it is more useful for larger holes. When the holes are small and/or when there are many holes in the terrain, the Drape workflow may be able to help.
Terrains with holes are discontinuous in nature, so the Drape command has the objective of using a discontinuous terrain as a reference for a continuous topology.
When using Drape, the user draws a rectangle on top of the terrain. The rectangle drapes on the topology, creating a smooth, continuous terrain:
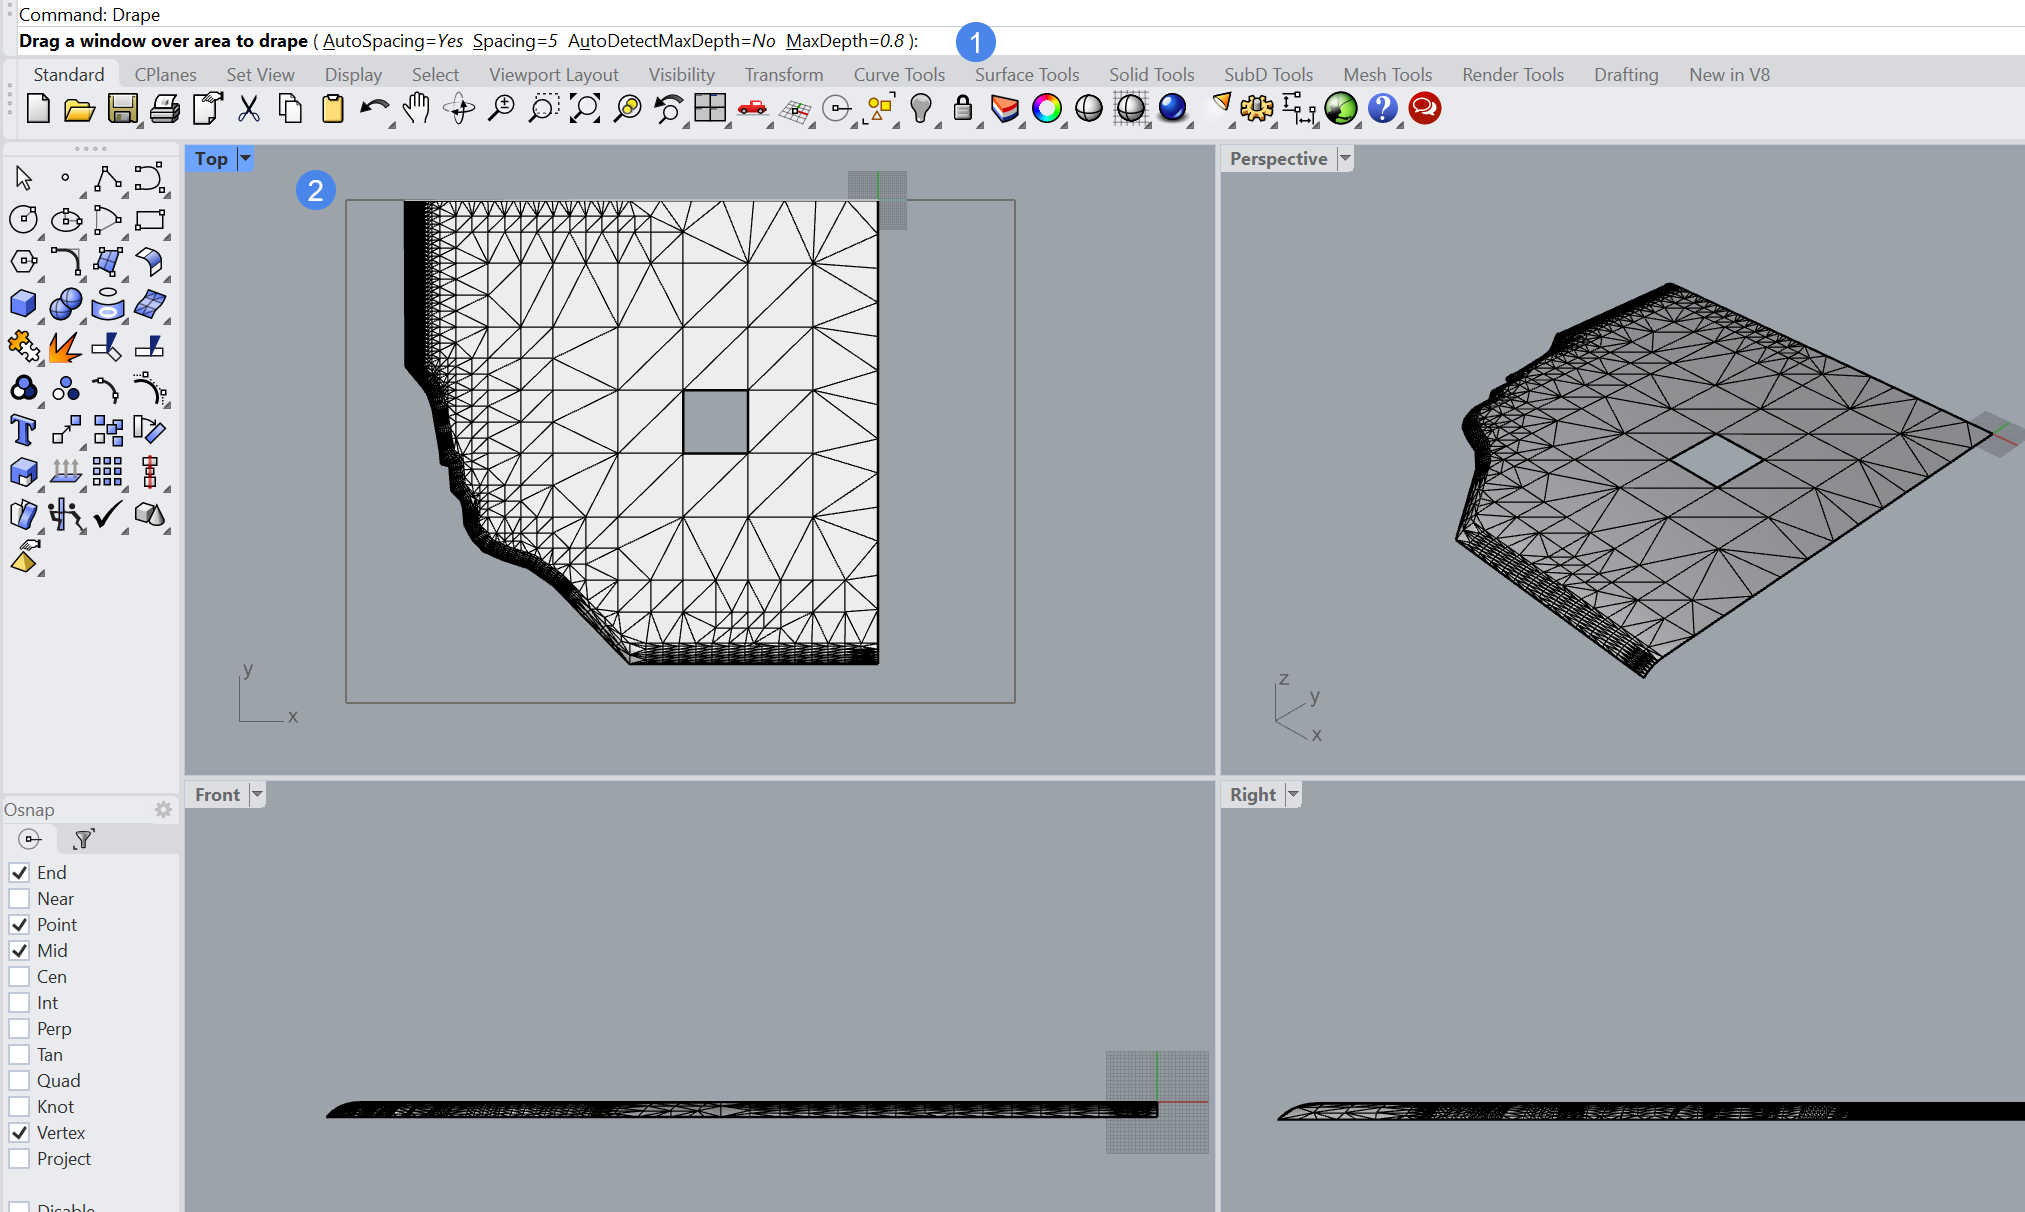
- Use the Drape command. Depending on how uneven the topology is, it is recommended to adjust the Spacing (i.e. resolution) and other drape settings.
- Draw a box covering the terrain
This operation will return a new, continuous terrain, such as the one below. By adjusting the drape depth and spacing, you may control the final result.
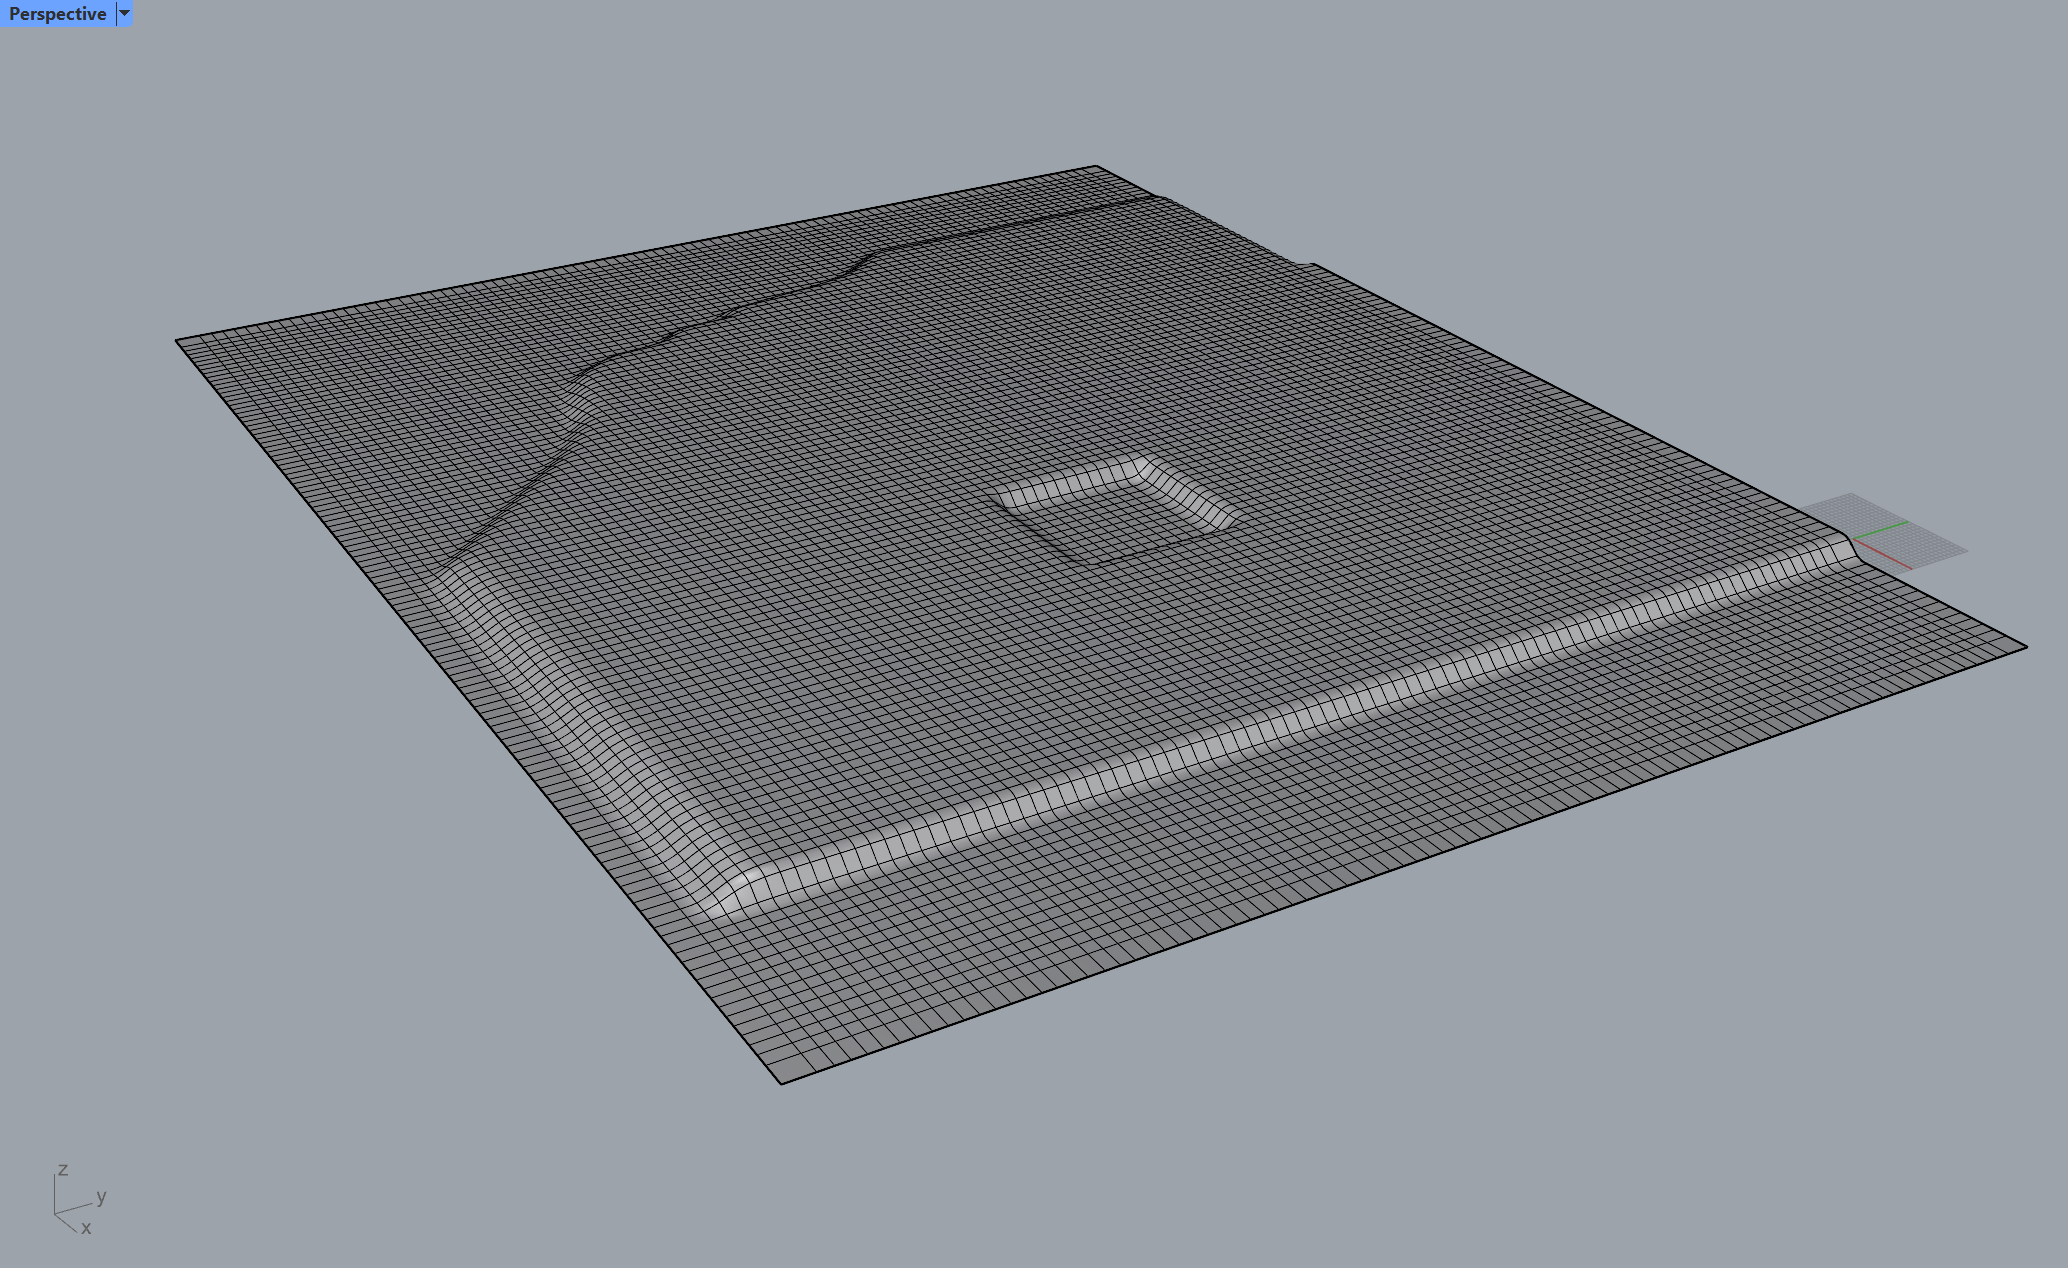
As such, drape can be a good option to quickly close many small holes that can be difficult to spot, while Patch takes care of larger holes.
Note
If none of the above suggestions solved your problem, then please post the issue on our forum or contact us.