For fluid flow scenarios where solid-fluid interfaces are present, boundary layer effects can be critical to the accuracy of results meaning accurate modelling of the interfaces is imperative. The two methods typically applied in CFD include applying a wall model or fully resolving the wall.
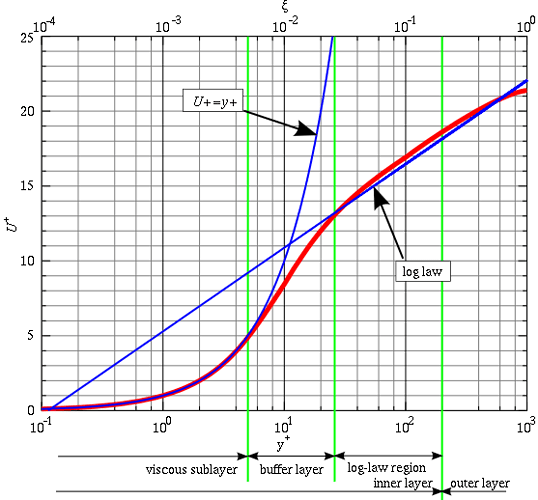
However, in pursuit of observing the boundary layer effect, an important parameter must first be explained. This parameter is the y+, which is a non-dimensional wall distance for a wall-bounded flow that characterizes the flow regime near the wall. This is important in observing turbulence due to existing solids in the domain or if there is flow separation in the domain. The y+ value will determine whether or not your wall modelling strategy is valid. For full resolution the y+ value should be kept below 1, with the first cell center is placed in the viscous sub-layer. When using a wall model the y+ value should be kept between 30 and 300.
Read more about how to calculate y-plus (y+) value on our forum:
Wall Resolution v/s Wall Modelling
In choosing which method to use, there are several considerations to take:
- Full resolution requires extremely fine mesh near the wall in order to achieve a y+ value less than 1, meaning large mesh sizes will be required. If a large mesh size can be used for the simulation then a full wall resolution can be used, on the other hand, if only a small mesh size can be implemented for the simulation, then a wall model must be chosen to simulate the boundary layer effects.
- The complexity of the expected boundary layer effects should also be considered. Wall models can only capture basic behavior. If for example, there is significant surface curvature the flow separation and reattachment may be too complex for the wall model to capture. The choice of turbulence model is important too.
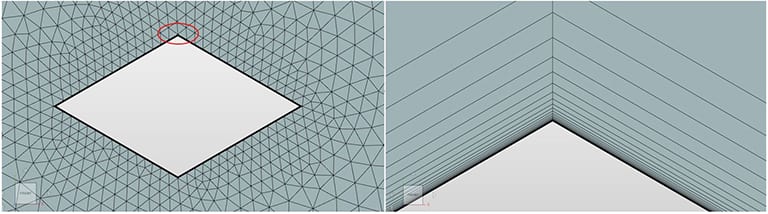
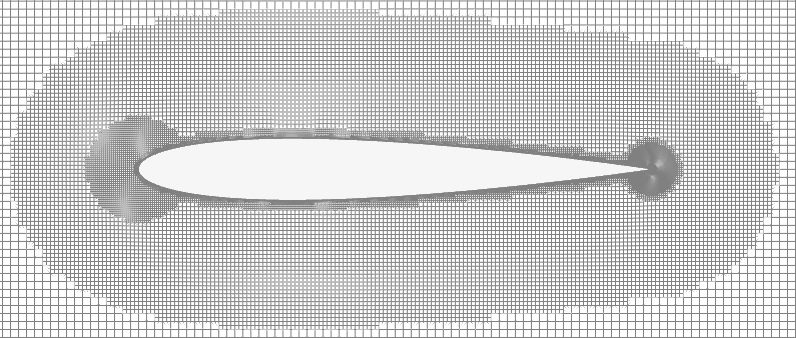
Consider the following example of a NACA 0012 airfoil. The fluid domain around it is discretized with the hexahedral mesh using both the approaches for wall treatment: modeling and full resolution.
The two approaches for the wall treatment are clearly visible when we zoom in enough on the leading edge of the airfoil. In Figure 3, on the left, is the wall modeling approach with just 5 layers, while on the right the 15 layers fully resolve the boundary and are intended to capture the near-wall turbulent effects with more details.
Analyze Y+ During the Simulation
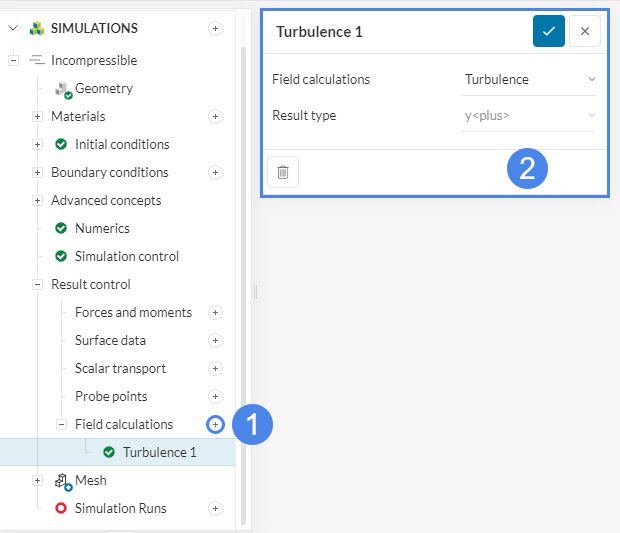
The calculation of y+ can be turned on on the SimScale platform by enabling ‘Turbulence‘ in Field calculations under Result control. It will pop a settings panel that will have y<plus> as the default Result type.
Note
If none of the above suggestions solved your problem, then please post the issue on our forum or contact us


