This article explains different ways to export a Revit model and import it into SimScale for simulations, thus answering the following frequently asked questions:
- Can I export Revit models to SimScale?
- Can SimScale import native Revit formats?
Supported Formats From Revit
SimScale supports the following Revit CAD export formats:
- Revit (.RVT)
- ACIS (.SAT)
- STL (.STL)
Direct Export to SimScale (.RVT)
It is possible to directly export a model as .RVT, and then upload it to SimScale.
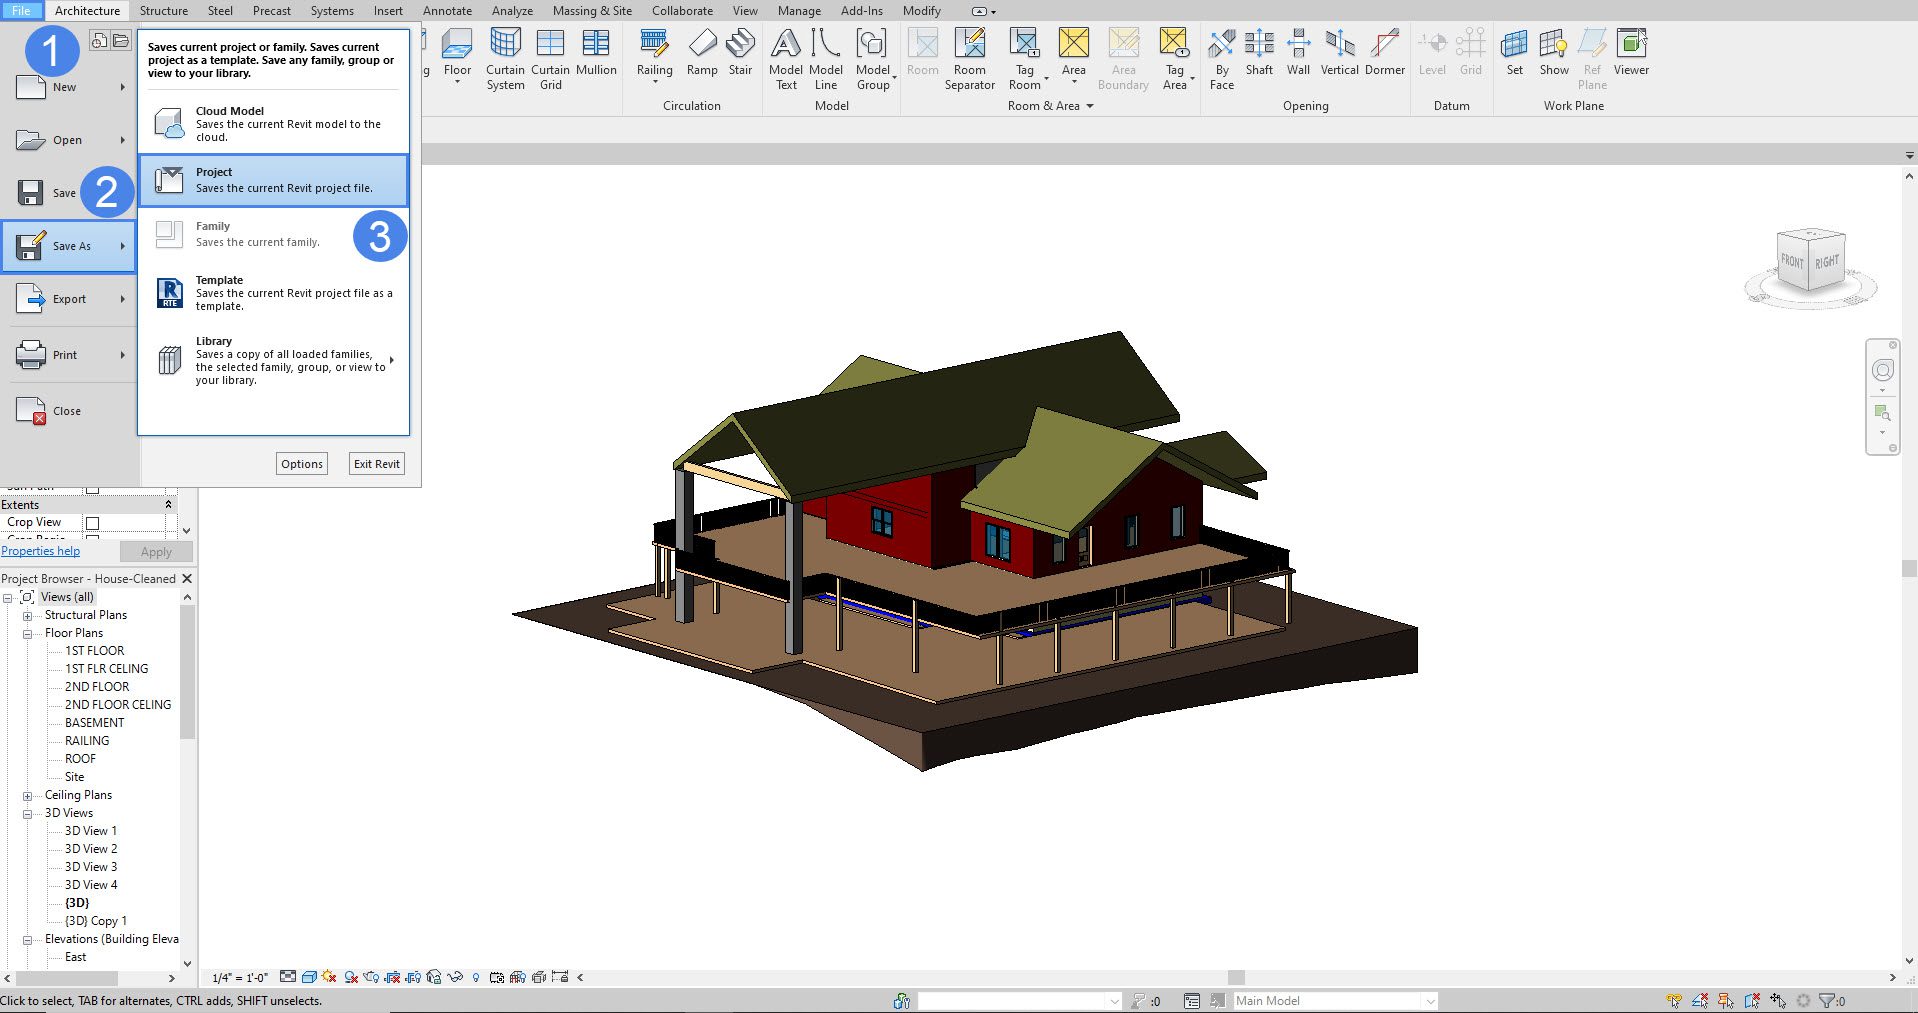
- Select the ‘File’ tab;
- Save your model as a ‘Project’:
Then name the file, and choose the location where it will be saved:
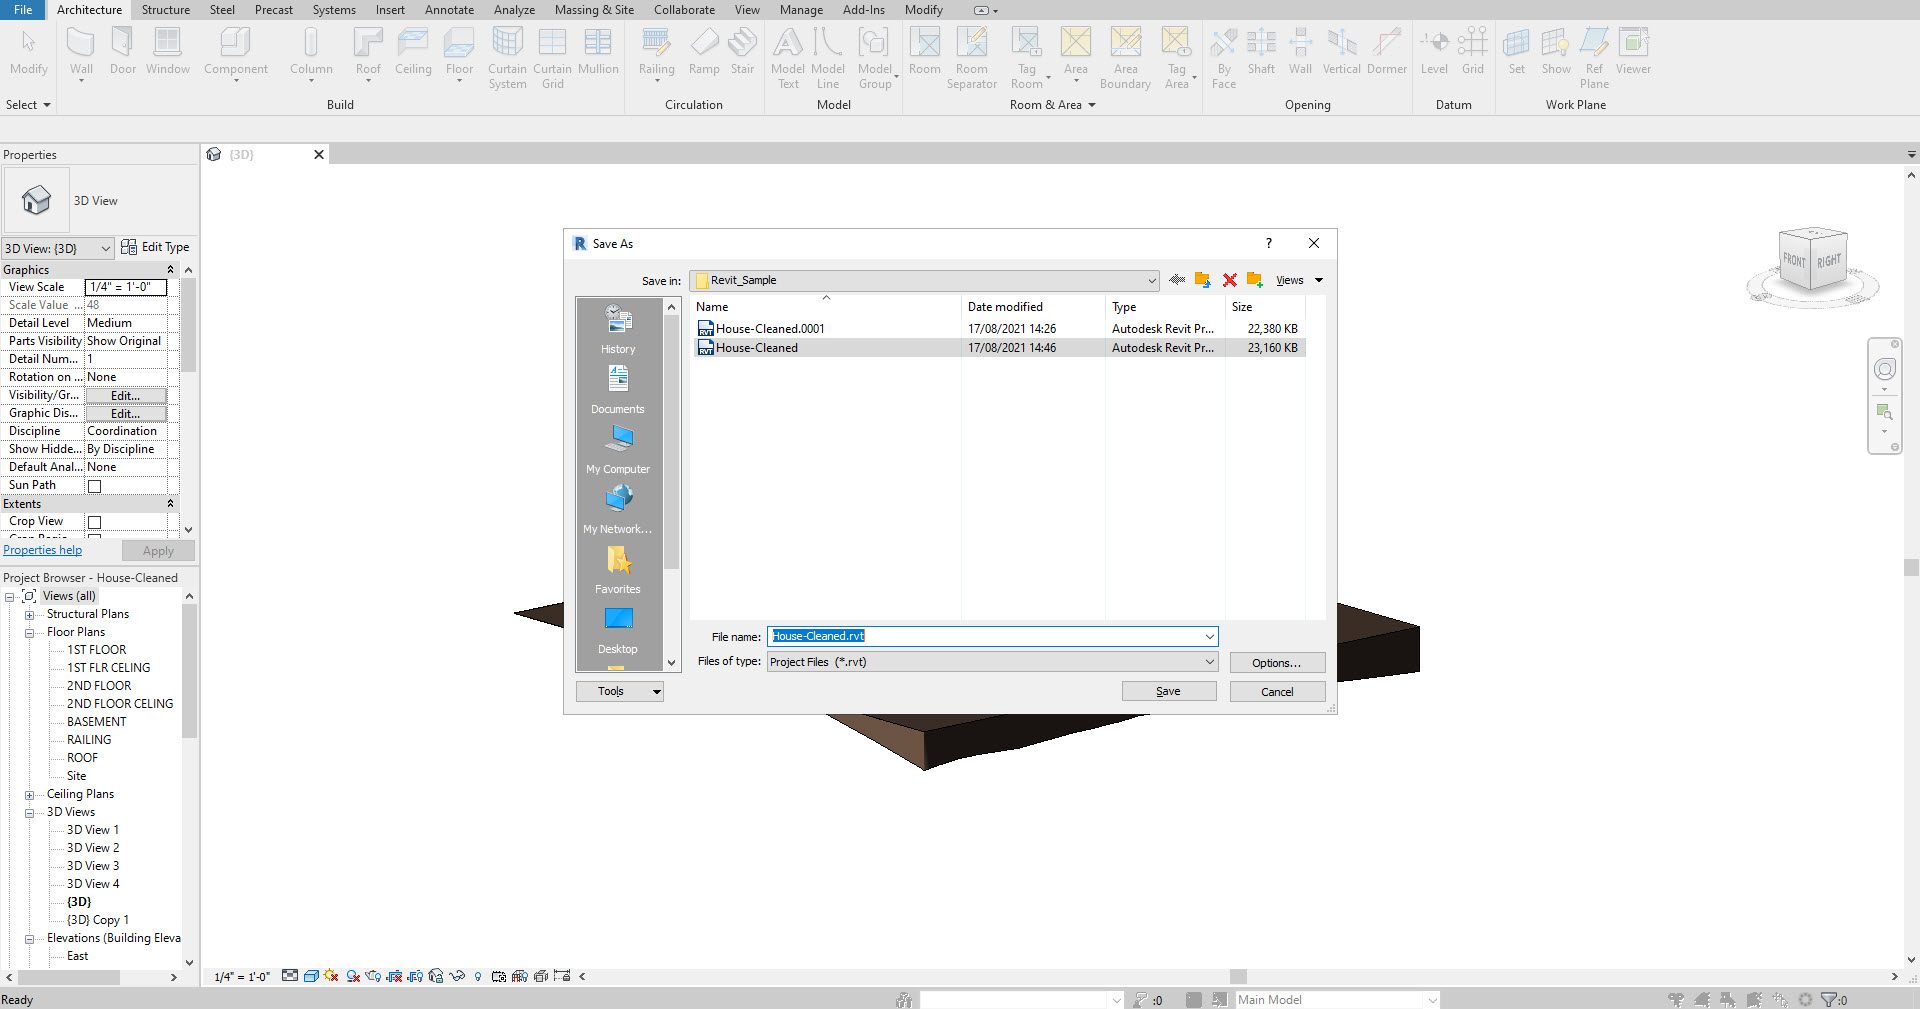
It is now ready to be uploaded to SimScale.
ACIS (.SAT) Export
Revit supports a direct ACIS file export. Once the model is ready and watertight without gaps, users can export it from Revit using File –> Export –> CAD Formats –> ACIS (SAT).
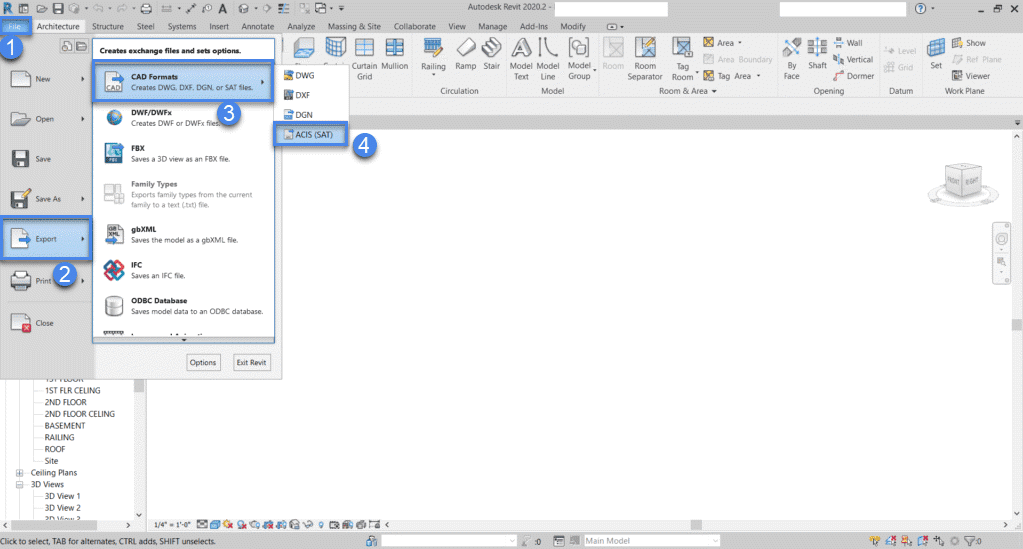
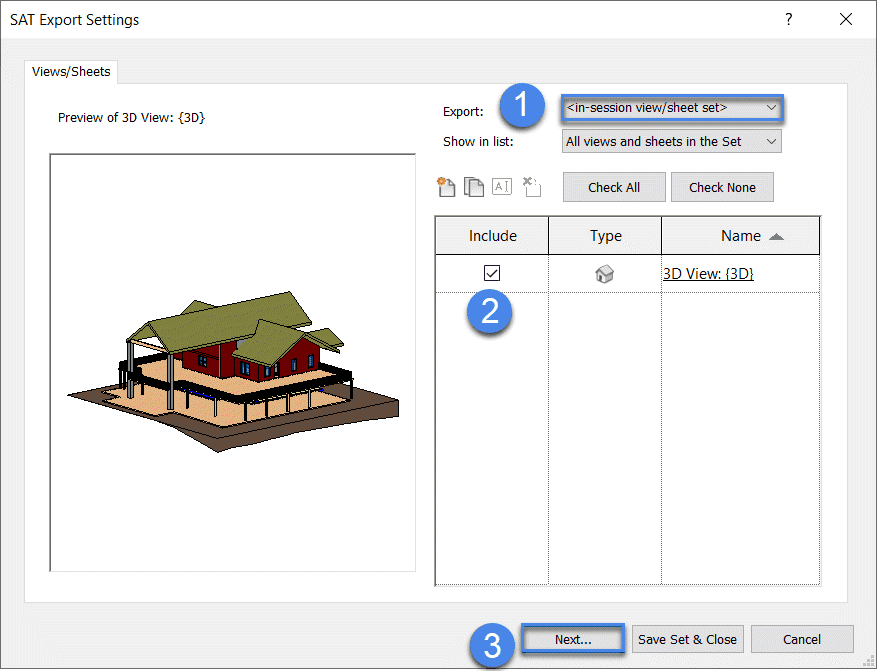
- Next, Revit asks for items to export.
- Selecting an ‘<in-session view/sheet set>’ option from the list ensures the export of only elements in the current view.
- Then select ‘Next’ to export the Revit model as ACIS.
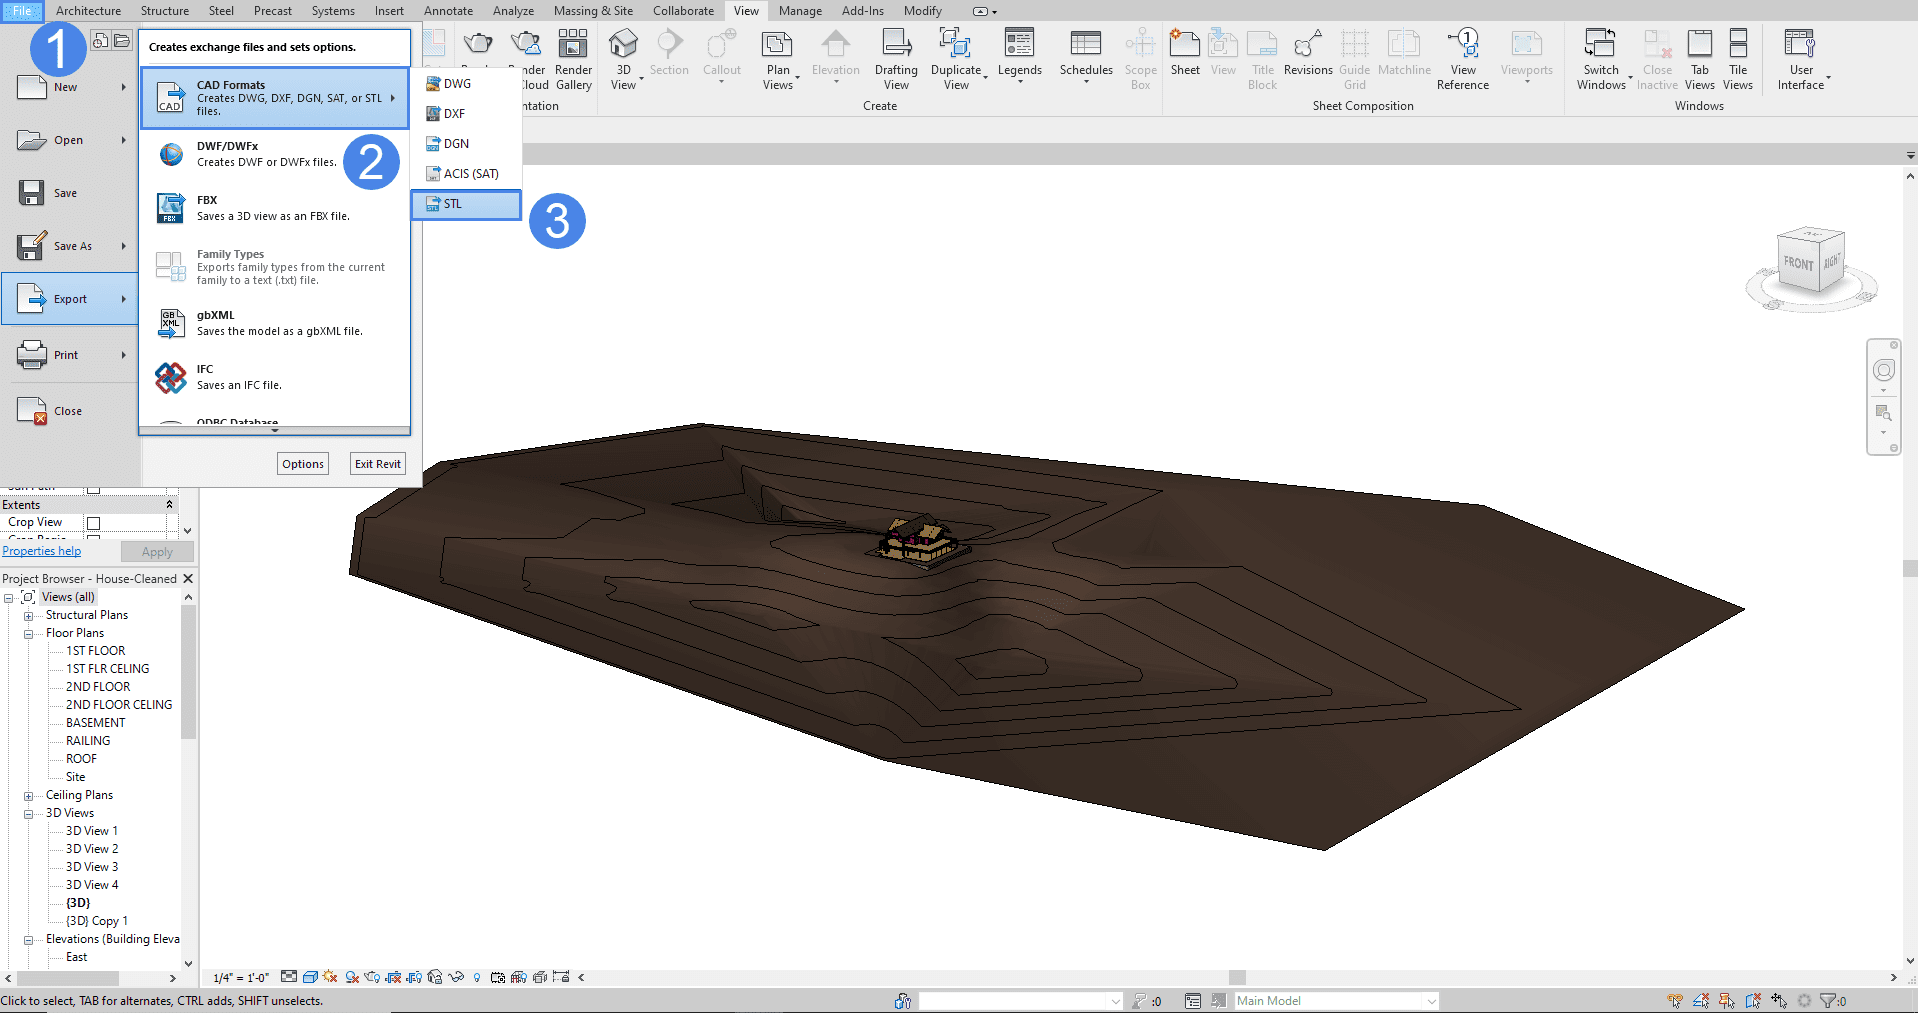
STL Export
In the case of complex Revit models like cityscapes or building masses, STL exports are handy. An STL export option is possible directly with Revit.
Use STL Export to customize and export your Revit model to an STL file:
- Open a 3D view.
- Click the File tab –> Export –>CAD Formats –>STL.
Note
The exported geometry will be based on the current view, and will reflect the visibility and graphics settings of it.
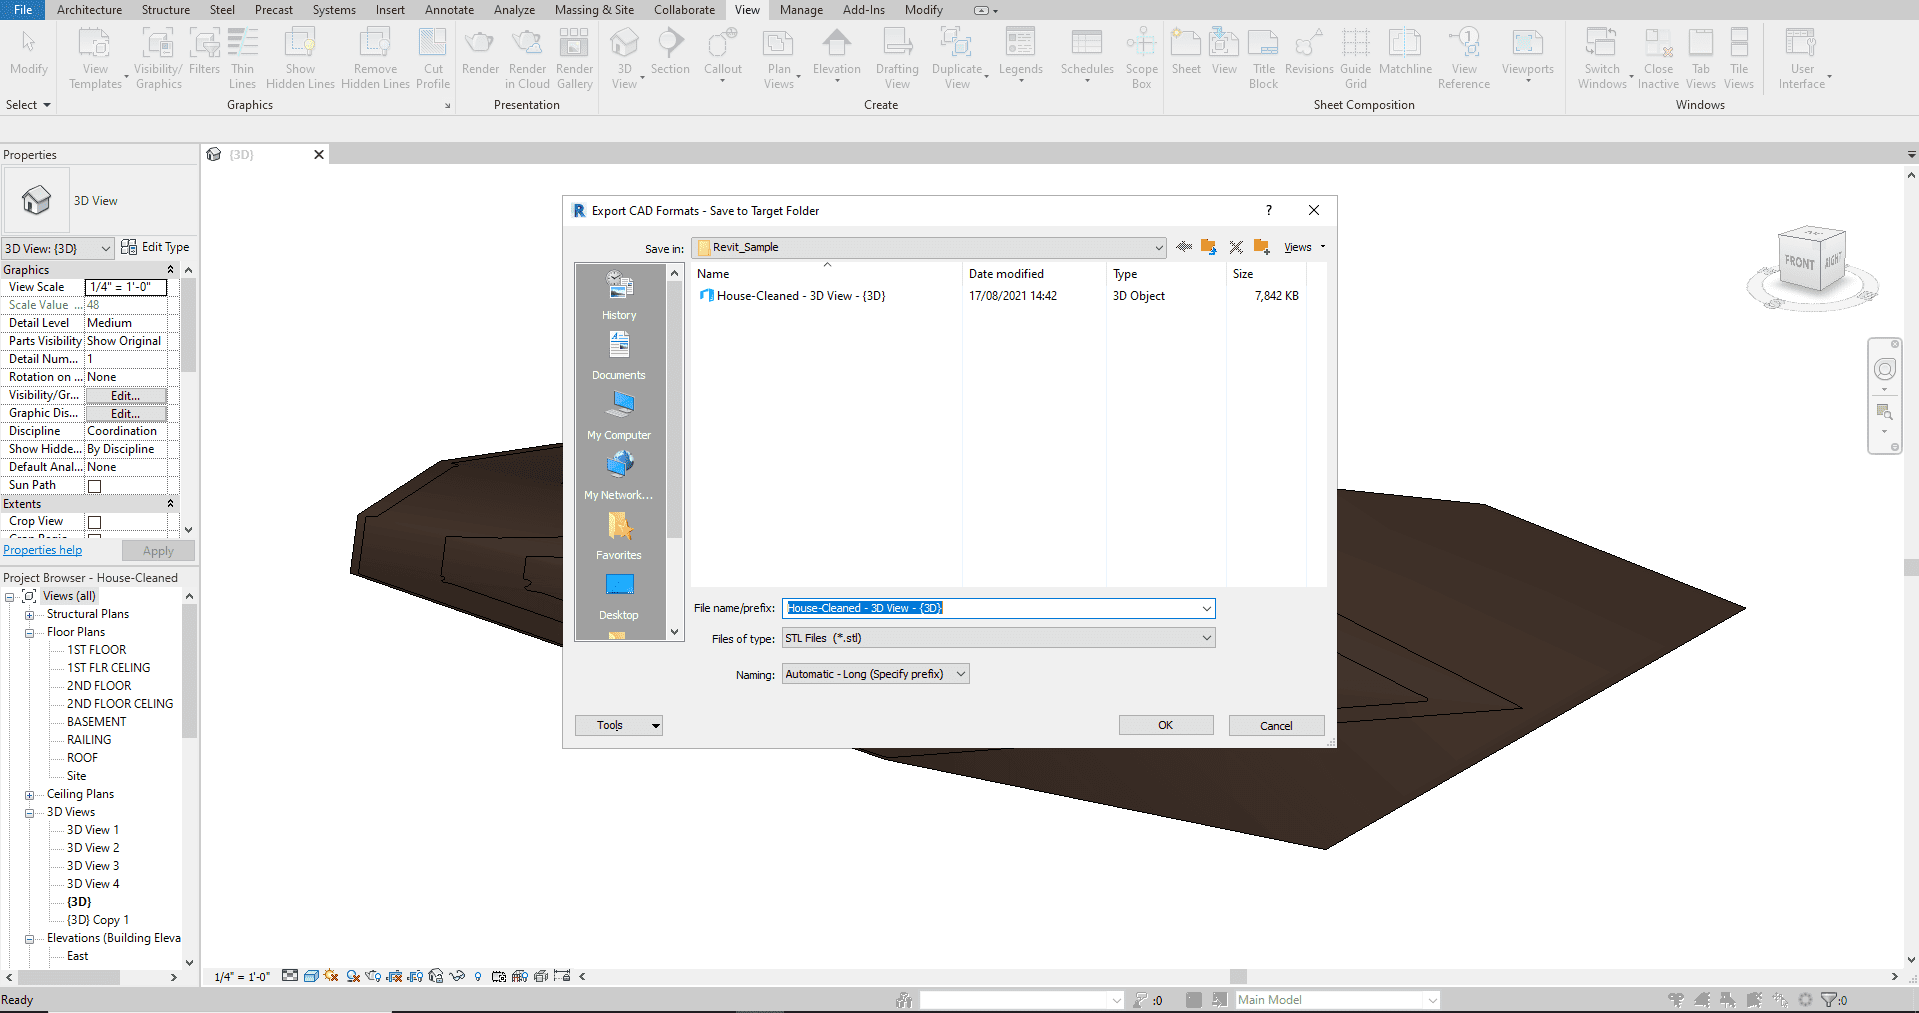
- In the STL Export dialog , specify your STL file options and click save:
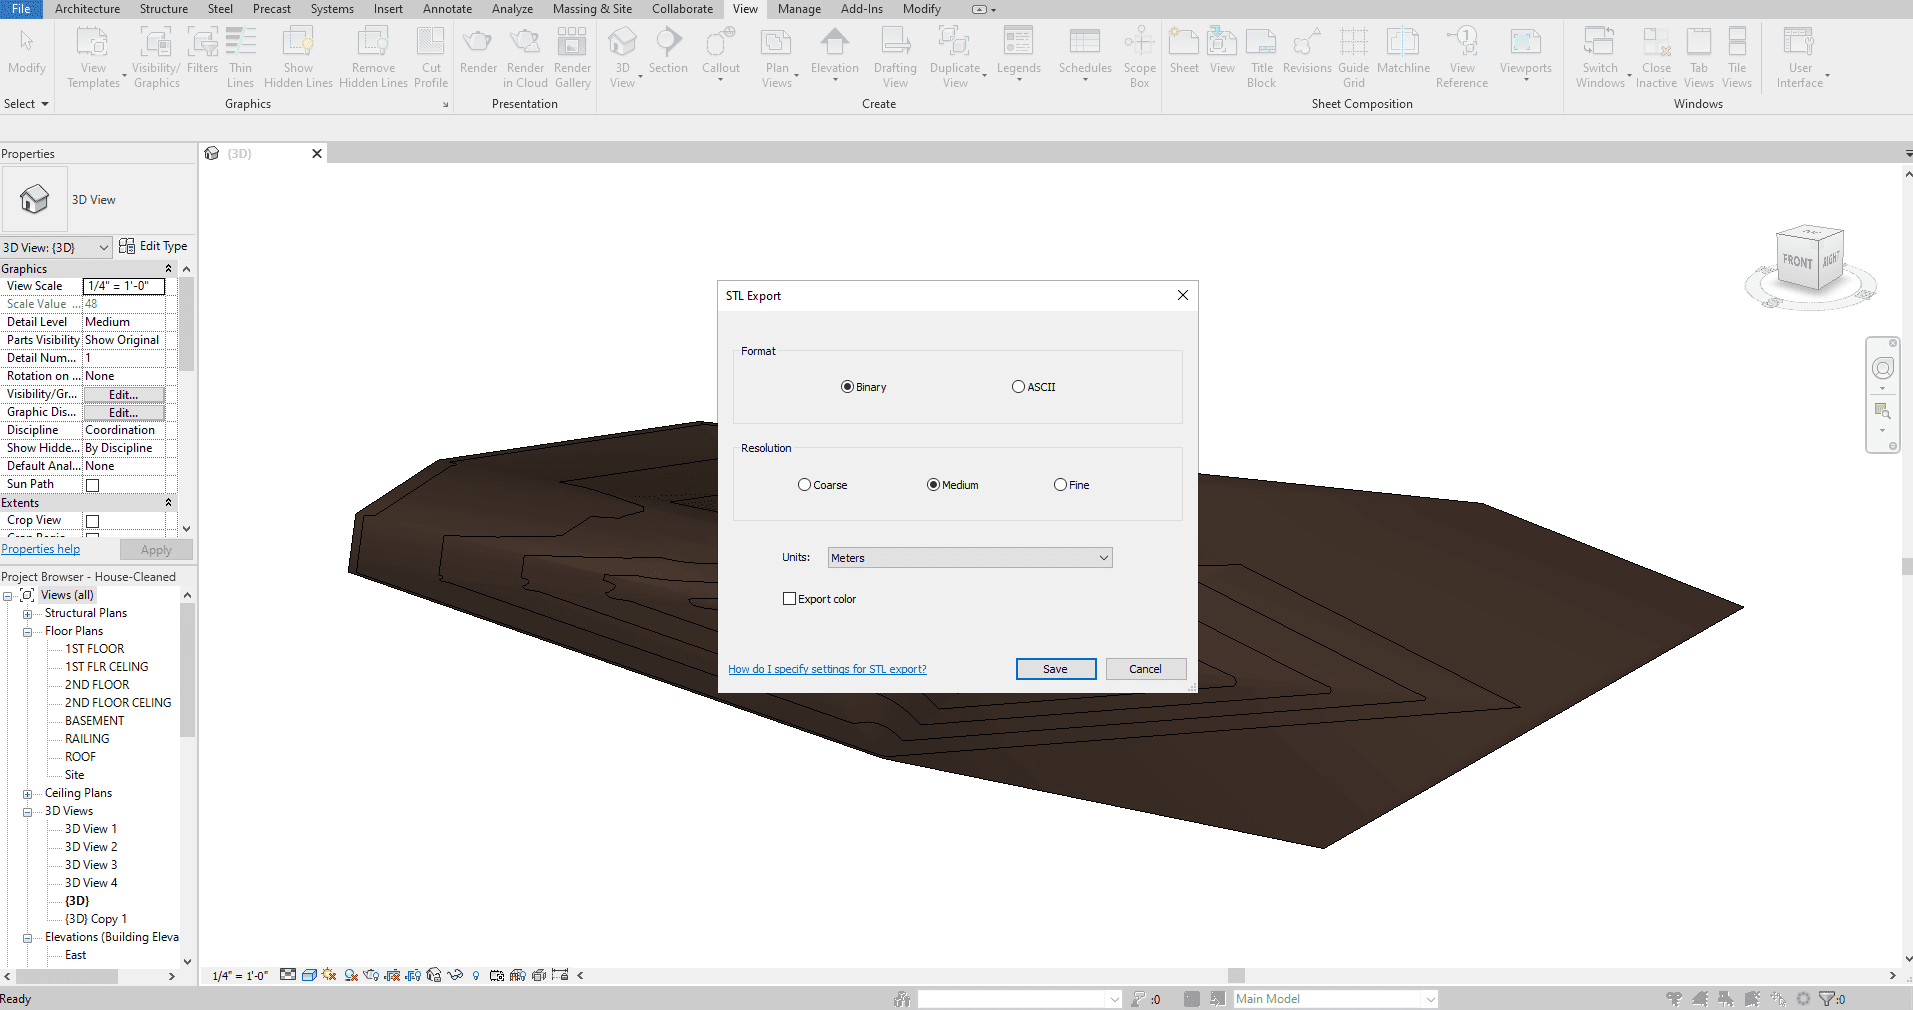
Then you will be prompted to decide upon the location of the saved file. After you are done, select ‘OK’ to proceed:
Note
STLs from Revit intended for internal flow, structural and Incompressible analysis types, have to be modeled watertight (without gaps ). Except for LBM/PWC analyses, it is advised to use an ACIS CAD format.


