This article explains how to export a file as an STL from Rhino, which can be uploaded to the SimScale platform.
Solution
Exporting a geometry from Rhino as an STL file is simple. The steps are shown below:
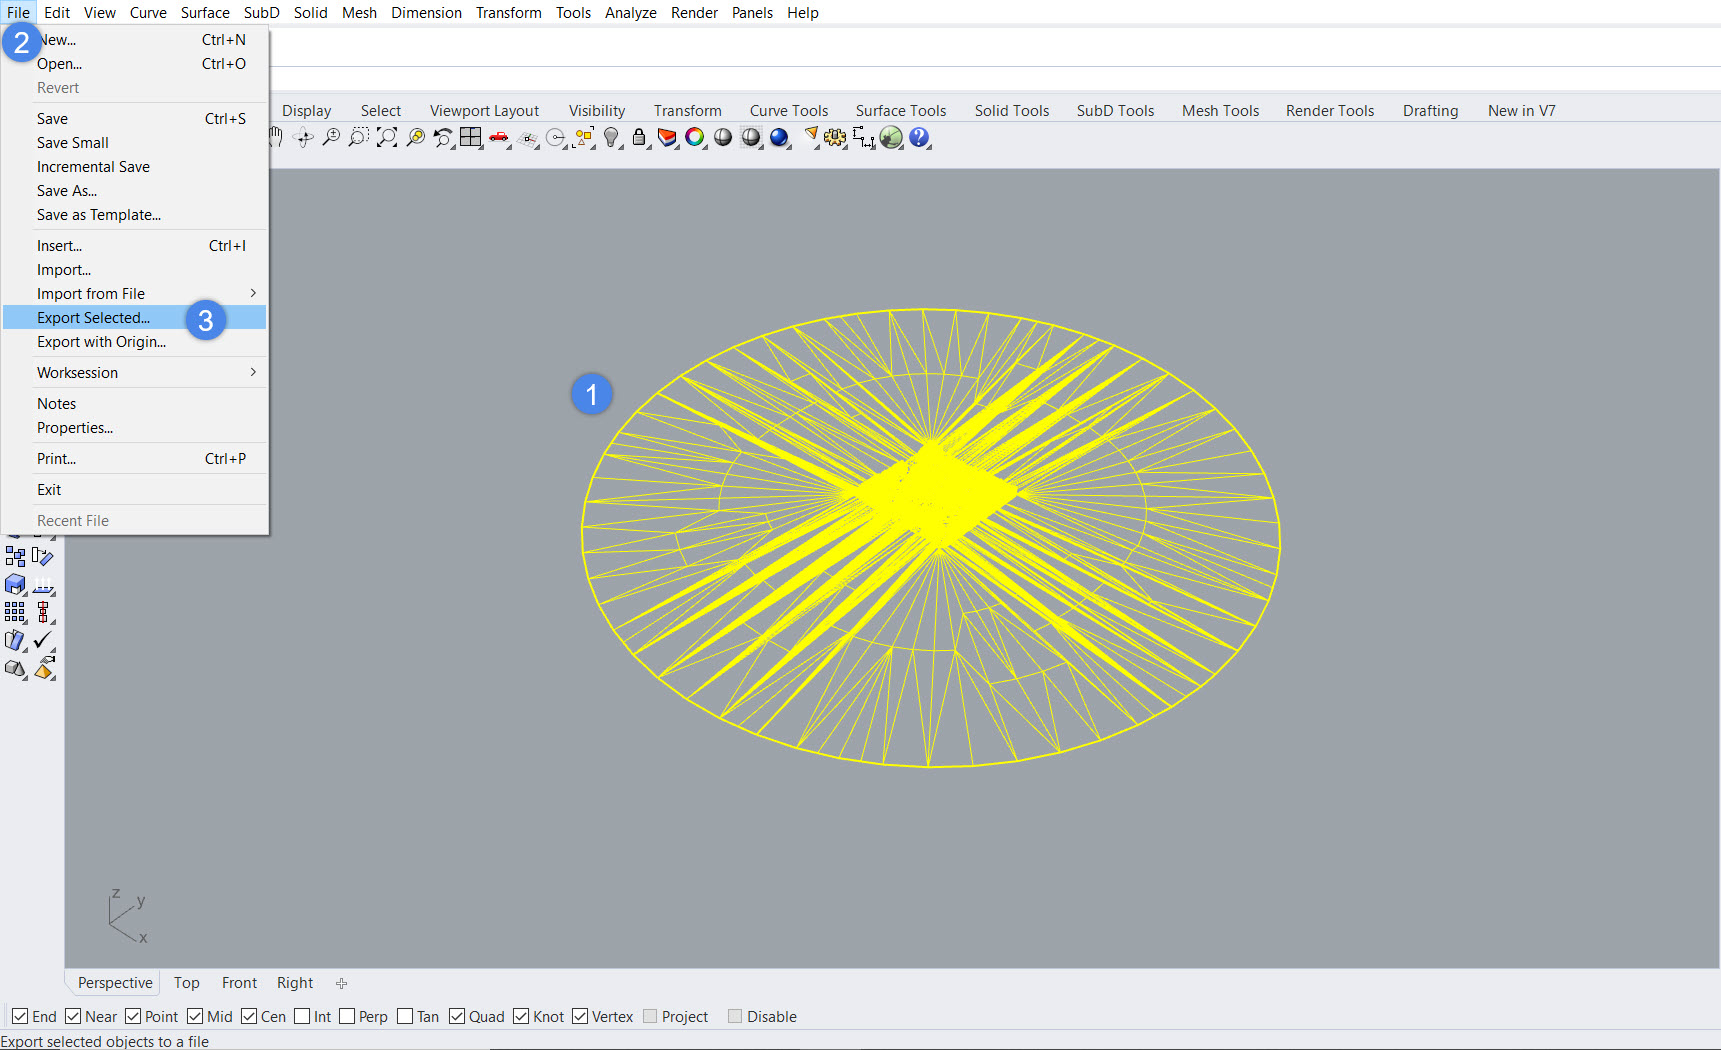
- Select the parts desired to be exported.
- Click on ‘File’ to expand.
- Select ‘Export Selected…’.
At this point, the export window shows up. Within this window, we can choose the type of the file, as well as its name:
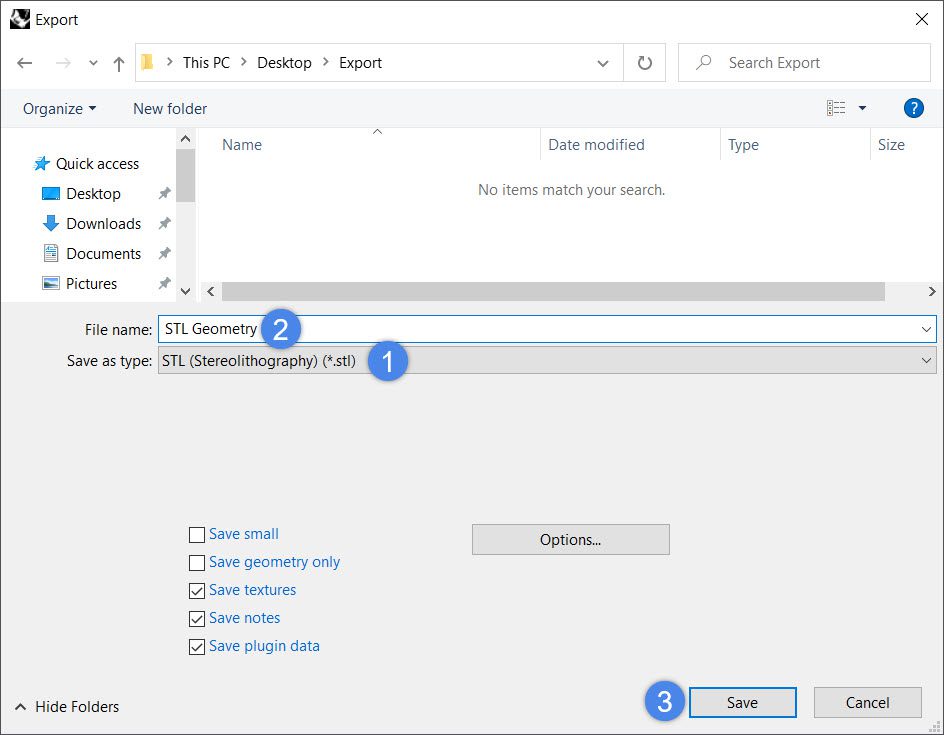
- Select ‘STL (Stereolithography) (*.stl)’ on the Save as type input box.
- Set a name to the file.
- Press ‘Save’ to go to the next step.
Now the user is prompted to select the File type, between Binary and Ascii. Both types are supported by SimScale, however, Binary tends to be much smaller in size. Therefore, it is a good option, especially for larger models.
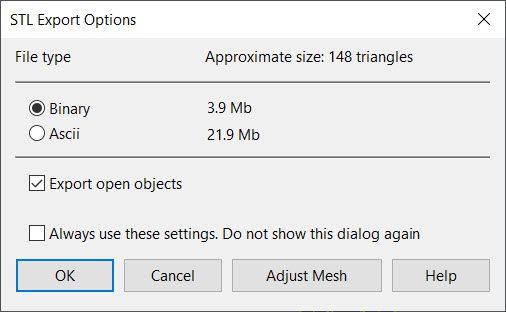
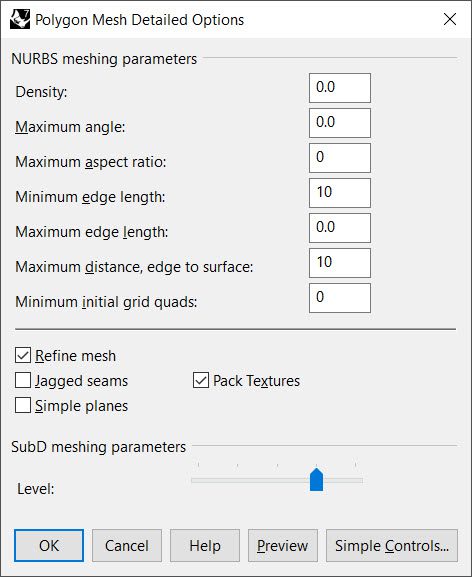
When the model is going to be studied with a Pedestrian Wind Comfort (PWC) analysis, we can further optimize the model. Using Figure 3 as a reference, click on ‘Adjust Mesh’ and then on ‘Detailed Controls…’. The following settings can be used as a starting point:
Note
The above settings are coarse, and therefore large surfaces will be low in polygons to reduce the upload size. If the settings make details look too tesselated, then you can use finer settings on specific objects by converting them to a mesh before the export. The above settings are assuming the base unit is meters, but you can multiply by a thousand (x1000) if using millimeters.
Typically, an STL will be much smaller than half a gigabyte (0.5Gb) and therefore, if the file is much larger, please consider the details you are exporting. Furthermore, if you are performing a pedestrian wind comfort analysis, please refer to the basic geometry requirements or if any buildings originated in Rhino or similar BIM software, please see our Revit preparation guide.
Video
A short video guiding you through the above steps is linked below.


