In most cases, exporting everything in your geometry as a single STL file is the simplest and most time-efficient way to upload a geometry to SimScale for a Pedestrian Wind Comfort analysis. However, there may be occasions in which you wish to upload an STL with different layers, which makes it easier to hide and show geometry, visualize different parts (such as trees or road surfaces), or to make selection easier using our bulk face selection methods.
Typically, there are a few programs that correctly export multiple objects and faces as separate STL parts, and therefore for most common CAD modeling tools, you will need to only do some geometry post-processing before importing to SimScale.
However, the following section explains rather simple methods where the different STL files can be uploaded together without any external software while still being able to work with the different layers separately.
The ZIP Method
This method allows zipping multiple STL files together, where each file can represent a separate layer or family in the originating CAD tool. The following steps are discussed:
1. The first step is exporting different parts of the geometry from your CAD modeling software. Once the CAD model is simulation ready, export each part of the model as a separate .stl file to your system.
For example, when using Rhino each part/layer can be turned OFF leaving only the one to be exported ON. Now go to File > Export Selected to export as a single .stl file.
2. Ensuring all part files have been exported compress them into a .zip folder as shown below:
3. As a final step select the .zip folder and upload it to the SimScale Workbench. Make sure the Optimize for LBM/PWC option is toggled ON.
Animation 3 shows the process of uploading a CAD file to the SimScale Workbench. Here the compressed .zip folder prepared in step 2 is being uploaded. Once uploaded all parts will be listed in the scene tree (top right). Furthermore, click on each part to assign an entity set name.
The Merge Method
This method allows you to merge the STL files generated in tools like Rhino, Sketchup, ArchiCAD, etc. directly in Windows OS. Follow these steps to upload the merged STL files hassle-free:
- Export each layer of the model (buildings, trees, terrain, etc.) as a separate STL file. Each file should be exported in the ASCII format. All the resulting STL files should be saved in one folder. This document explains the export process in detail.
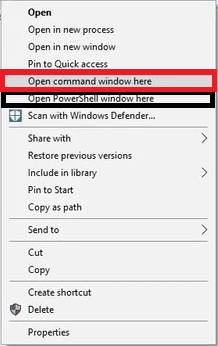
- Open the folder containing the saved STL files and while maintaining the SHIFT button on the keypad right-click and select either “Open command window here” or “Open Powershell window here”.
- Now copy-paste and execute the below command:
- copy *.stl Allfiles_merged.stl (for command window)
- cat *.stl | sc Allfiles_merged.stl (for PowerShell)
- Import the “Allfiles_merged.stl” file to SimScale.
The end result will be an STL that can be uploaded to SimScale and maintains individual layers that are both hideable and select-able.
Note
If none of the above suggestions solved your problem, then please post the issue on our forum or contact us.


