This knowledge base article answers the following questions:
- How to export a CAD model with terrain or topography from Revit?
- Can we import such terrain models directly into SimScale from Revit?
Workflow
For city massing models with relatively flat terrains, users can decide if the topography is relevant for analysis. To export just the buildings from Revit, follow the article about “How to export a model from Revit to SimScale?”
In case of uneven topography, performing a wind analysis with the terrain model is preferred. Revit models the topography as surfaces called Toposurfaces. Although a direct export from Revit with terrain is possible, there is also a workaround to do this.
Direct export to SimScale
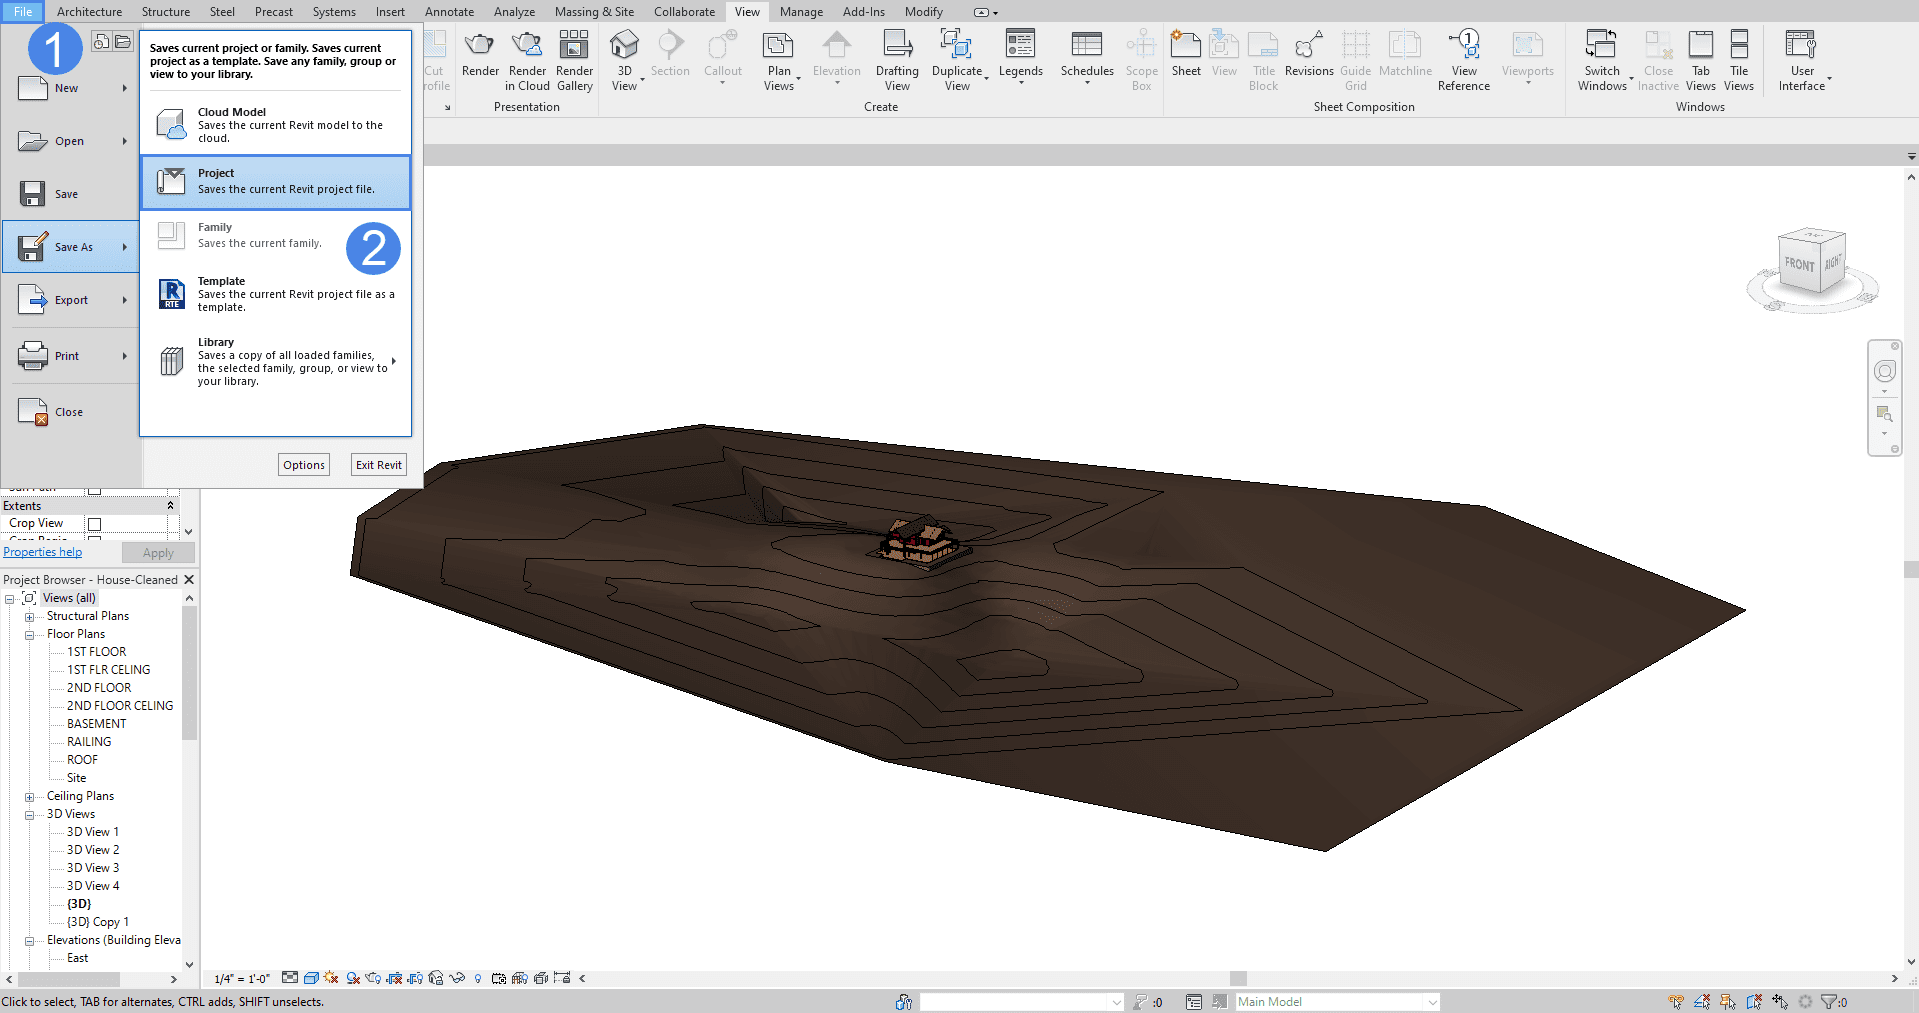
It is possible to directly export a terrain model from Revit as .RVT, and then upload it to SimScale.
- Select the ‘File’ tab;
- Save your model as a ‘Project’:
Then name the file, and choose the location where it will be saved:
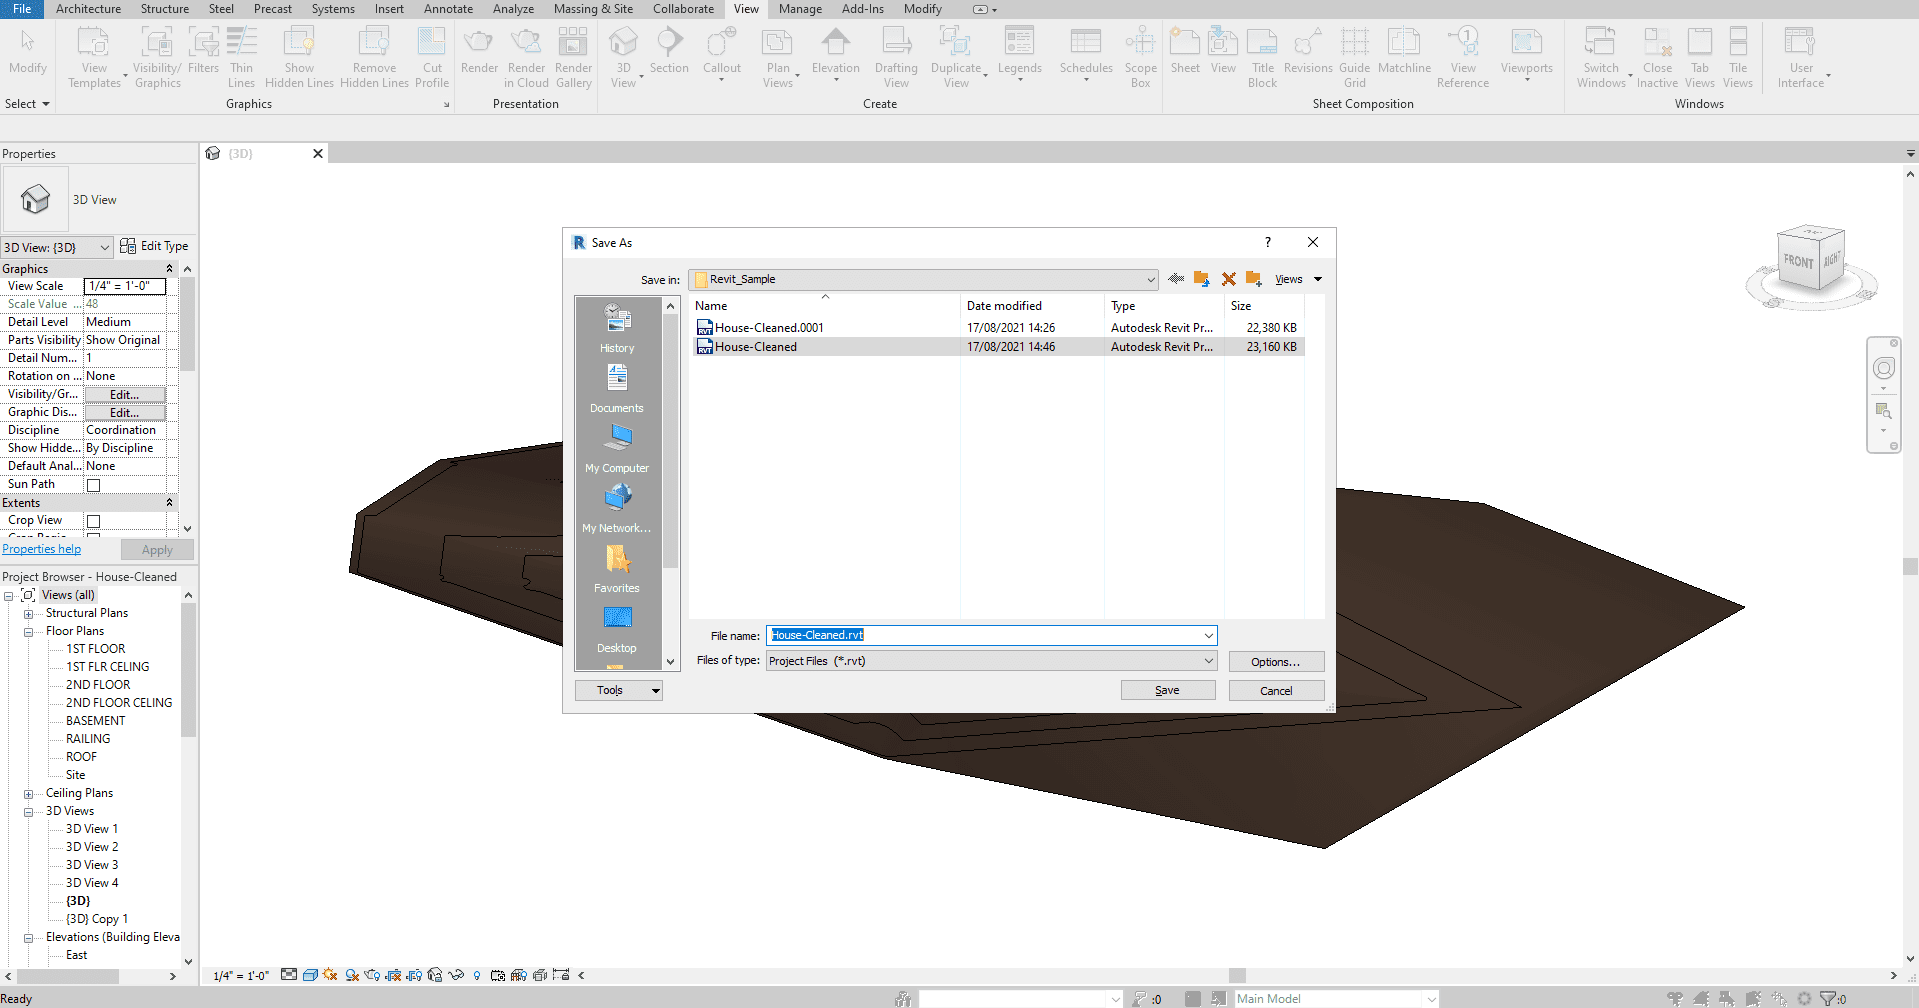
It is now ready to be uploaded to SimScale.
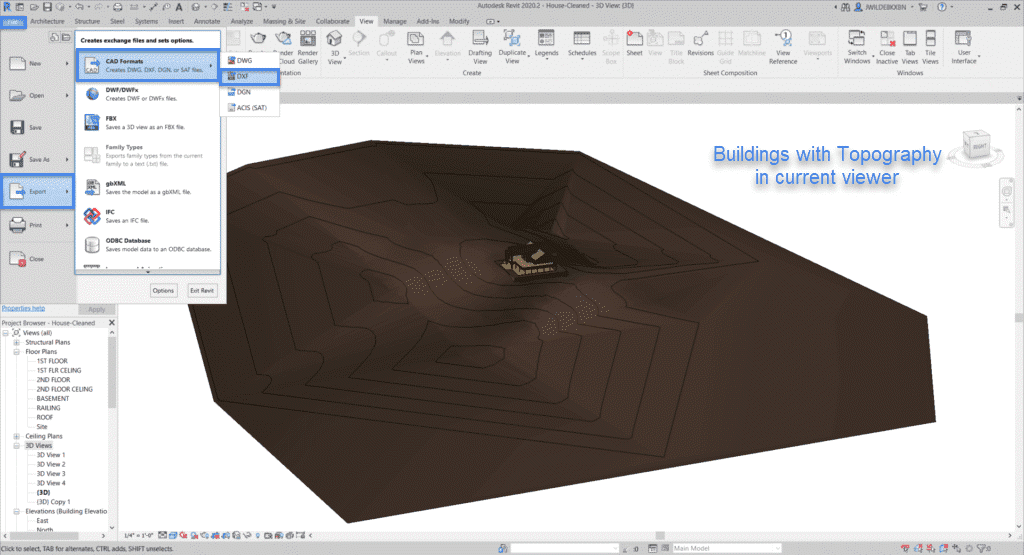
Exporting Models With Terrain From Revit using Rhino
Another workaround for exporting topographies is to export them in DXF CAD format. To export the entire project as a DXF file (along with buildings), please make them active in the current viewer. Then export it to a DXF file from ‘File —>Export —> CAD Formats —> DXF’.
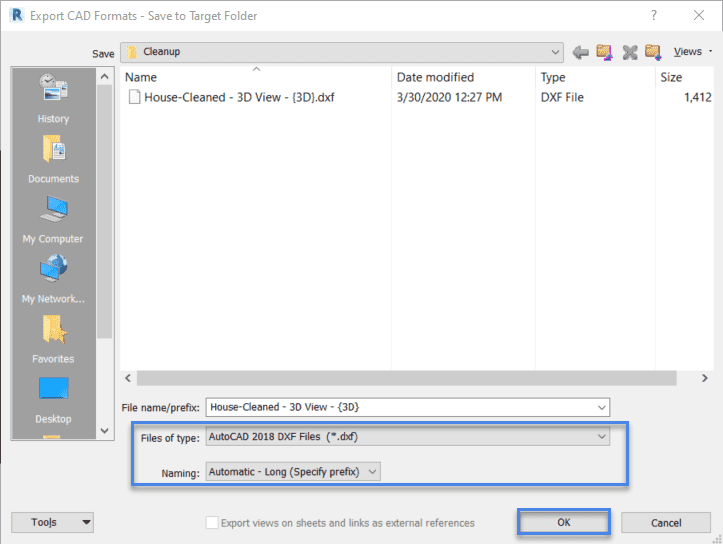
In the following dialog box, select the name and folder of interest, then press ‘Next’, thereby saving the model to the desired location.
Importing DXF Files into SimScale
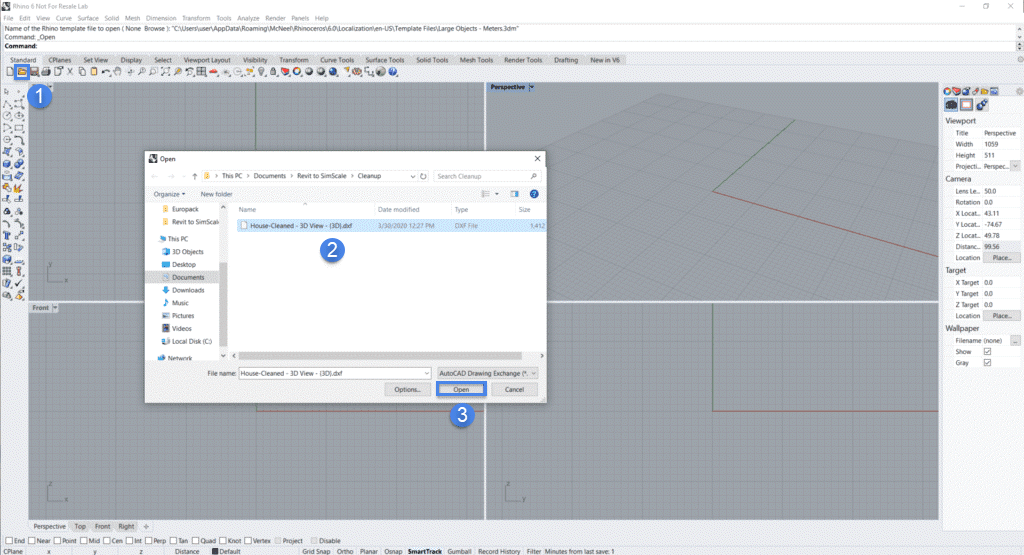
To import this model with terrain into SimScale, an STL file should be created out of the DXF. In this article, this is explained using Rhino.
In order to open the DXF file in Rhino, select Open —> select the DXF file from Revit —> open.
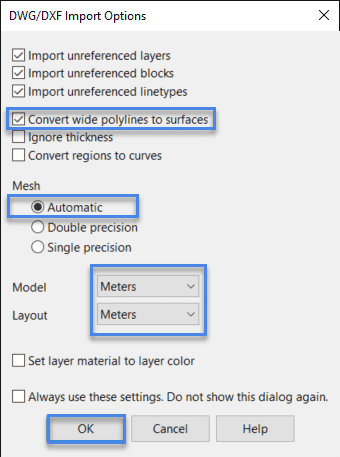
Select the ‘Convert wide polylines to surfaces’ option and set the Mesh to ‘Automatic’ at the import:
Units
While importing the DXF file into Rhino, please make sure that the units are appropriate. For example, if the model is exported in meters from Revit, then select Meters while importing into Rhino. This might affect the topography file if set wrongly.
With Rhino, you can simply export the DXF file as an STL as shown in the image below.
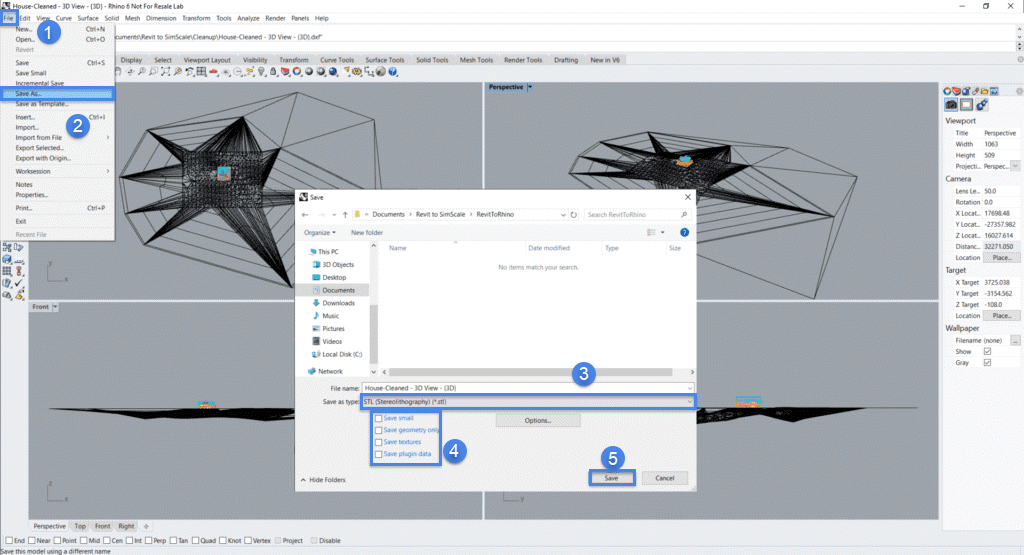
This STL file is now ready to be imported into SimScale. Just like other CAD model extensions the import process for STL files is explained in our CAD preparation and upload documentation.
Related Articles
To find out how to extend a terrain using Rhino click here.


