“However beautiful the strategy, you should occasionally look at the results.” - Winston Churchill
This tutorial is the second part of the Beckham’s rocket kick clocked at 97.9 mph - crossbar impact Part 1: Simulation Tutorial which explains the post-processing of the simulation. In case you missed the last session, feel free to start it and then follow this session for post-processing
We will go through the post-processing in two levels:
LEVEL-1: Emphasizes on basic post-processing of the simulation by using both online post-processor and local Paraview.
LEVEL-2: Emphasizes on more advanced post-processing with local Paraview in order to get more nicer results with smoother animation.
At the end of LEVEL-2, you would be able to get the animation like this:
You need to setup the local Paraview before we start. In order to do so, please follow this guide: FEA post-processing guide (using online post-processor and local Paraview)
LEVEL-1
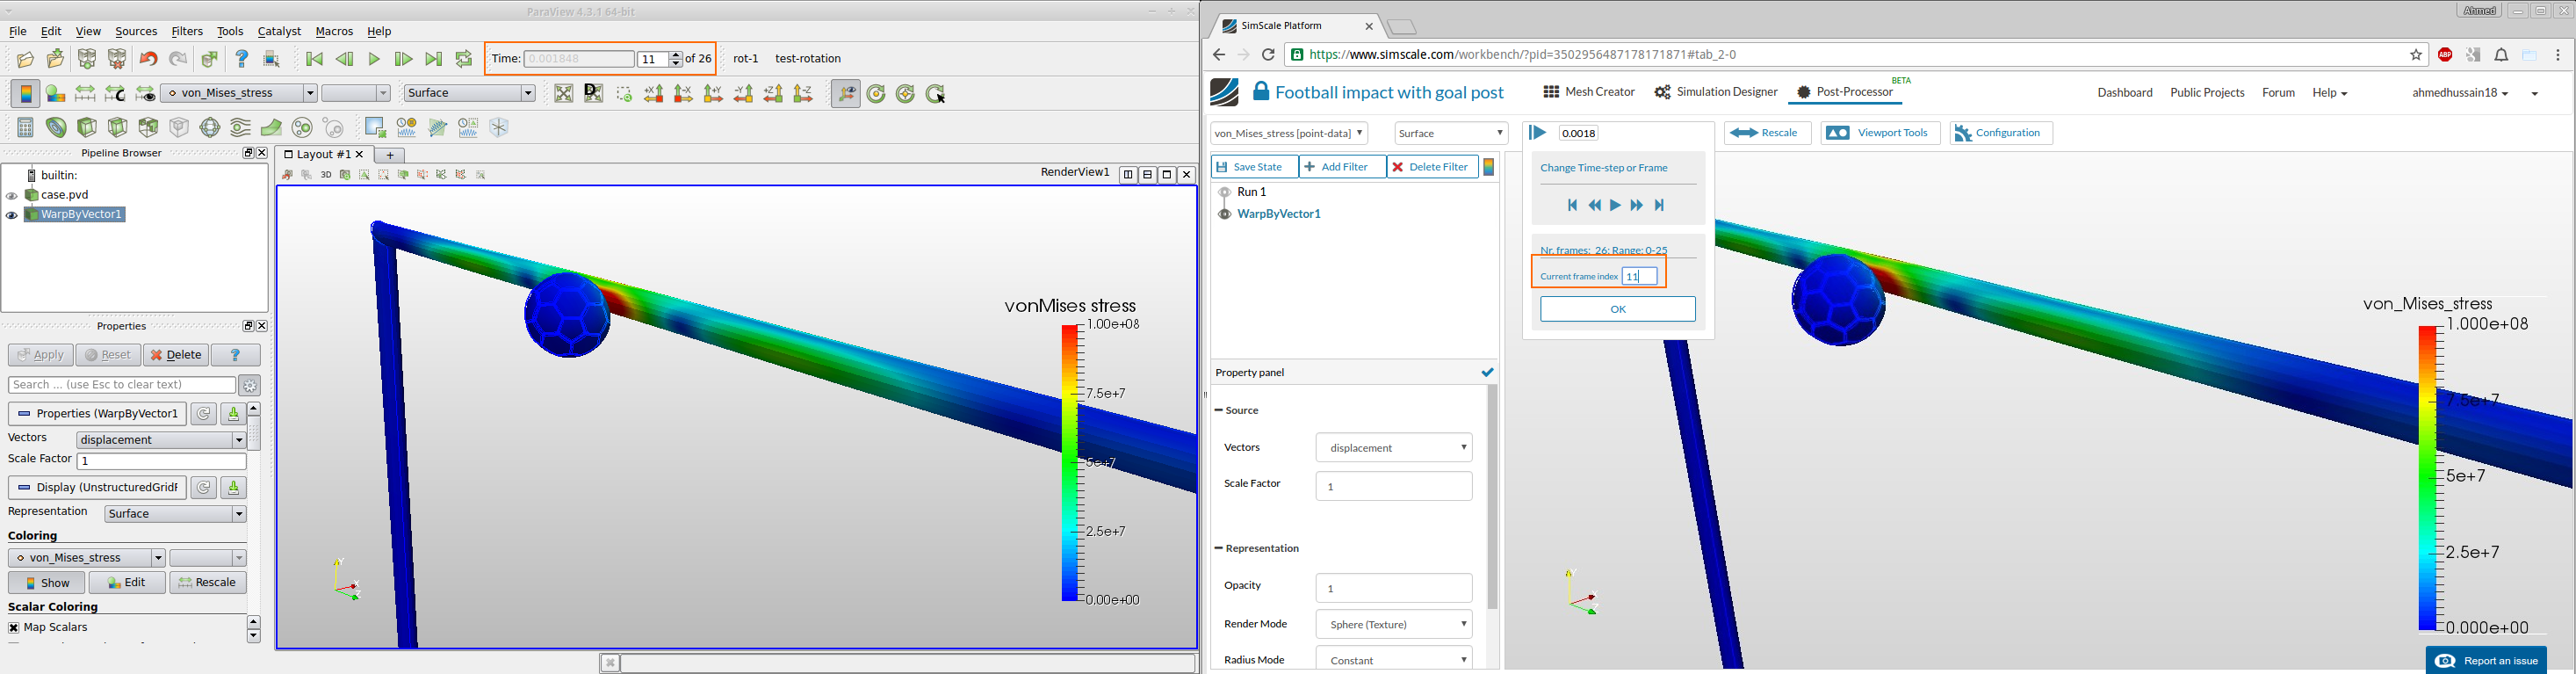
Step-1: Load the results in to the online post-processor and Paraview. Then select vonMises stress for both and toggle on the color map (bar).
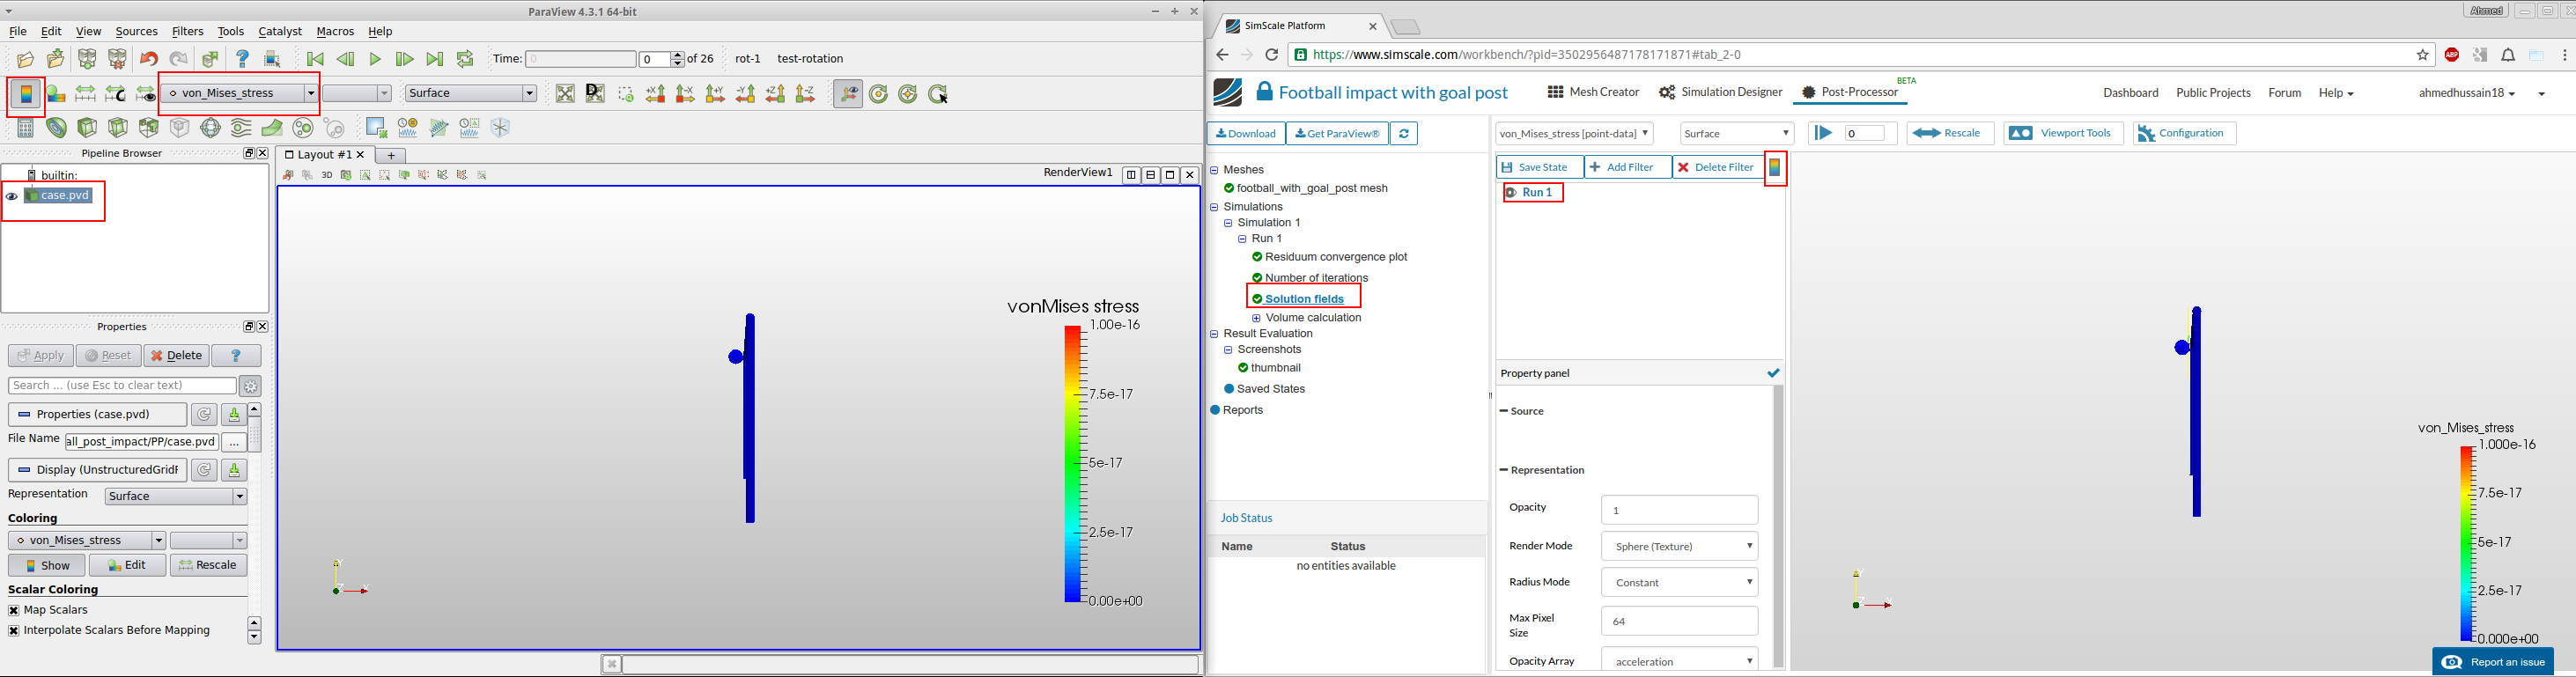
In order to turn off the visibility of center of rotation lines in online post-processor, click  under Viewport Tools. Furthermore, to enlarge the viewer you can close the side tree panel by sliding the panel bar to the left.
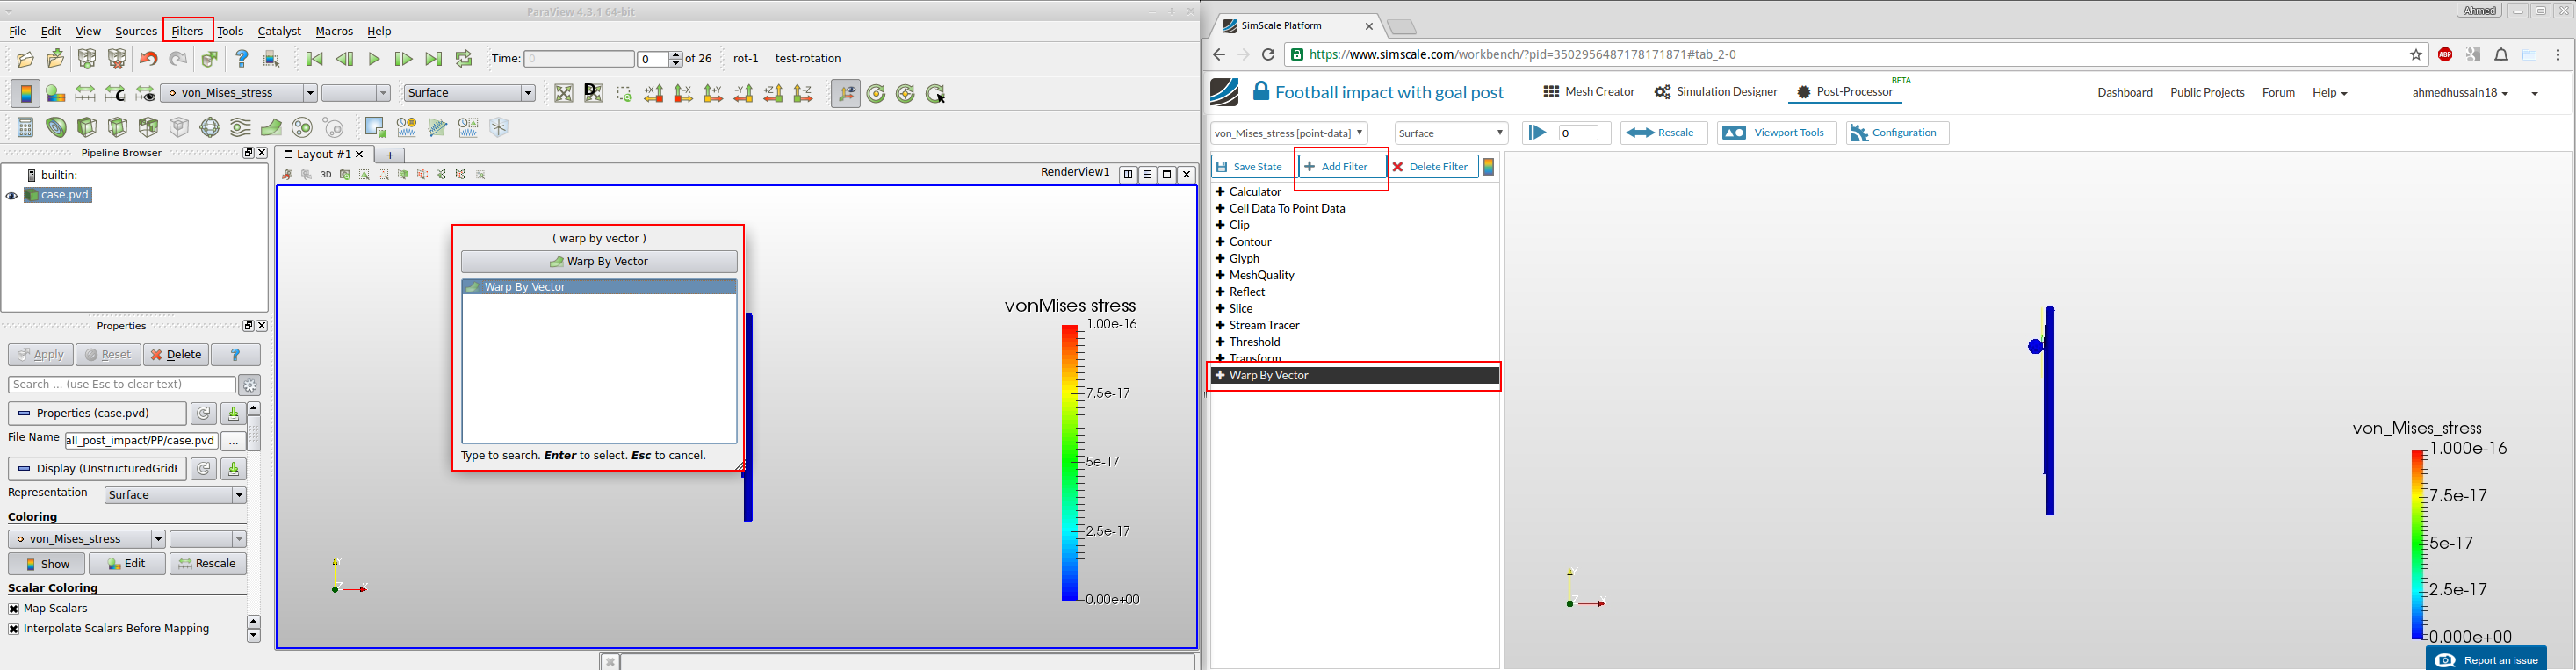
Step-2: Apply the Warp By Vector filter. You can search this filter in local Paraview by going to Filters > Search. (you have to turn off the Run 1 visibility by clicking the eye on it’s left)
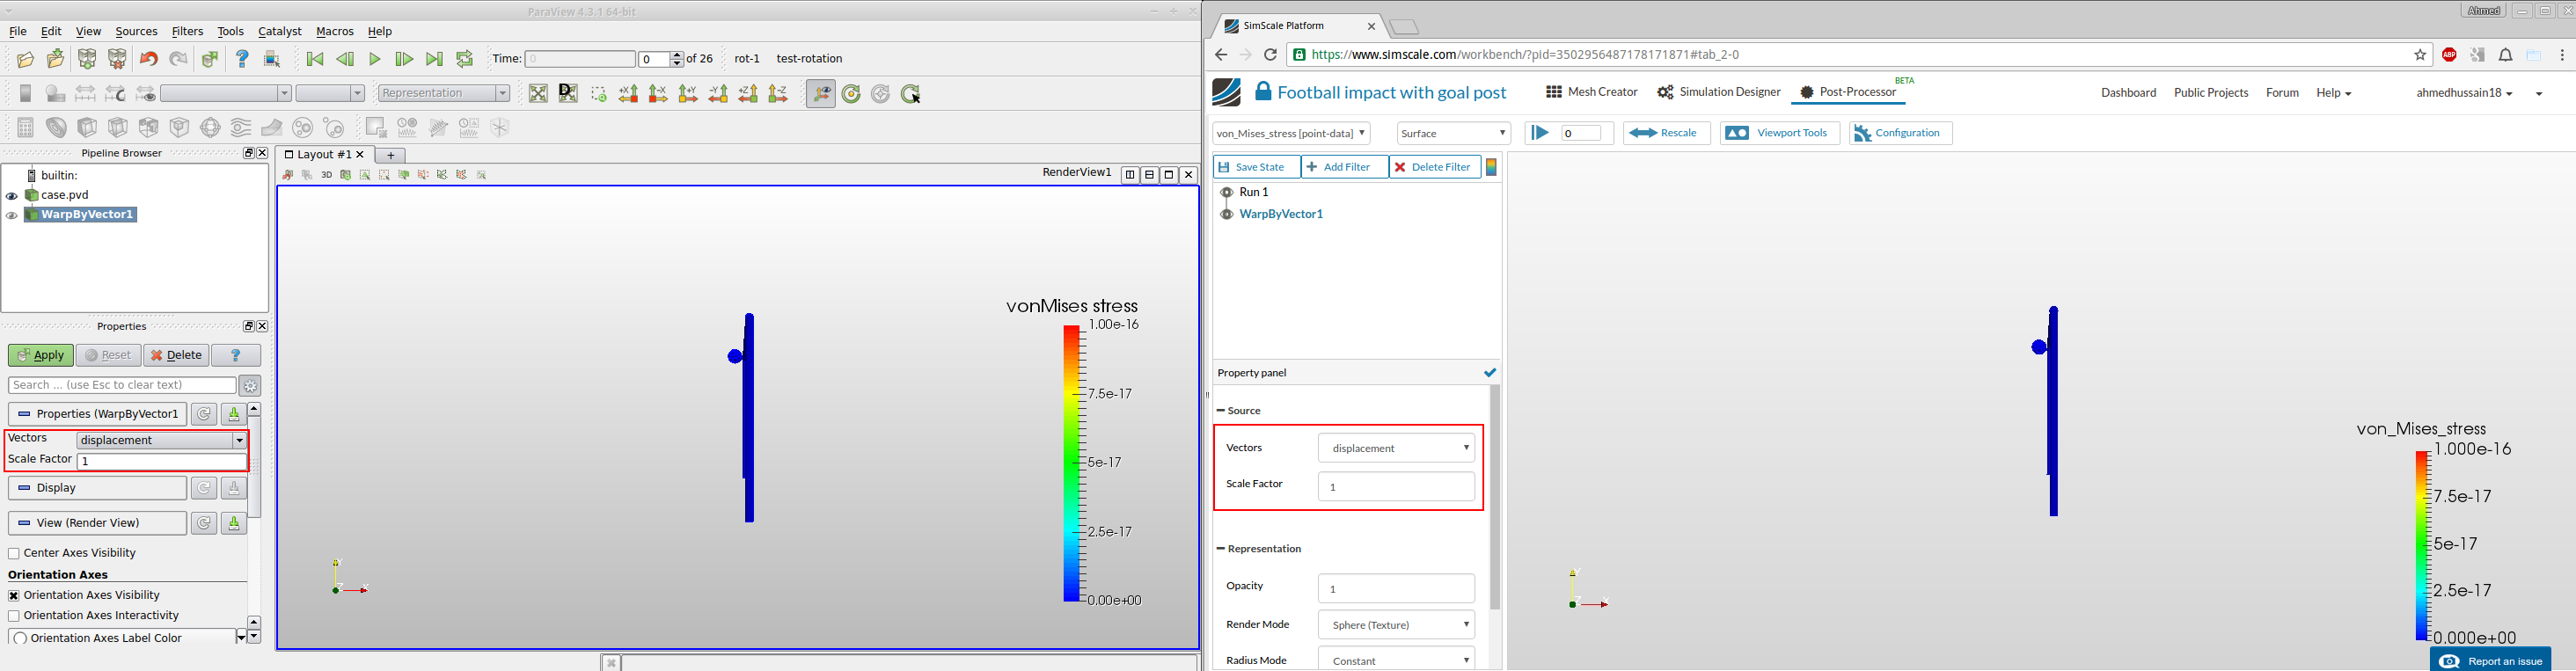
Step-3: Make sure the Vectors is set to displacement and then click apply. This is the only filter which is used to see the motion or deformation of the object.
Step-4: Rescale the vonMises stress values to one given below.

Step-5: Next click the Play button to start the animation.
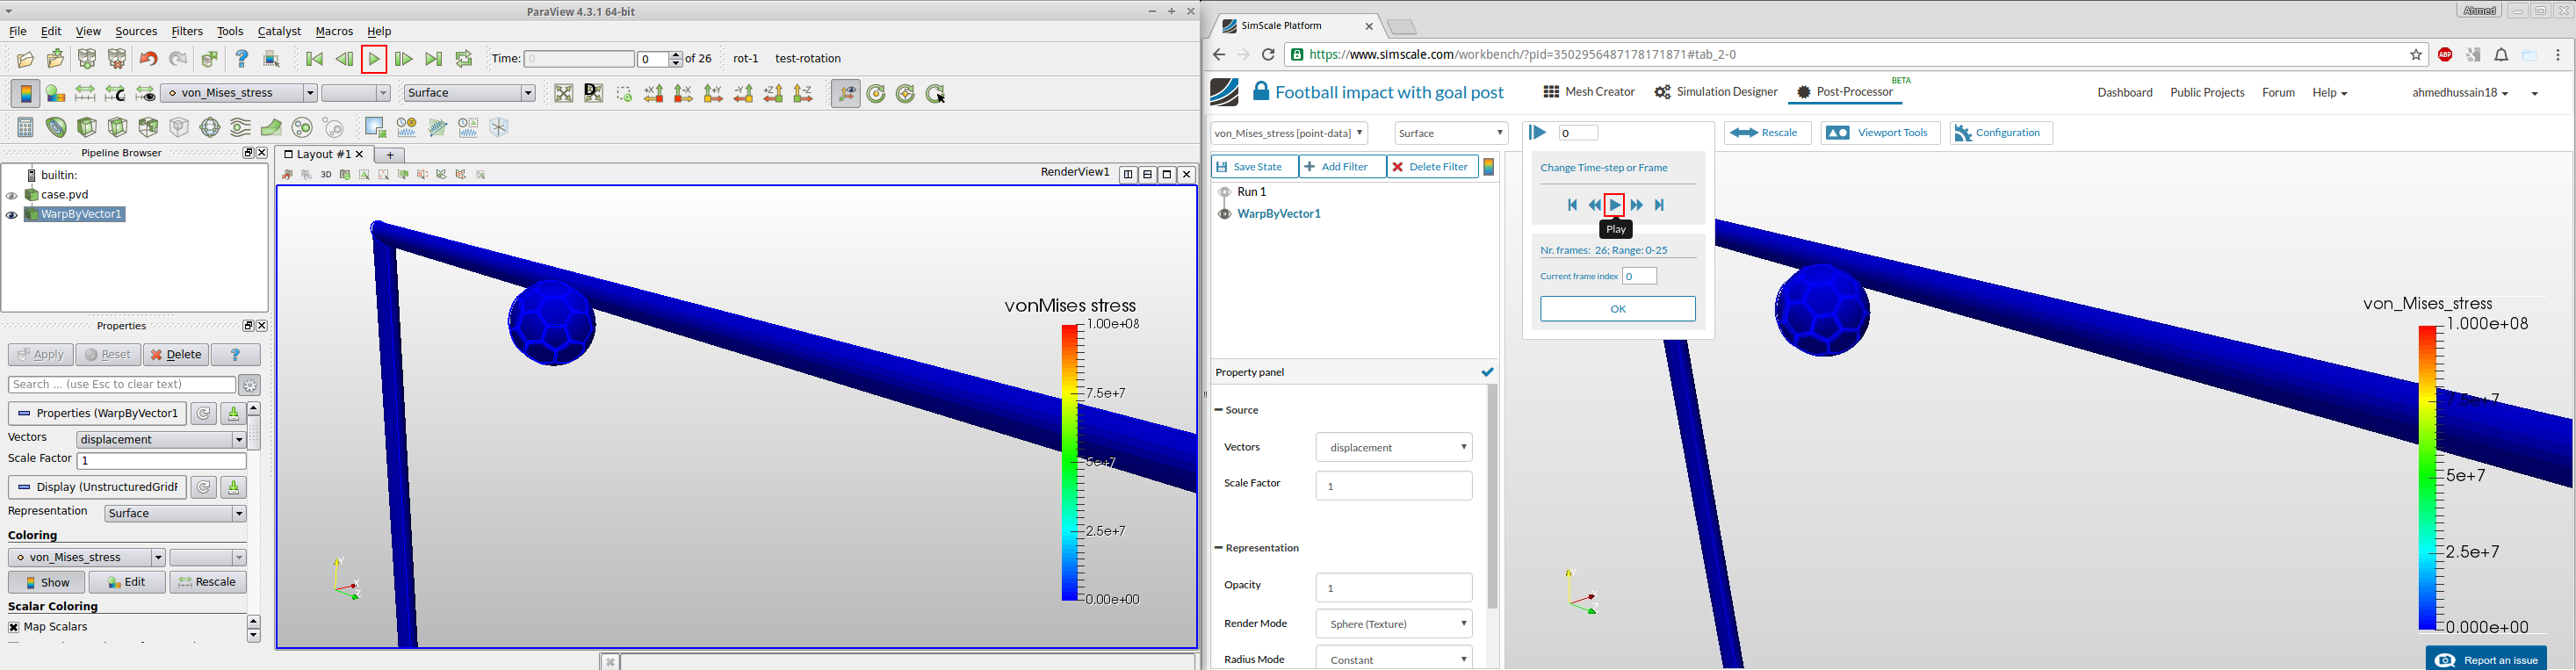
Step-6: You can pause at step 11. If you skipped the step, you can then use the next or previous step buttons to move to step 11.
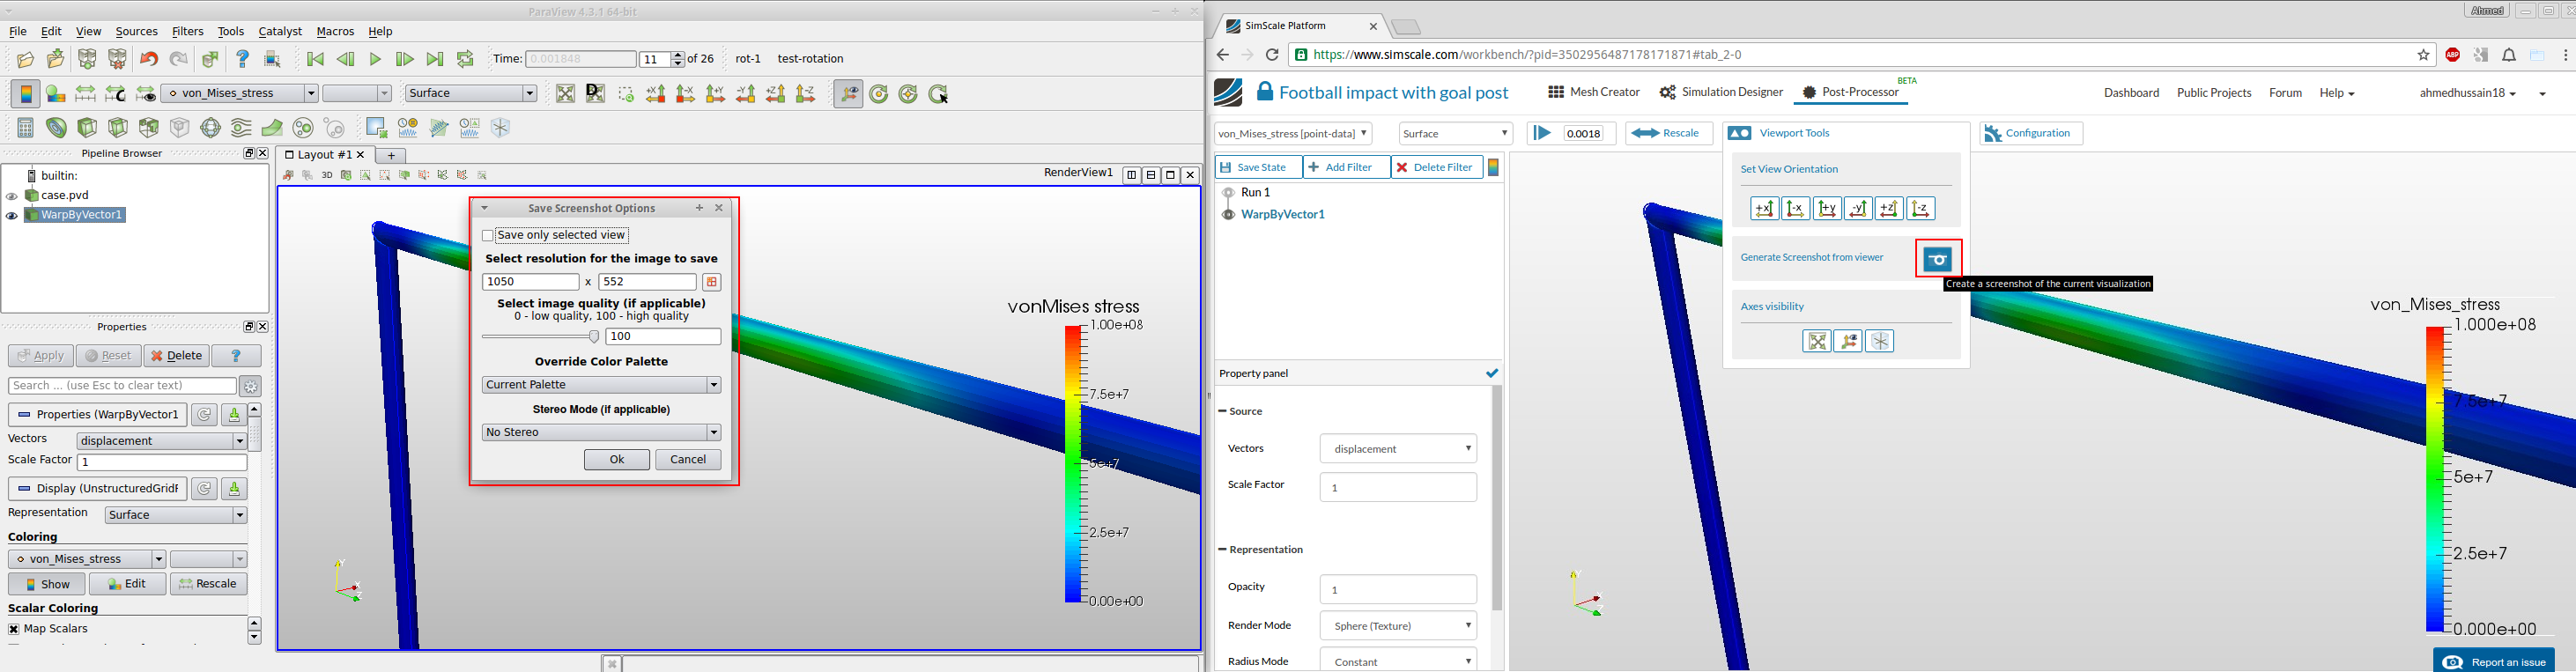
Step-7: In order to save the screenshot, click save screenshot button under Viewport Tools for online post-processor and File > Save Screenshot for local ParaView. The saved screenshot will appear under Screenshots in left tree.
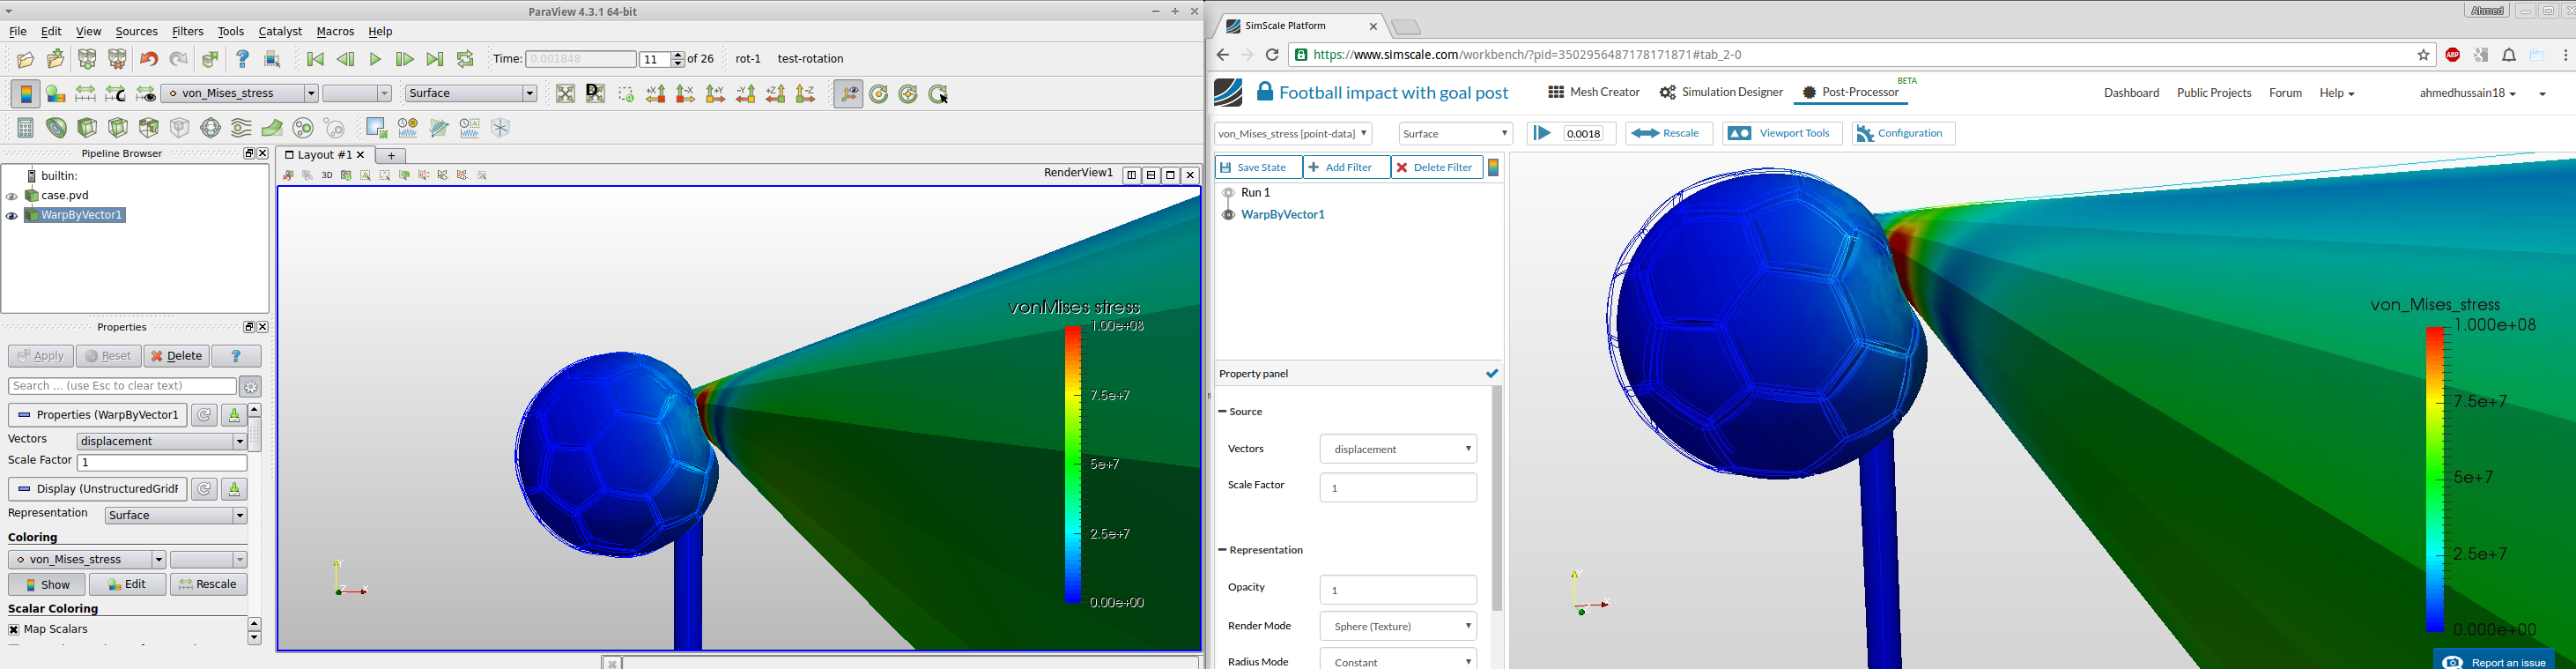
Step-8: Zoom in to see the deformed state of the ball at maximum impact.
Now we are done with the basic post-processing of the simulation. Let’s dig in to more advanced case to get nicer results and also get smoother animation.
LEVEL-2
Before you start LEVEL-2, make sure you have followed fully LEVEL-1 above for local Paraview. Also please make sure you follow the steps below in the same order otherwise you may get errors.
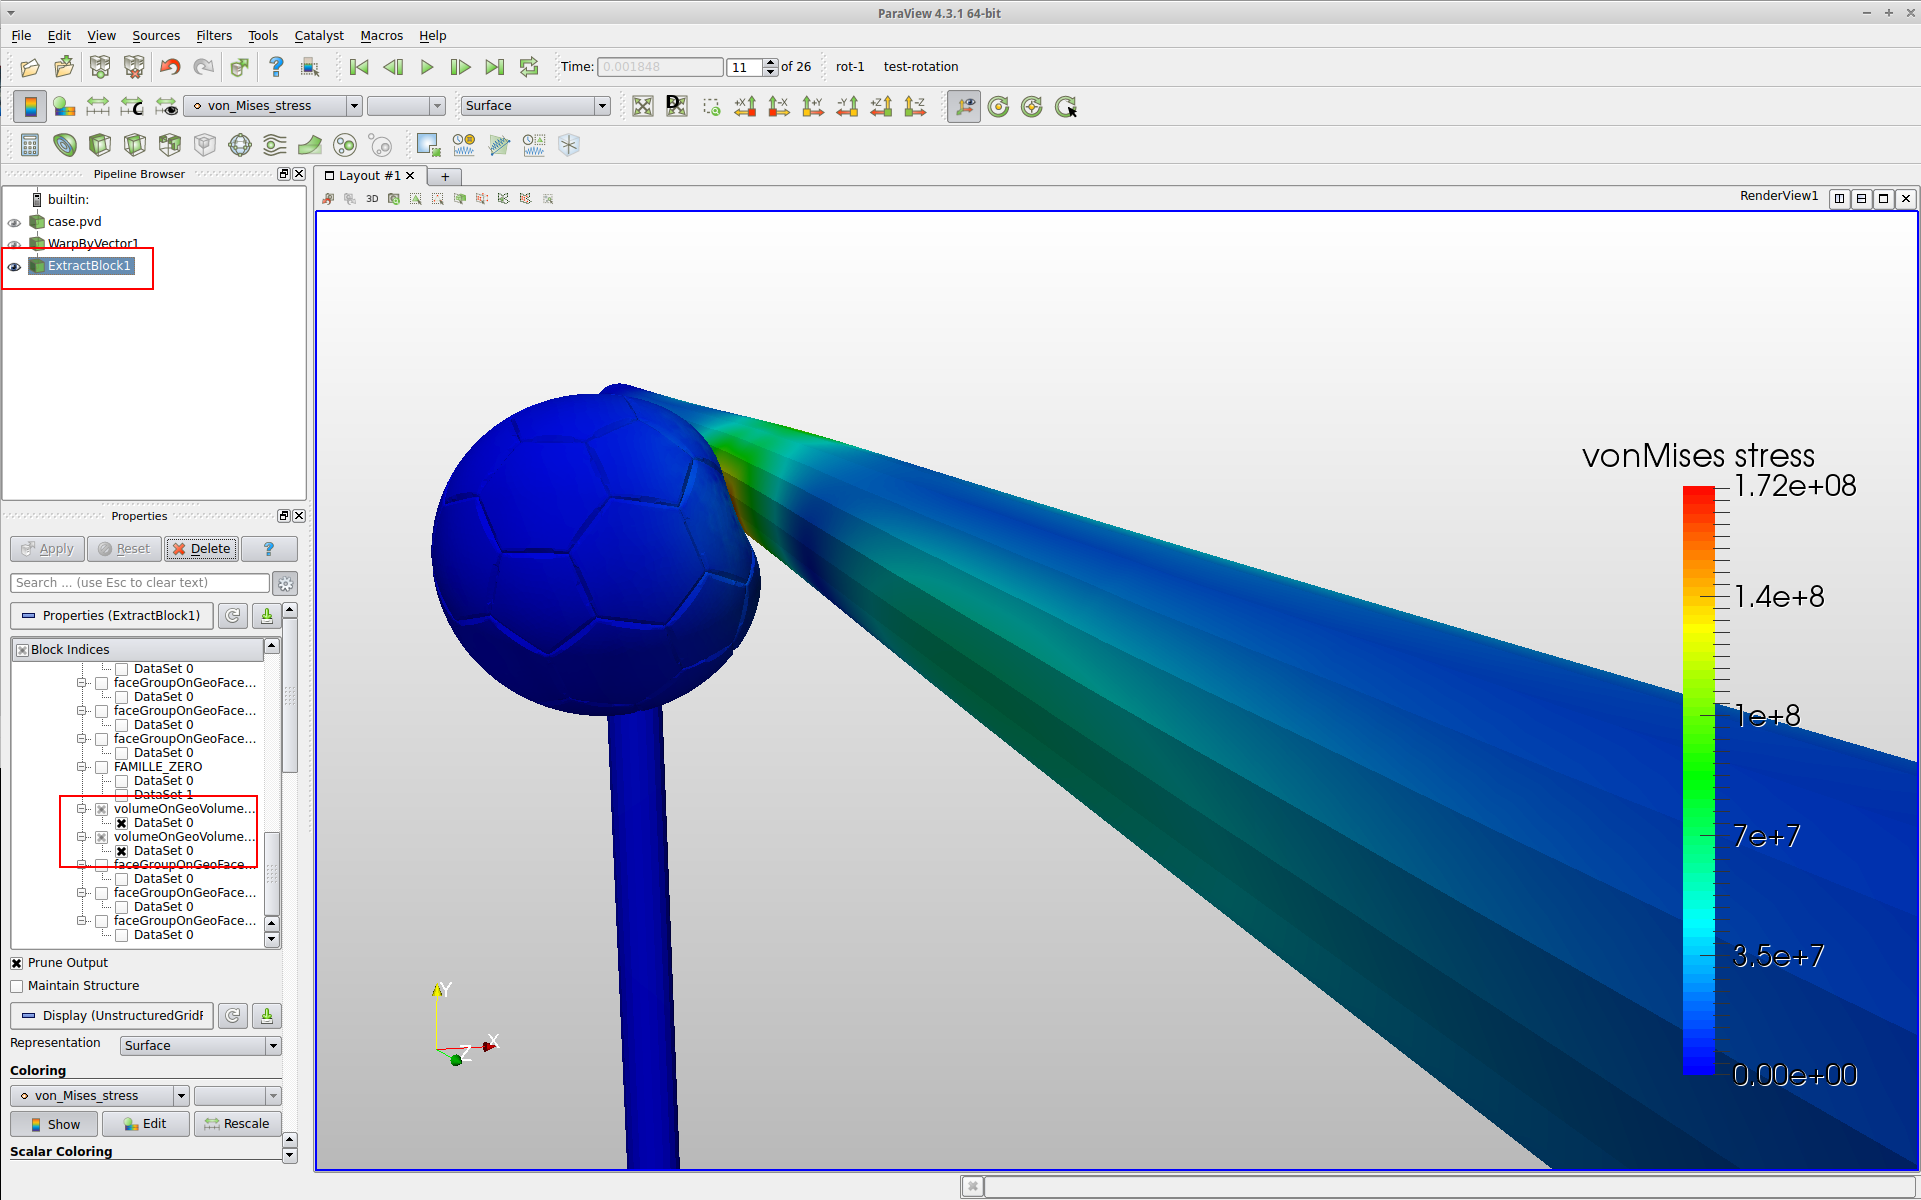
Step-1: First we need to get rid of ugly edges all over the geometry. For this we need to only get the volumes out of the geometry. Extract Block is the filter which does this. Search for this filter and select only the volumes from the list under properties and click Apply. You will immediately see the difference.
Step-2: Next to make the animation smoother for creating a video or gif, Temporal Interpolator is the filter that comes in handy. Select this filter and give the value of 5e-5 to Discrete Time Step Interval under it’s properties and then click Apply. You will notice that timesteps have changed from 26 to 110.

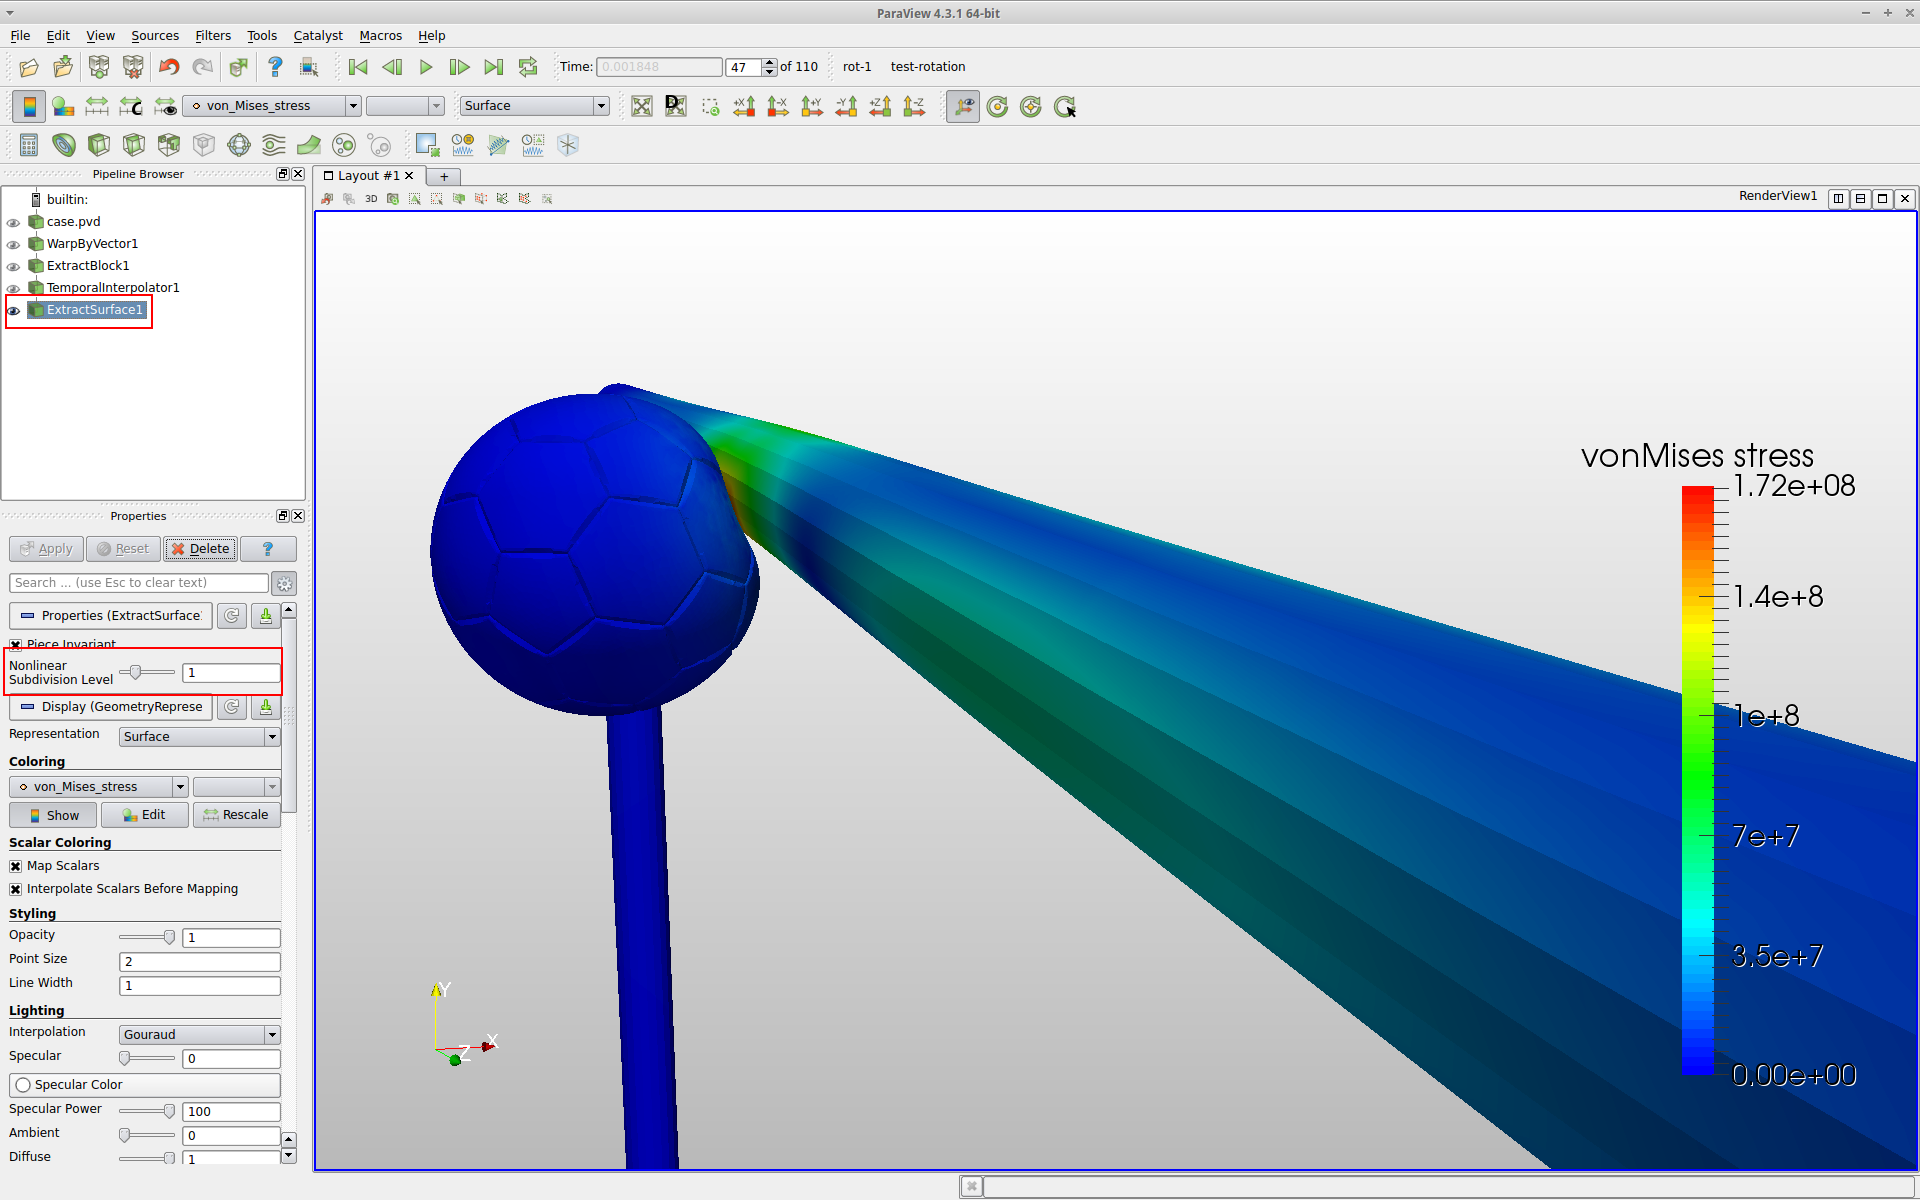
Step-3: Next we need to smooth the tessellated surfaces e.g. the tessellated crossbar as can be seen. This can be done via two filters. The first filter is Extract Surface which will be used to extract the surfaces. This filter is a pre-requisite to the next filter discussed in next step. Therefore, second filter can’t be applied without this one.
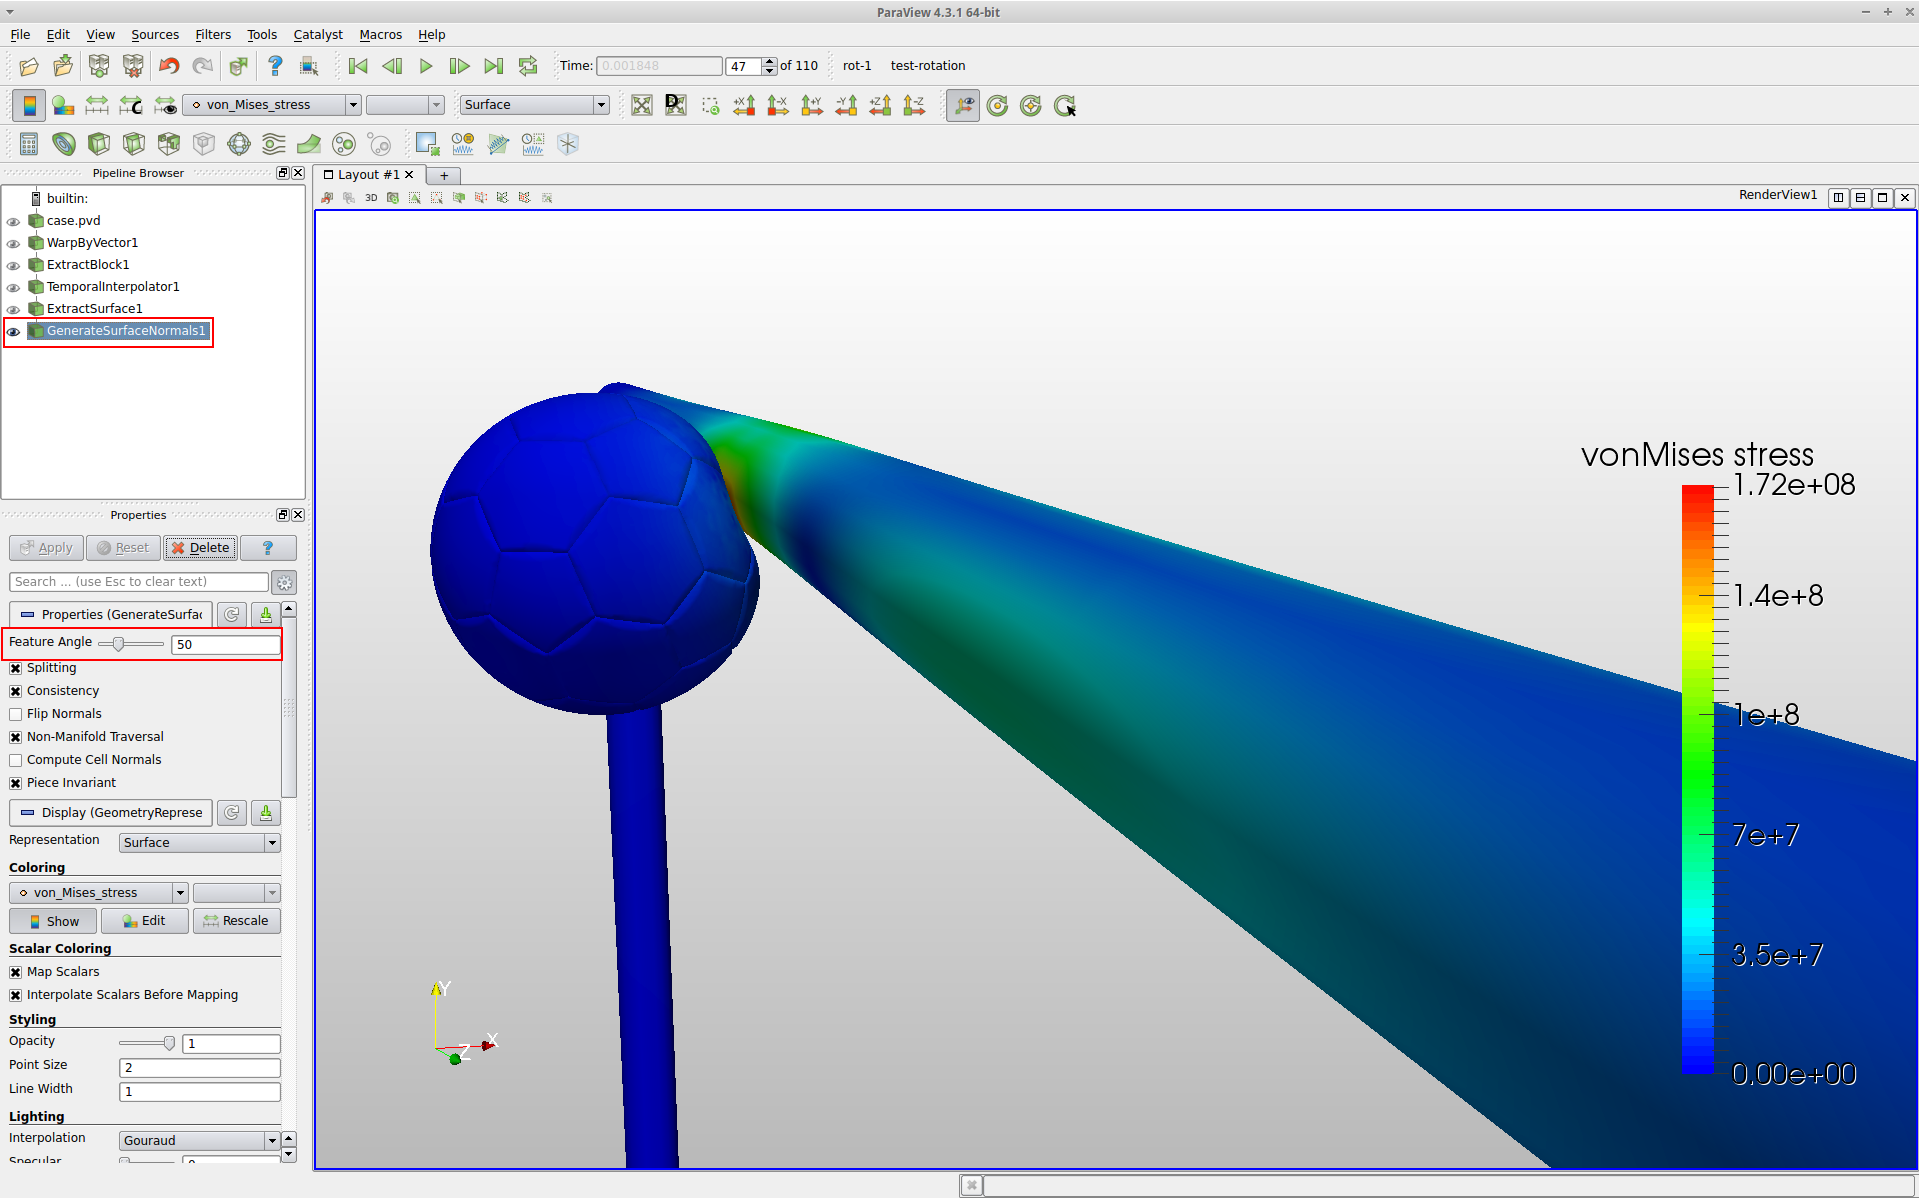
Step-4: Now here comes the magic! The next filter does the job of smoothing the tessellated surfaces. Search for filter Generate Surface Normals and change Feature Angle to 50 under properties and click Apply. You will see the huge difference. Now the geometry will look much nicer. (you can increase the value more but after some point it distorts the surfaces rather then fixing them)
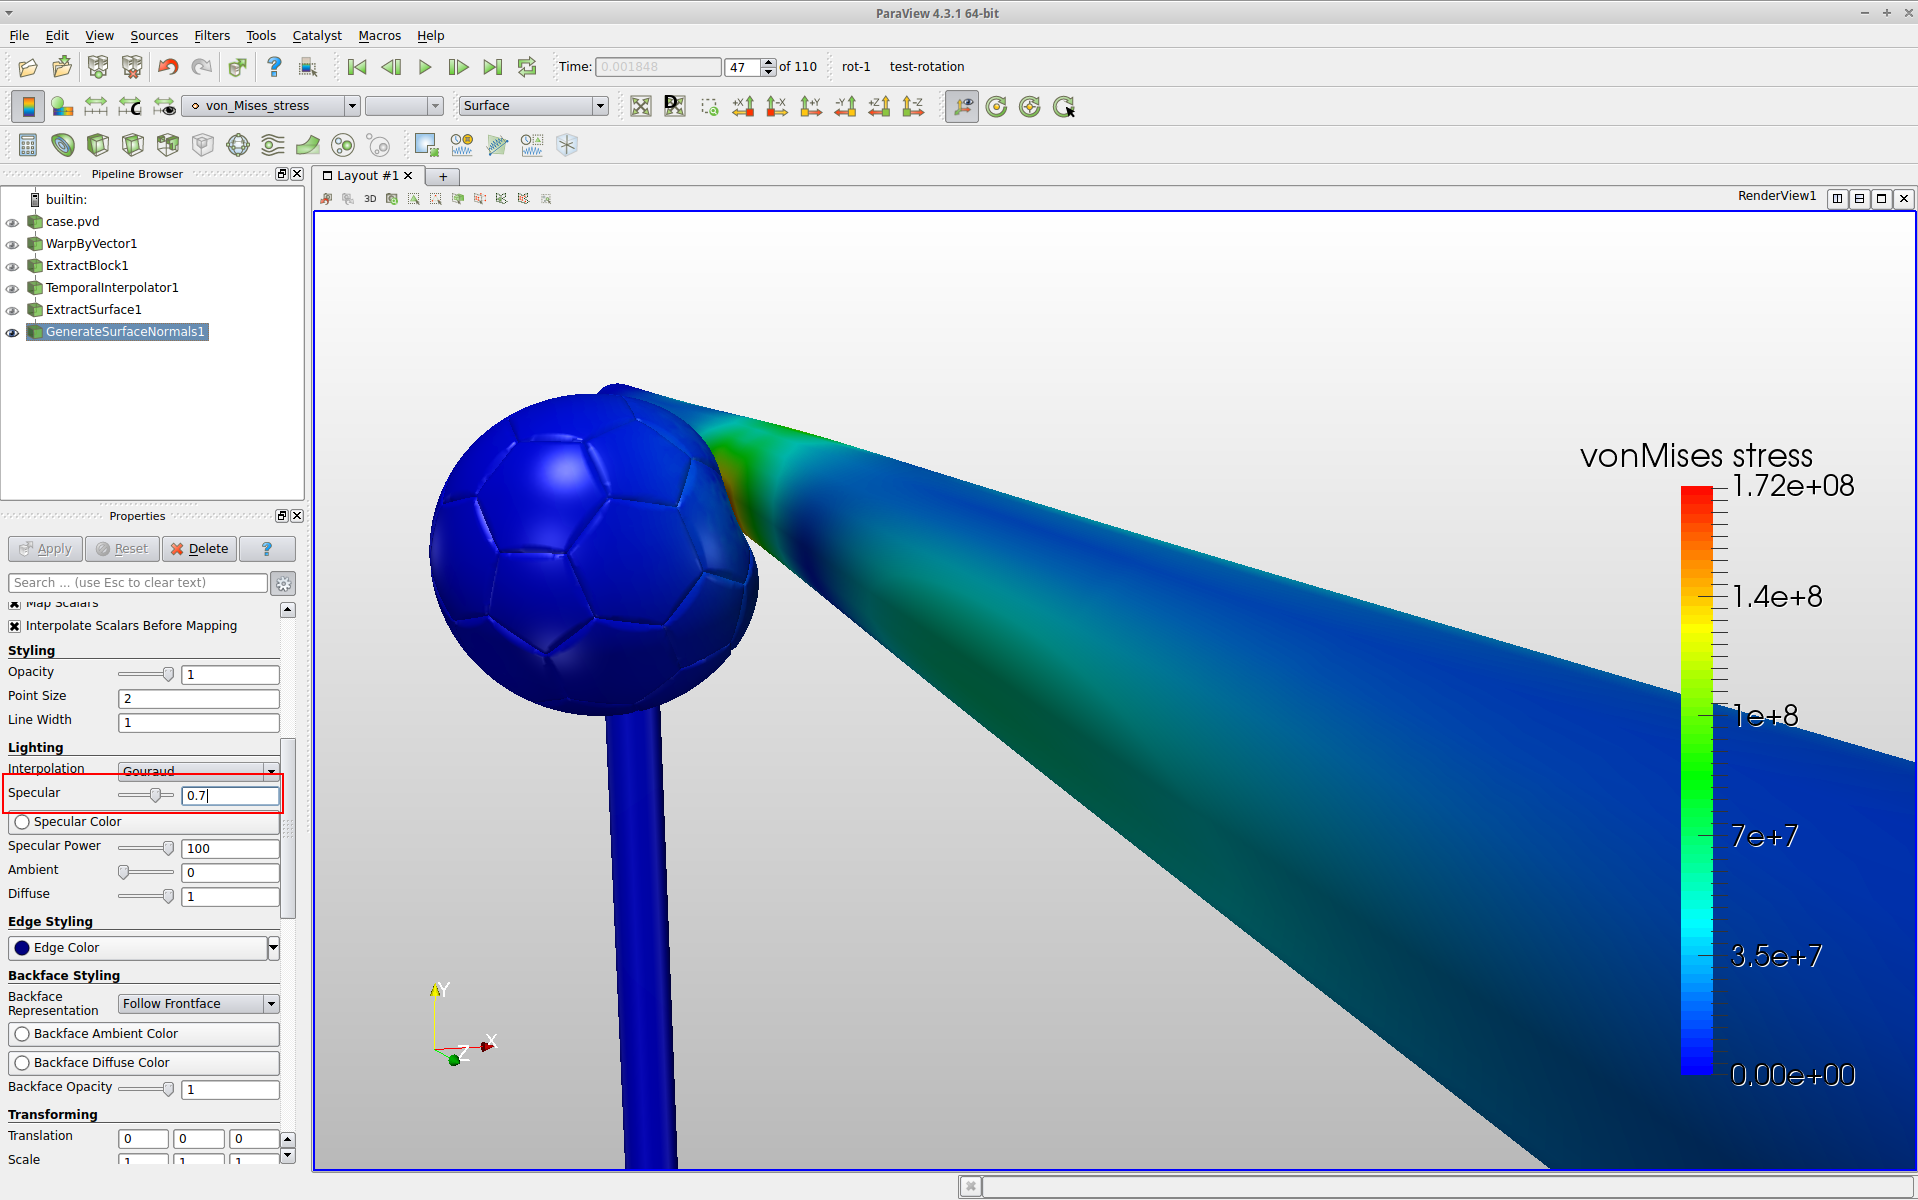
Step-5: Next to give the shine to your model, change Specular value under properties panel of your last applied filter to 0.7
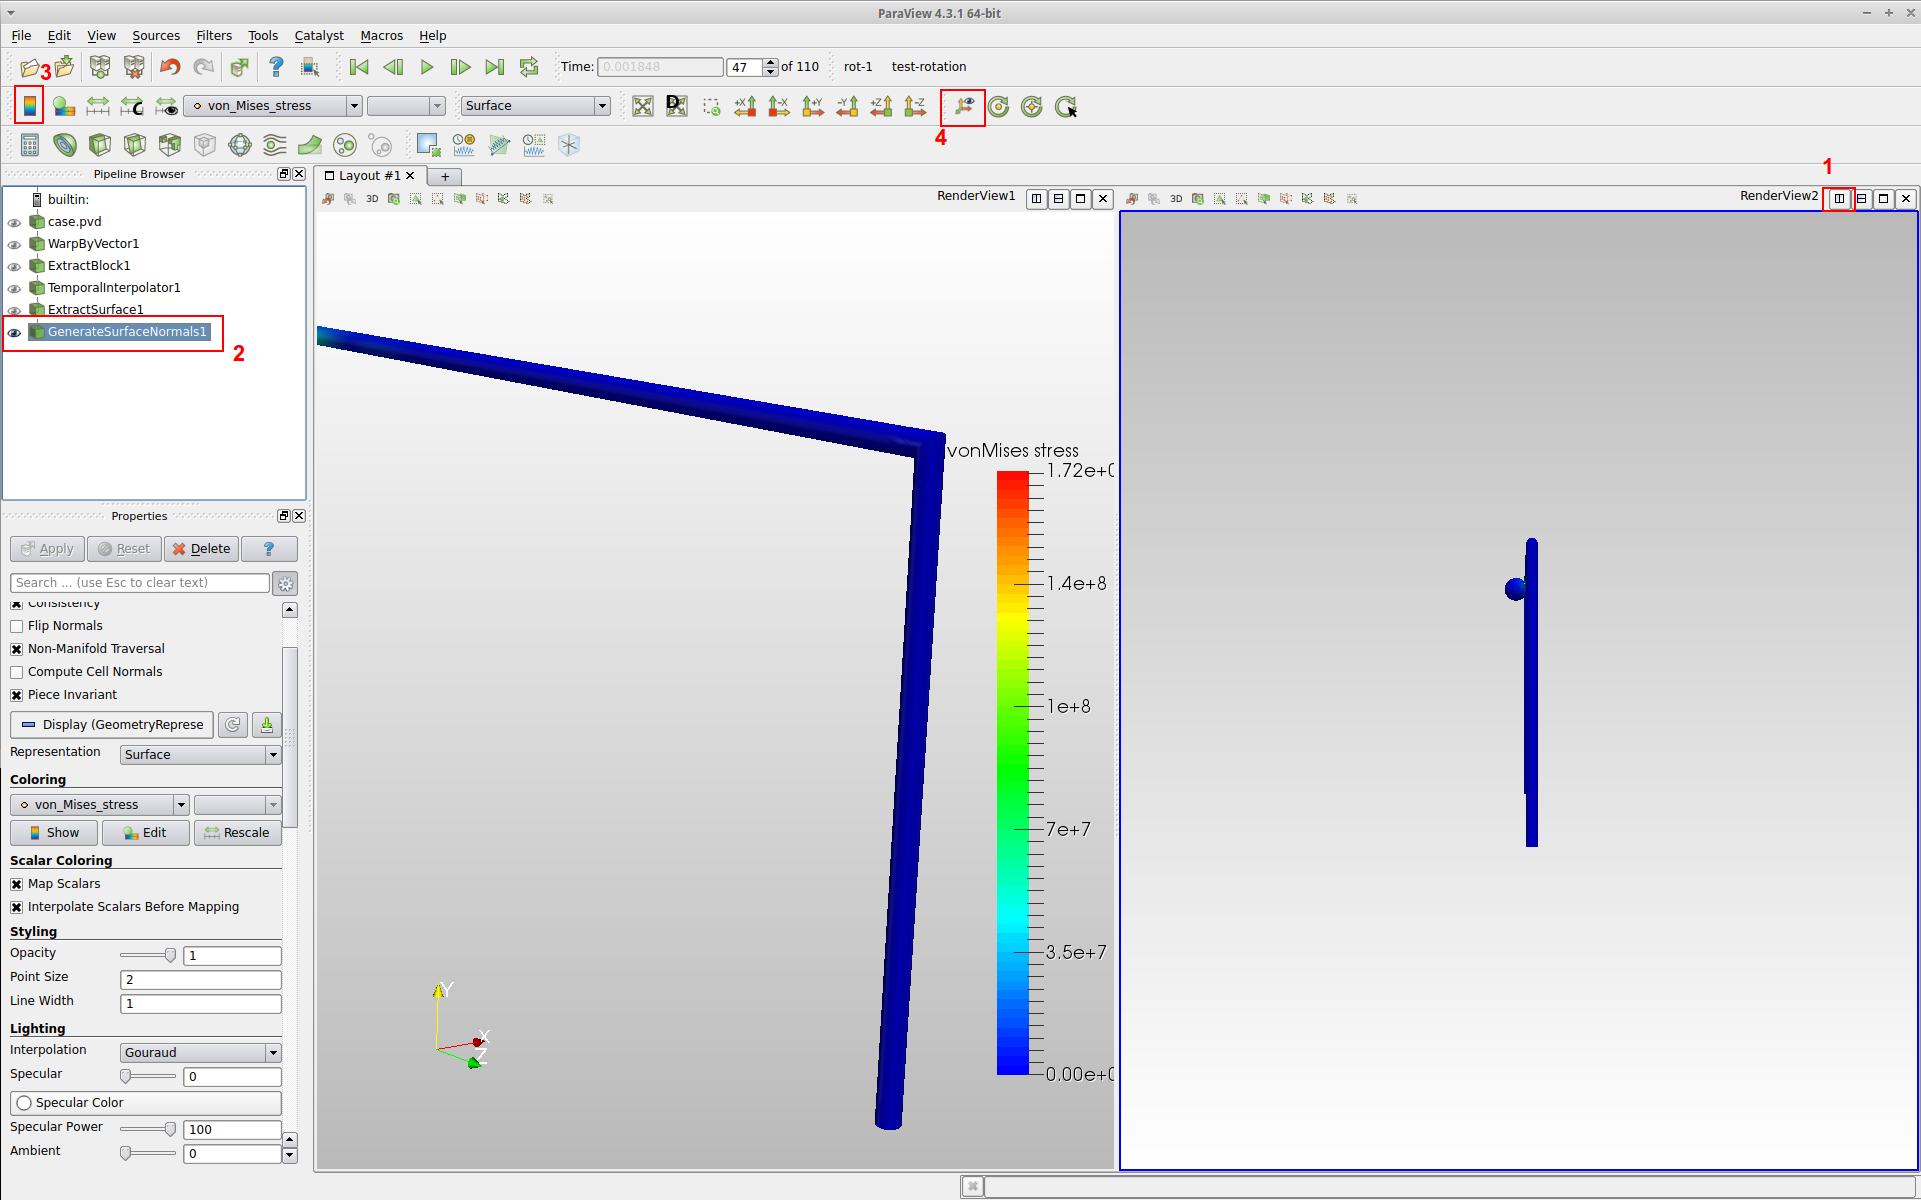
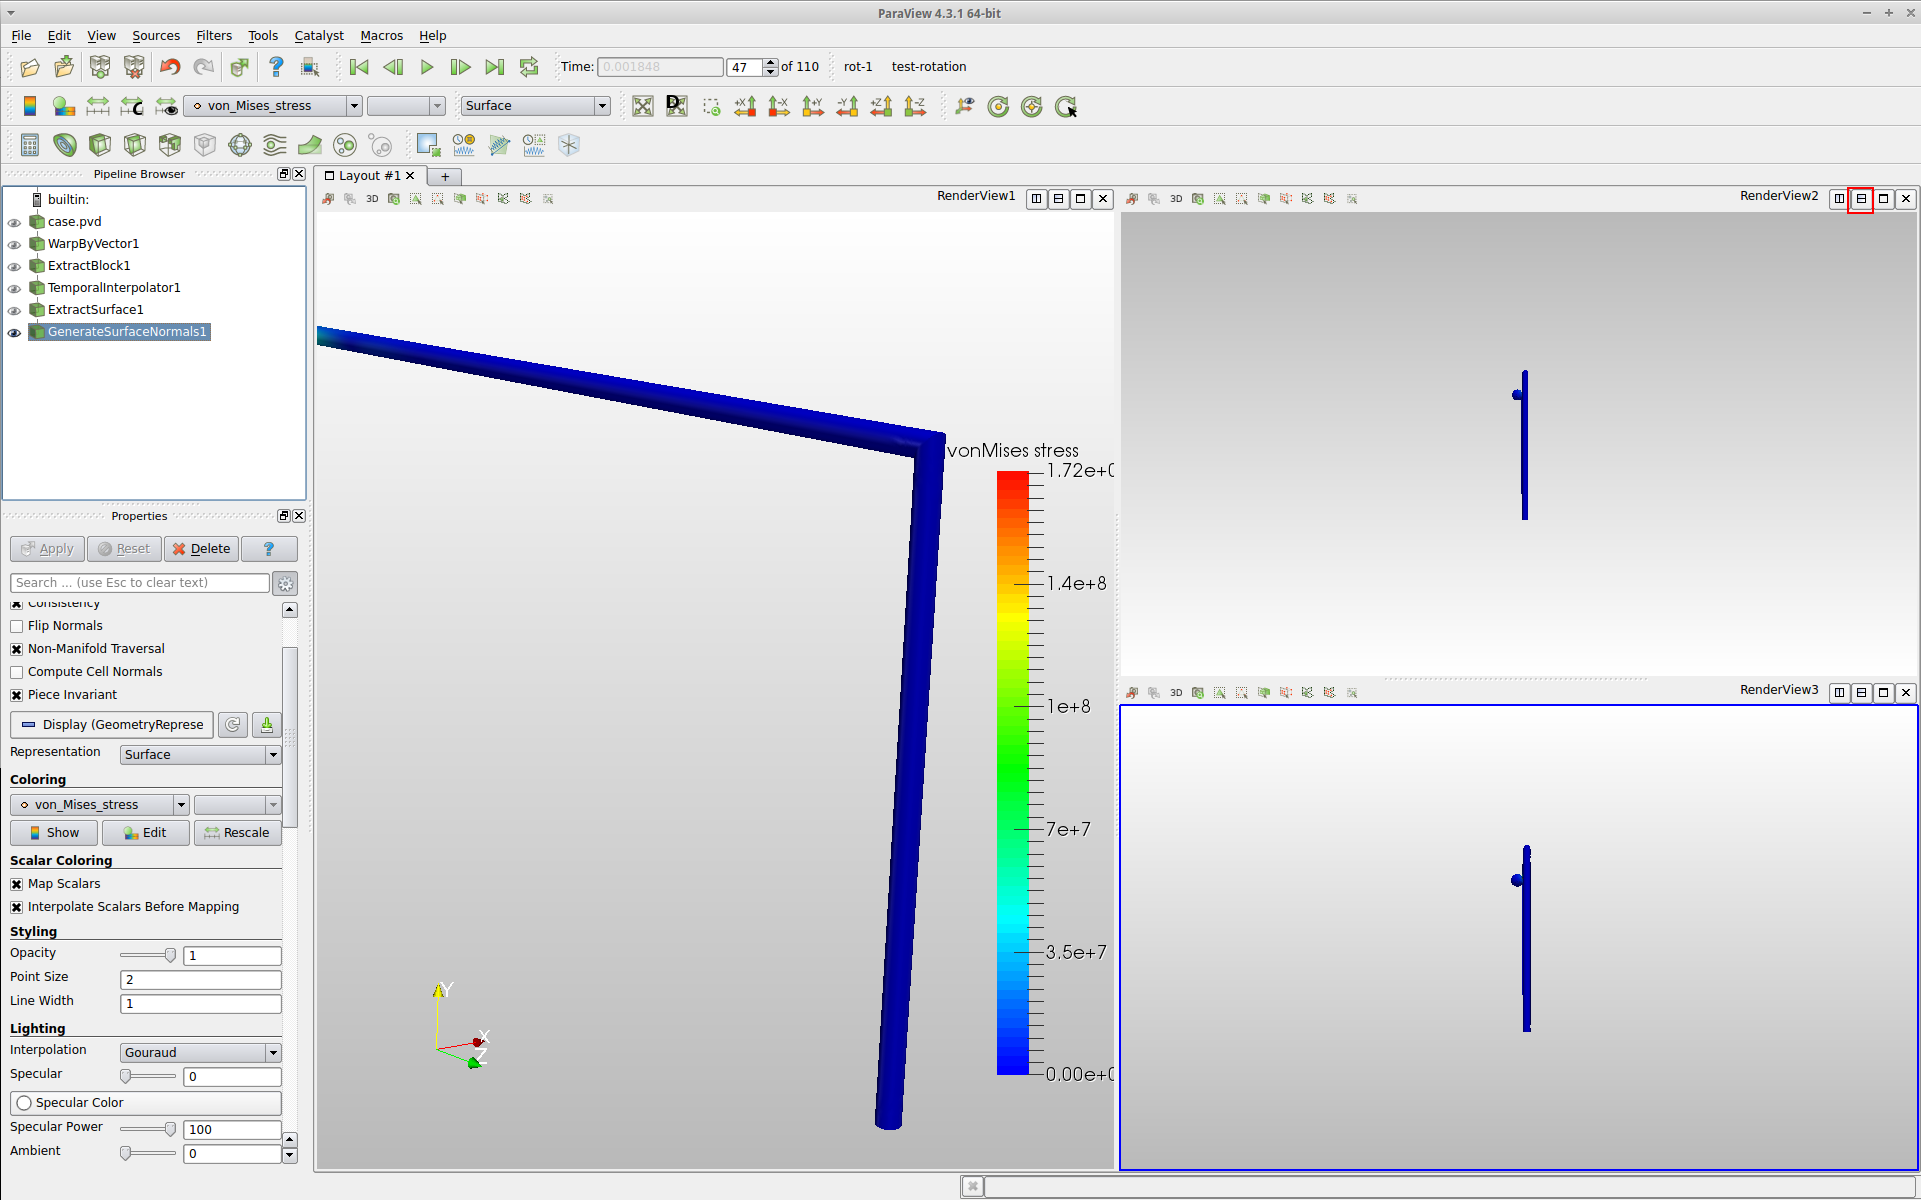
Step-6: Next up we will create a new horizontal render view to the right in order to have another view of our results. For this follow the following steps:
-
Click Split Horizontal to split the view in to two. Then select Render View from the options. Next change the background (see here). This time make the inverted gradient i.e. grey on top and white on bottom.
-
Click eye on the left of GenerateSurfaceNormals1 to make results visible under new view.
-
Toggle off the color map (bar).
-
Turn off the axis.
Step-7: To make a second vertical render view below the newly created horizontal view, click Split Vertical this time and follow the same procedure as mentioned above. This time follow the same gradient as in the original viewer.
You have to set the Specular again for the newly created viewers in order to put shine to the geometries inside these viewers.
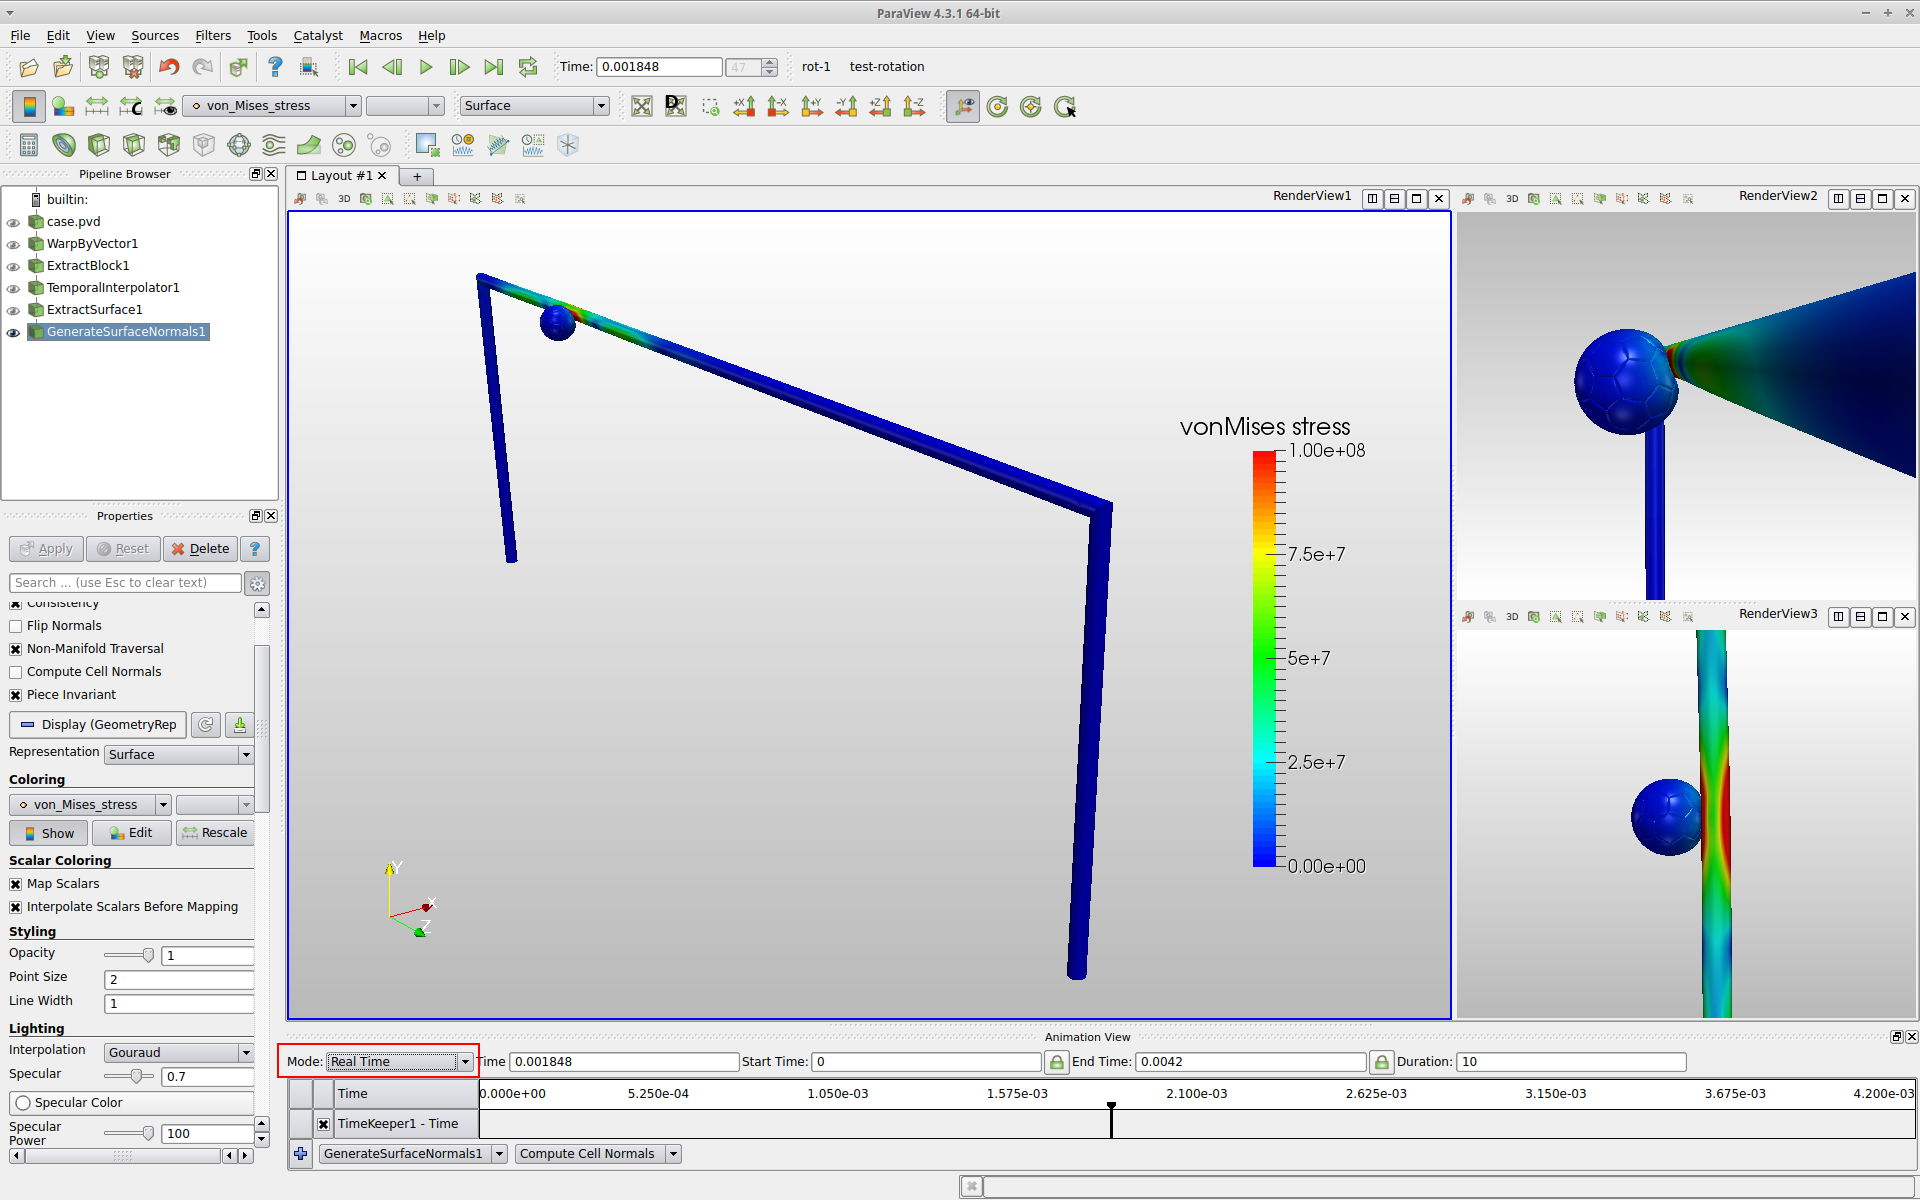
Step-8: Align all the views as shown below and edit the custom range from 0 to 1e8.

Step-9: We are now all set to create awesome animation. But before we start creating it, we will do one more step to follow the real time when creating the animation i.e. either create the animation of 5 or 10 sec. Go to View > Animation View, a small panel will appear at the bottom. In that panel change Mode to Real Time and then close it.
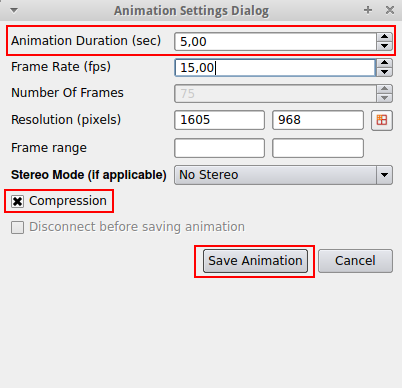
Step-10: Go to File > Save Animation and change Animation Duration (sec.) to 5. If you want to create a gif, make sure Compression remains checked. Otherwise the output animation will be too large to make a gif out of it. On the other hand to create a high definition video, you can turn off this option. Click Save Animation and save it in .avi format.
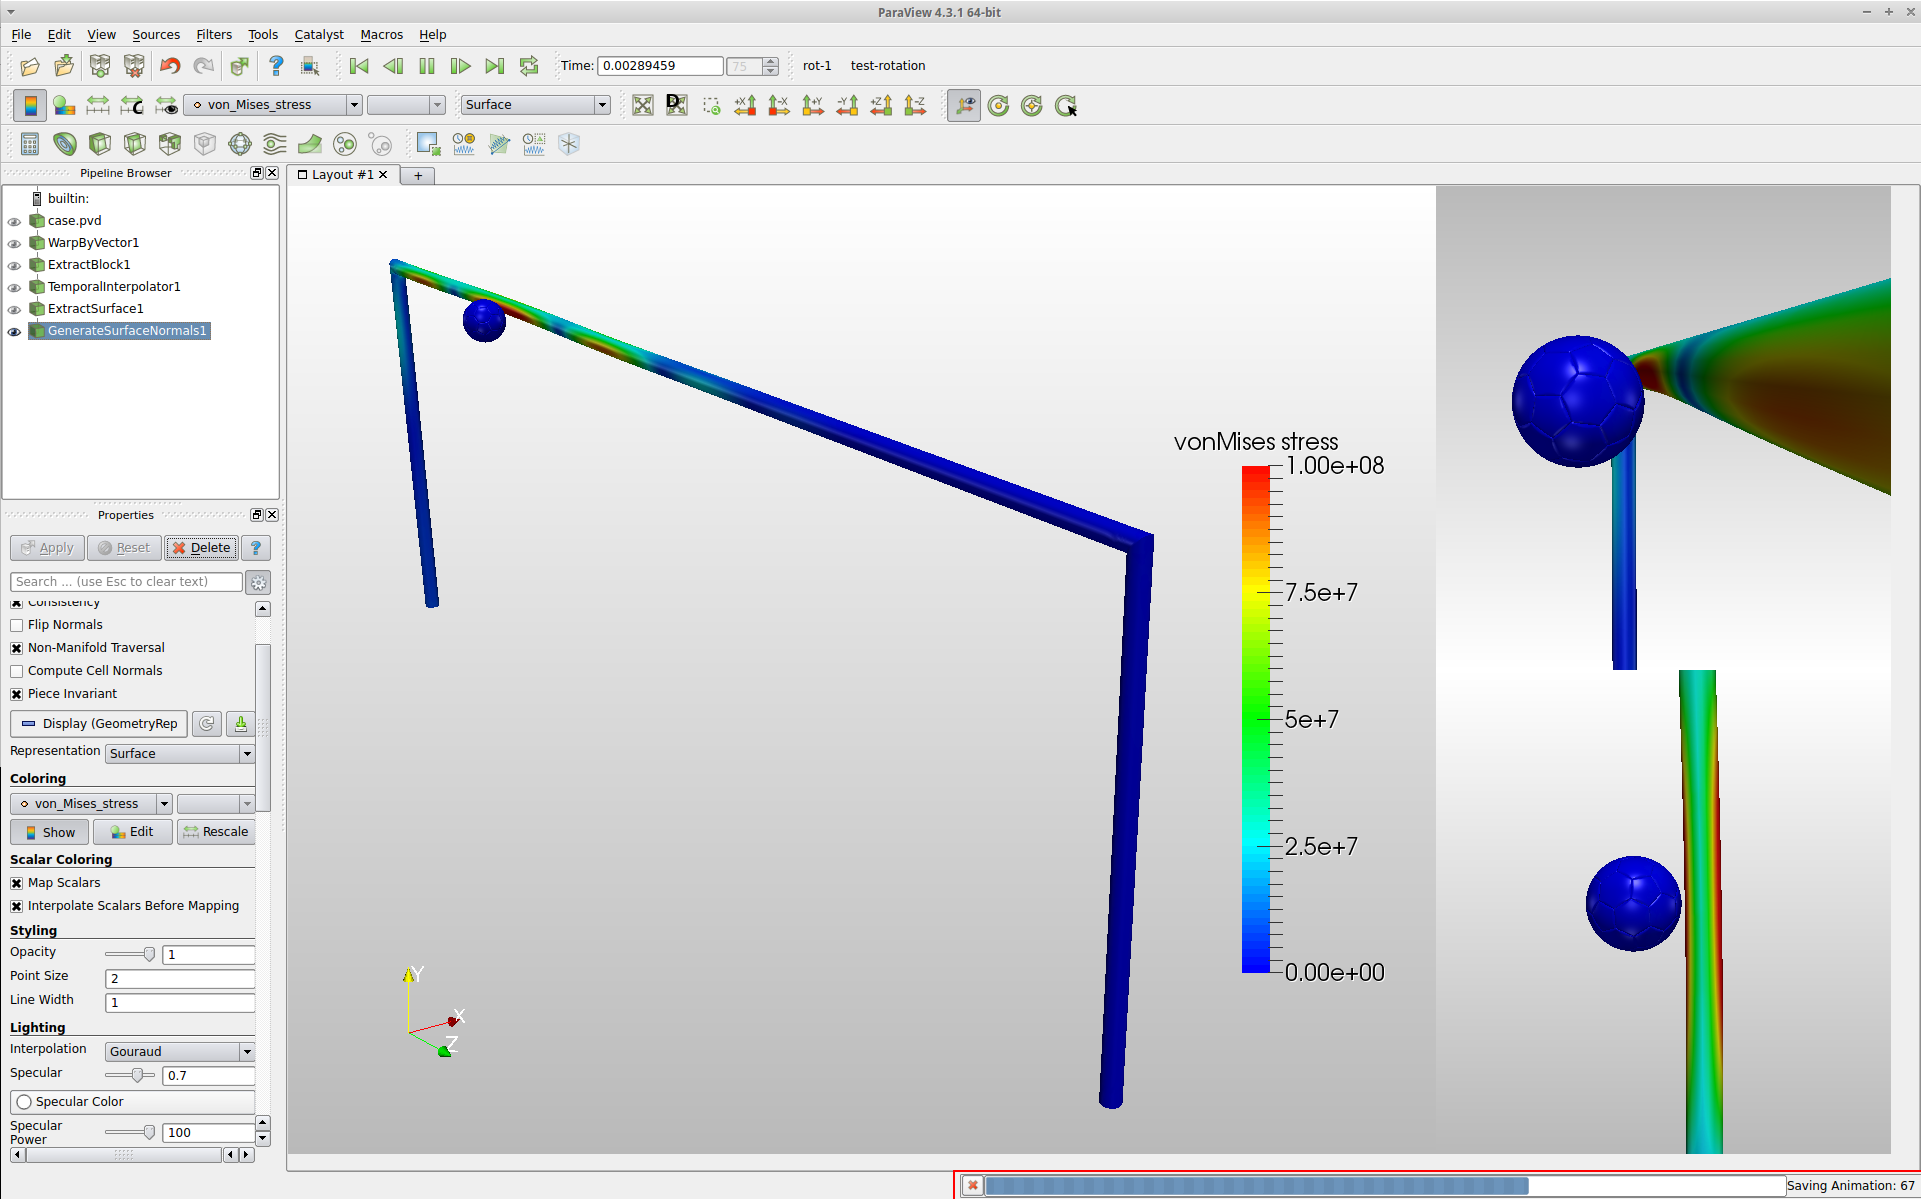
Step-11: Once the animation output process has started, you will see the progress in lower bar.
Creating gif from the saved animation:
In order to create gif, do the following:
-
Make sure your animation video size is less then 60 MB.
-
Go to www.ezgif.com and click Video to GIF.
-
Click Choose file and select your file. Click Upload! to upload it.
-
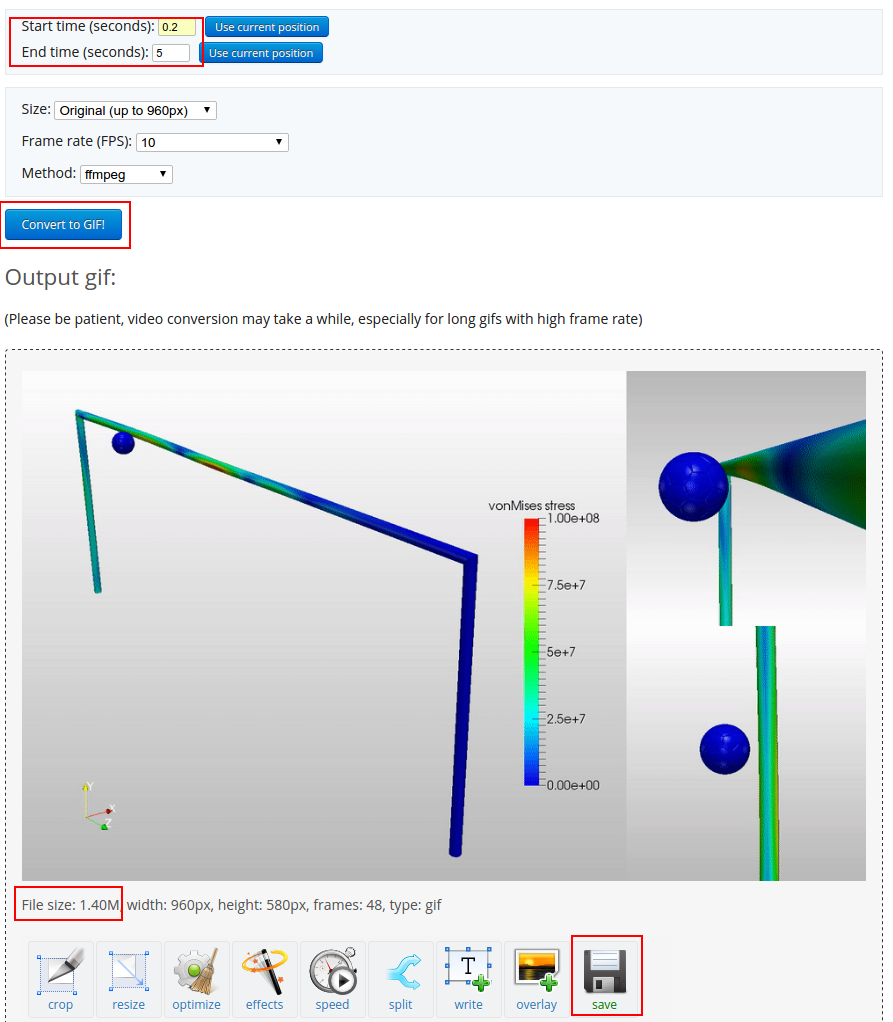
Set Start time (seconds) to 0.2 and End time (seconds) to 5. Click Convert to GIF! to convert it to gif. After a while you will see the created gif. Make sure the size of gif is lower then 3 MB otherwise you wouldn’t be able to upload it on forum. If it’s above 3 MB, then you can apply certain operation like Optimize to make it smaller. Click Save once done.
This will save gif to your local PC which you can then paste under your project comment box to show others how your simulation looks like!