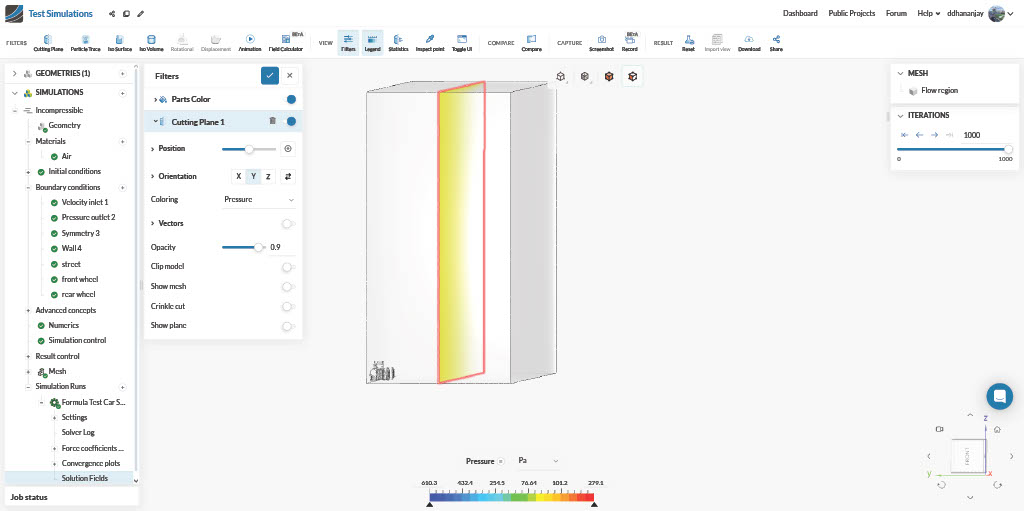
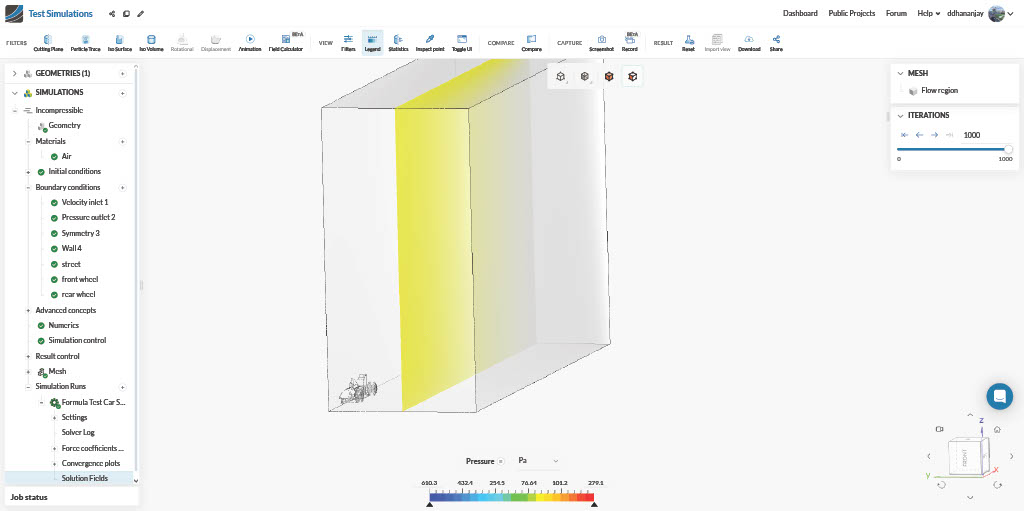
Hello there. I am currently conducting a test CFD simulation for a research project on F1 cars, and aerodynamics is one of the subjects of study, so I thought I should learn how to use a CFD and use it. I wanted to first test a car to make sure I understood what went on before I used a legitimate model, and I followed the " Tutorial: Aerodynamics Simulation of Flow Around a Vehicle (Aerodynamic Flow Behavior Around a Vehicle Tutorial | SimScale) that was available on the simscale website. When I got to post processing and reviewing my results however, my result didn’t look the exact same and instead of airflow covering the entire fluid body, it came out as a 2d plane. I am not particularly educated on the specifics of how CFD works, I would appreciate it a lot if anyone could help solve the issue and help me understand what went wrong.
issue screenshots: