Hi everyone,
I have performed a CFD simulation over a front wing.
My objective when I was meshing was to achieve a y+150. I set the ratio to 0,3 and made the calculations according to What is y+ (yplus)?
The layers were perfectly created in the mesh visualizer. And of course, I’d used wall functions.
My question comes up when postprocessing the results, I got the result of y+1 in most of the wing. If I set in Paraview to just show the y+ value between 1 and 10 I get this:
It is true that some regions may not have the best y+ to rely on perfect results, but considering that the flow is detaching maybe that is what is causing the y+ value to increase a bit.
My questions are:
1-Why in paraview I get the value of y+1 if I was using wall functions and scoping for a y+150? Is because when I use wall functions then in the post-processing if the value is well approx it returns the value of 1?
2-Why not all the zones of the wing have a y+ close to my desired value? Because the boundary layer in that regions needs to be different or because the flow is detaching?
If you want to have a look at the project: https://www.simscale.com/workbench/?pid=1129744023204751944&mi=spec%3Acbacb17a-e81c-432a-a60d-eab9a8af5dce%2Cservice%3AMESHING%2Cstrategy%3A52&ps=algorithm%2FFullSnappyHexMesh--oneOf%2Frefinements%2F0&sh=48
Best regards,
Jaime
Hi Jaim!
@dschroeder & @DaleKramer have extensively discussed this not too long ago. Guys, do you want to give our user some tips on how to optimise the setup and help him interpret his results? 
Best,
Jousef
Hi,
Whereas they notice the post, could you send me the link where they were discussing this topic?
I have been looking for it but I didnt see it.
Thanks!
Jaime
Hey Jamie,
Some quick answers so you dont have to decipher the super long discussion between dale and myself.
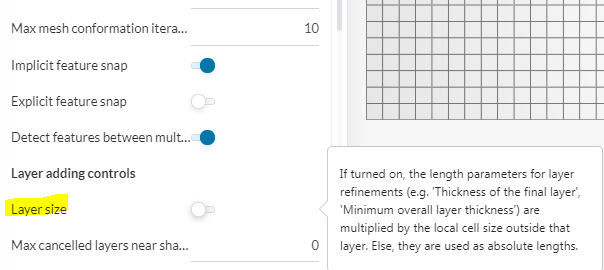
- When you have the layer size feature on (off in the picture) the boundary layer is added in relation to the neighboring mesh size. This means that if you increase cell fineness, your overall BL will become smaller, effecting your Y+ values. Using a 0,3 ratio, your final BL cell will be 30% as thick as this neighboring cell. With layer size off, your BL is in absolute mode, meaning your total BL thickness will stay that size REGARDLESS of changing cell fineness.
- Most of your questions relate to #1, For this question, the flow detaching or not has nothing to do with your Y+ values. If flow is detaching it is because of your geometry (too aggressive angle of attack etc…)
Your Y+ values are based off of your desired flow measurement ( laminar flow = viscous sub-layer = Y+<8) ( Turbulent flow = log-law region 30<y+<300, with wall functions). For your desired Y+ of 150 and using wall functions, you have done this correctly. Now you just have to achieve this Y+ and verify it. For this i HIGHLY suggest you download the Y+ histogram and ORSI program created by Dale, it is amazing. Here is the link for this information.
Y+ Histogram program
Instrucitons for Y+ Histogram and ORSI use
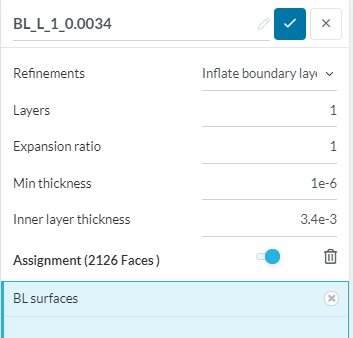
If you want to use the results of that long thread - the single boundary layer method - The settings are:
Good luck,
Dan
3 Likes