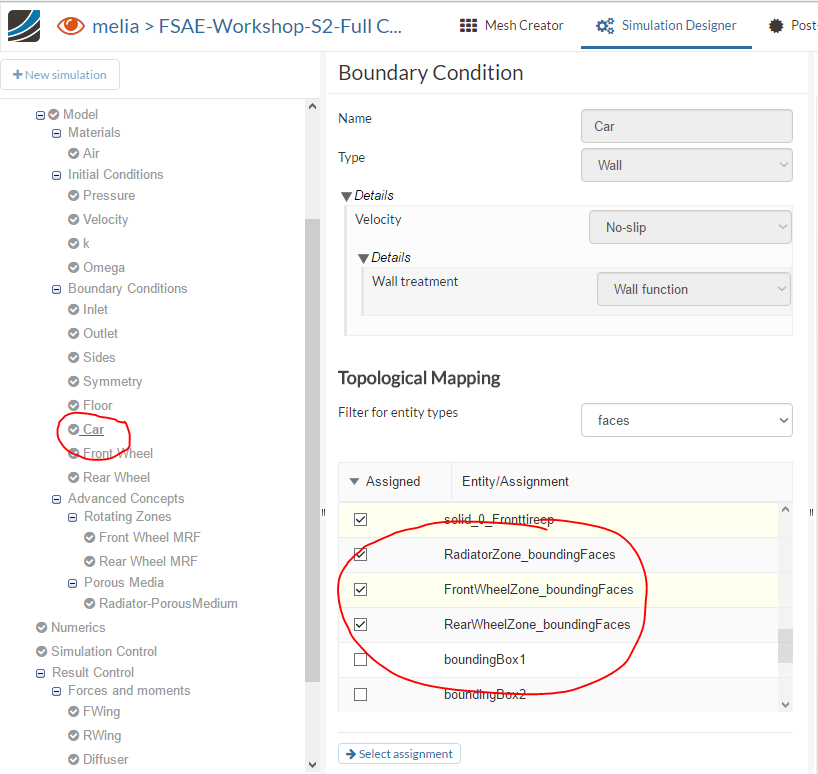
Hi @melia, you have to deselect the zones from the car boundary condition…
When i go to import the link that has the file of the homework to my projects, i am getting an error. It takes me back to my dashboard and does not let me view the file. Can i get the file from somewhere else?
@varunsura @fhnx @ahmedhussain18 @anon67859130
Greetings,
I am having the same situation.
Mesh and Simulation parameters were checked two times and I am having the same output. I was wondering if you could check my model, just in case (https://www.simscale.com/workbench?publiclink=4c7fcf28-2ba6-41e9-be81-77a267312e34). Or you can mentioned me in your reply or solution.
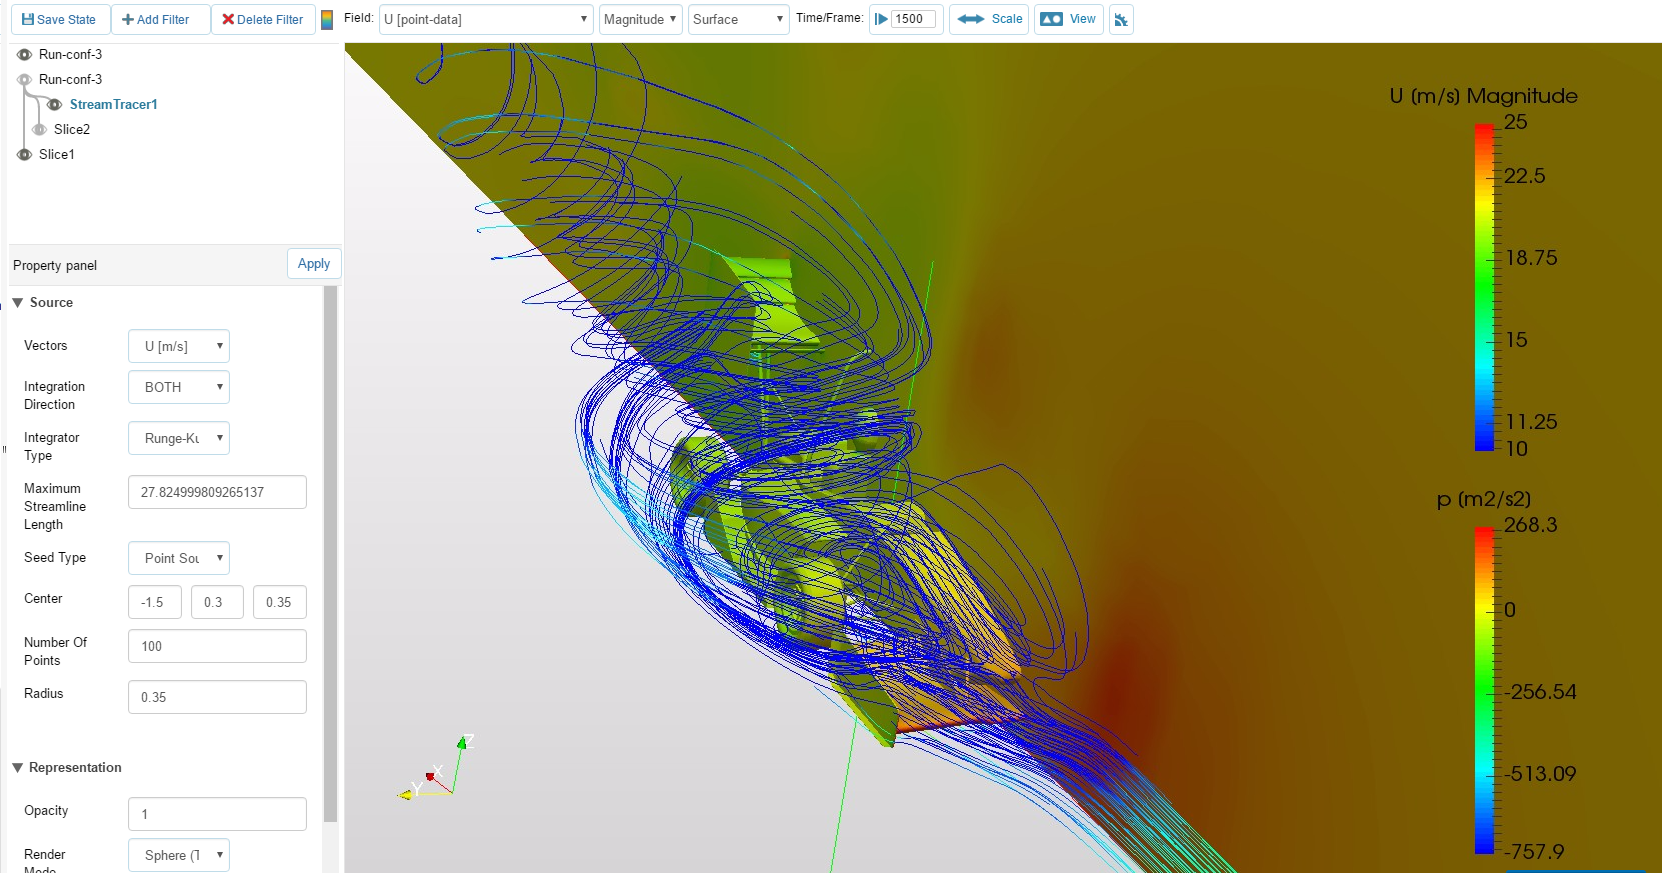
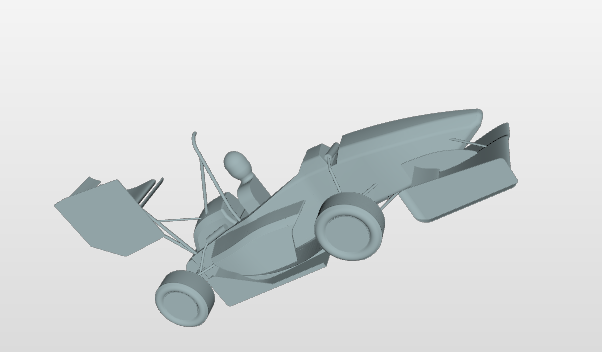
This is a picture of my model.
Thank for your attention, have a great day.
Hi @afuente, Your solution is not converged, but you have to zoom-in in order to see that.
Hi guys,
perhaps you can help me with my problem.
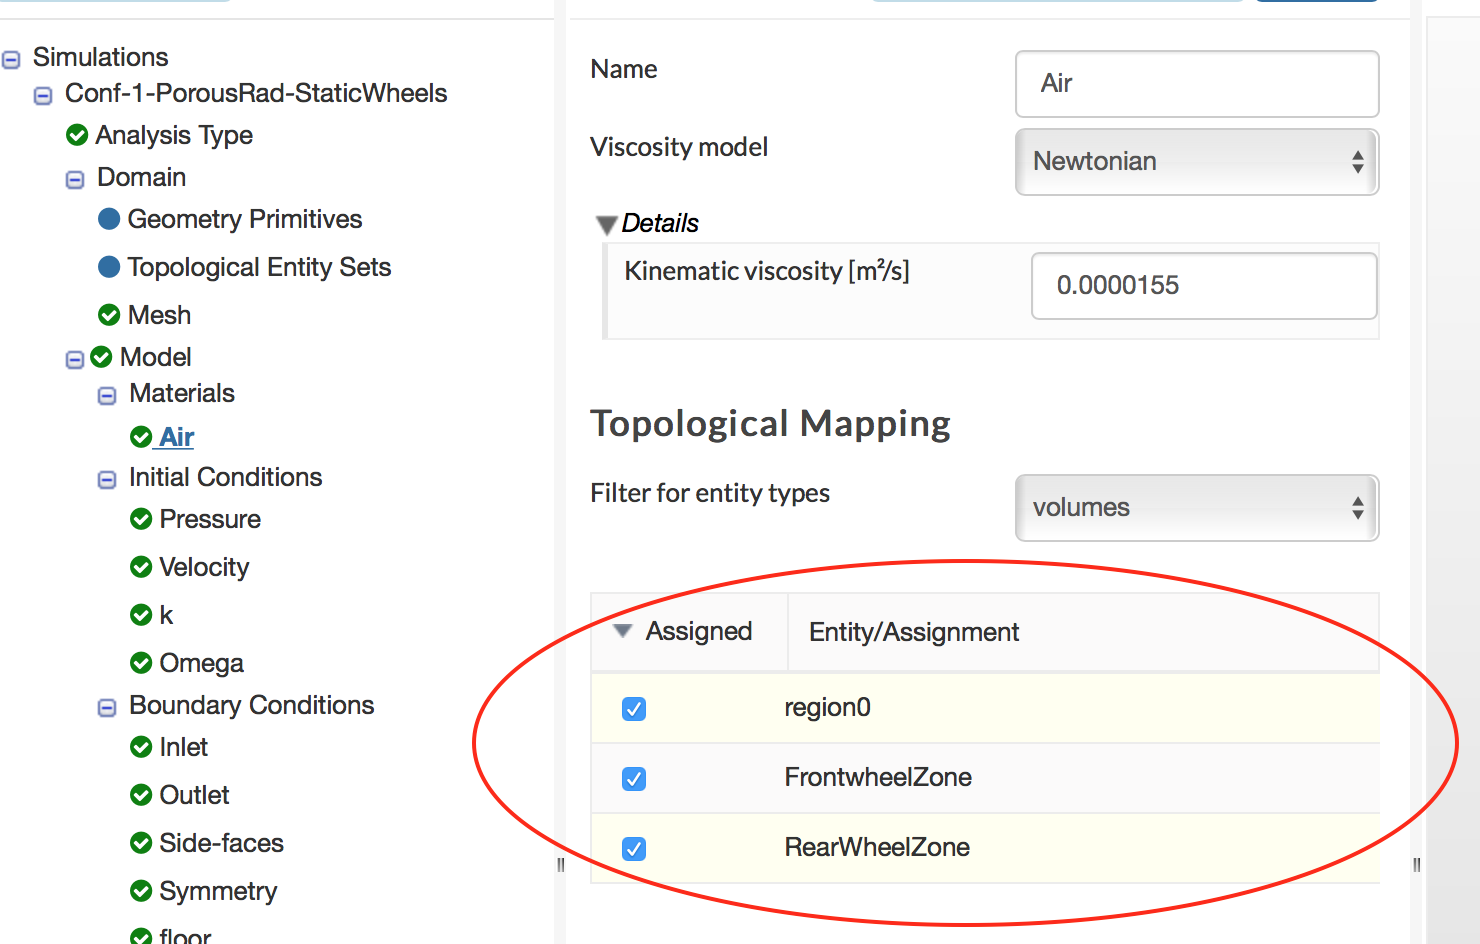
meshing the full car was working great. Now i want to start Simulating by adding the Material “air” by following the tutorial and select region0; FrontWheelZone; RearWheelZone and Radiator.
But in my Simulation-Area I cannot select the radiator.
Where is my Error ?? Can you help me.
The project Link:
Hi, @jkollautz,
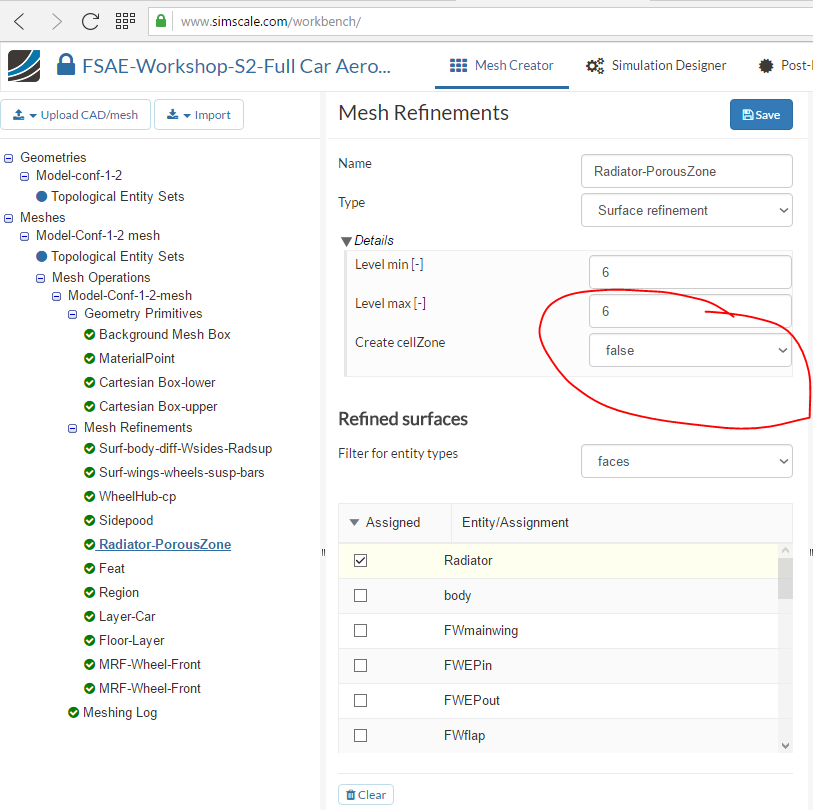
You have to create the cellZone for the radiator by setting the option to true. You’ll have to re-mesh the geometry.
Hi,
@afuente, @varunsura, @LoganZundel
I did a rerun of my simulation (wirth MRF and rotating wheels) with 6k timesteps, as @pfernandez suggested. As you can see the graphs converge at around 4k timesteps. So if you want to run your simulation on your own I would suggest that you run it with at least 4,5k timesteps.
The converged Plots look like this:

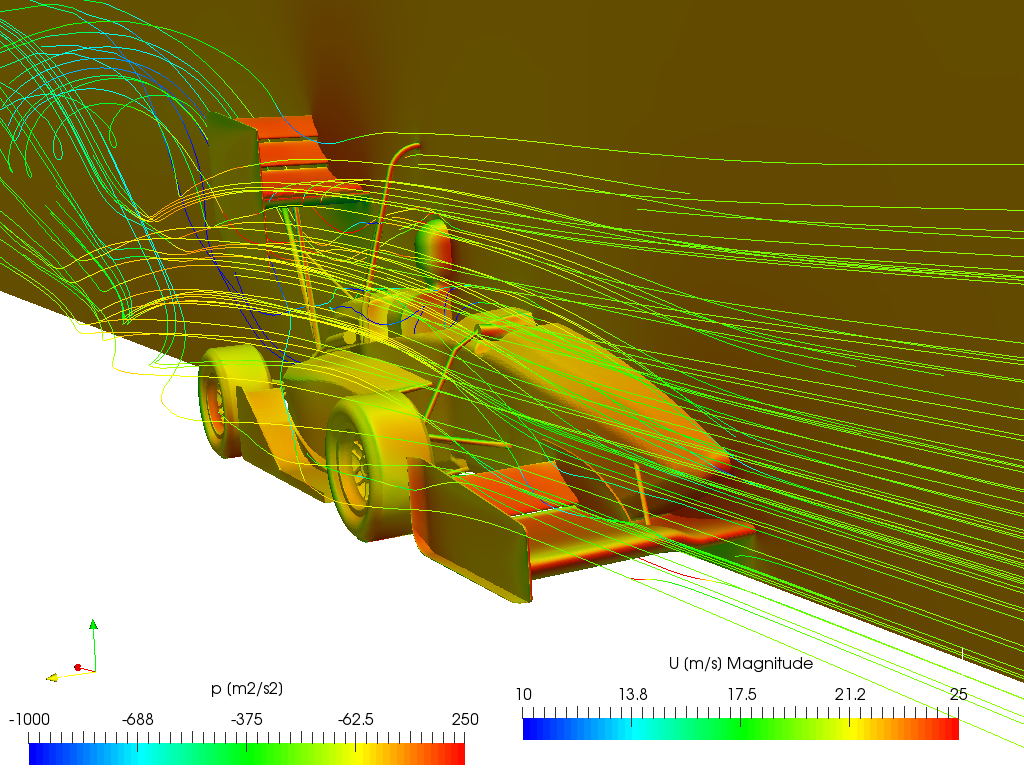
And the final post-processing looks a lot more like the picture in the tutorial:
If you want to save your processing time (~340 core h), you can copy my project and do the Post-Processing on your own: https://www.simscale.com/workbench?publiclink=46ce4658-185e-47c0-9a9b-9493ac3983db
Greetings,
I don’t get it… I only got config 1-2 for my simulation as a model and not config 3 and I don’t get whether we shall do 1 simulation or 3 simulations? Can someone help? I guess I have the wrong project??
Thank you 
You should do only one simulation with MRF-zones and rotating wheels, as described in the tutorial. If you have the model with the MRF-zones (the “wheel-caps”), then you have the right model
Greetings,
I am currently rescaling the pressure contour at post-processing however as is shown in the picture I can only see an slim section of the car, which steps should I follow to be able to see the rest of the car?
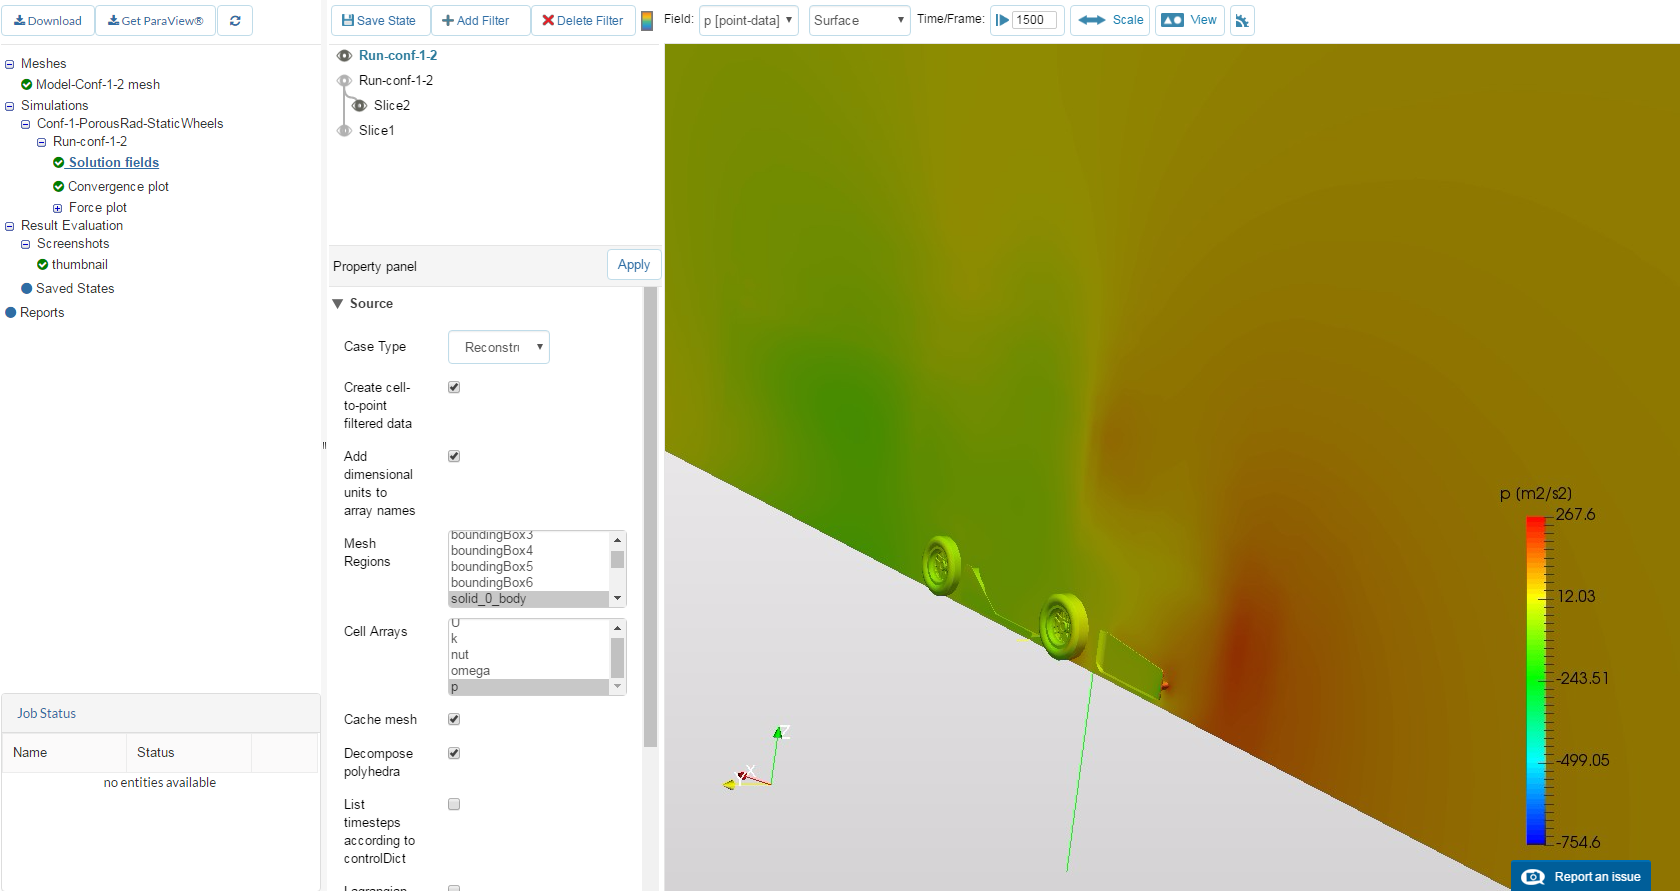
Also I would like to know if the results on the viewer are correct since they look different to the pictures of the tutorial, here is a link to my project:
Best Regards.
This looks right. Please note that the staff updated the base project because there were too many models. perhaps you have got an old version.
@kianz89: Look at my last post. Your results looks as if your simulation did not converge because of too few timesteps in the simulation.
Greetings
Hey @juansan995 you have to simply deselect the Slice2 by clicking the eye beside it in the tree and activate the Slice1 by clicking the eye beside it in the tree.You are currently viewing the plane for slice 2.
Hi all,
Just to confirm. The submission is just this tutorial, for one geometry?
Thanks!
@varunsura @fhnx @ahmedhussain18 @anon67859130 @pfernandez.
Got i!! Definitely the 6K iterations helps to solve such convergence issue. Thank you for the help!!
HW is done!!
Hello Everyone,
@varunsura , @PhilippB94, @durgesh786 , @agupta , @fhnx ,@LoganZundel , @slibbi , @kianz89
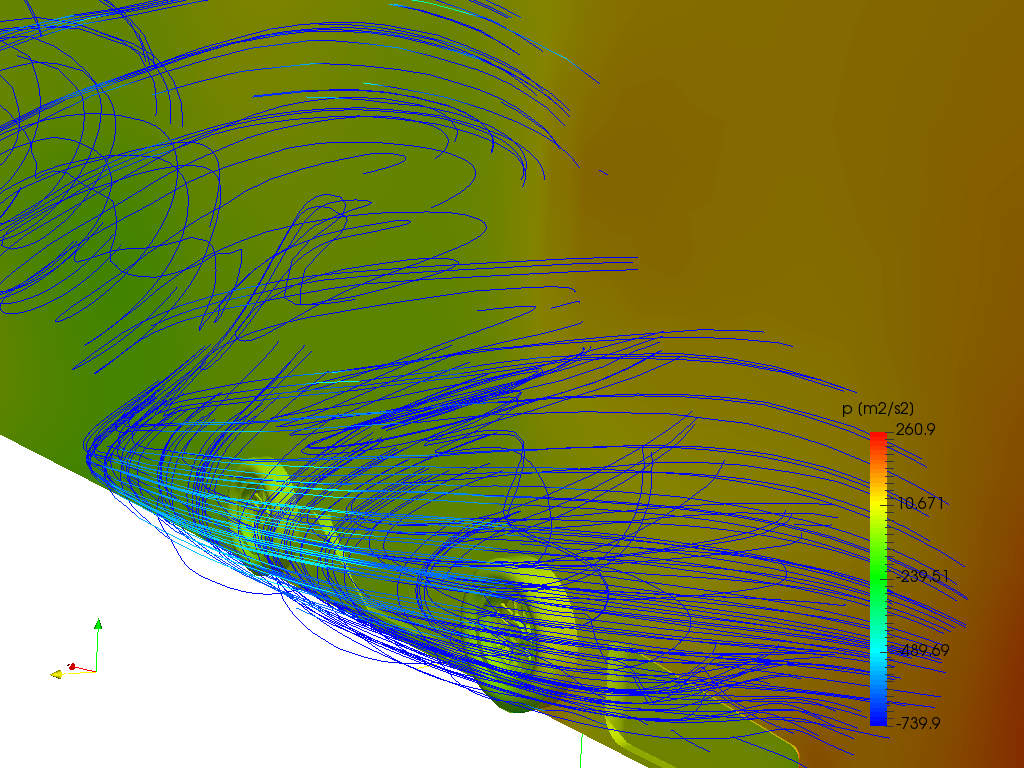
IMPORTANT NOTE: for all who are facing issue of strange simulation results e.g the figure below

What was causing this ?
The reason for this was a lot of illegal cells ( bad quality ) in the mesh. You can check that by clicking the meshing log as shown in the figure below:

In most cases, the number was around approx 200 illegal cells which then requires more iterations ( about 6,000 as already mentioned by some users) to reach the correct result. Or for some it may cause the simulations to crash.
(This can happen in some cases, when we do too many iterations in a specific step of the meshing algorithm for meshes of moderate size.)
If that is the case for you, then please read the Fix below.
How to Fix this ?
To avoid too many illegal cells, we can reduce the number of iterations for:
nFeatureSnapIter to value “1” under Snap Controls as shown in the figure. (If the mesh is of moderate size, as in this case, then a value <= 3 is sufficient)
This has also been UPDATED in the 2nd figure in the meshing part of the tutorial
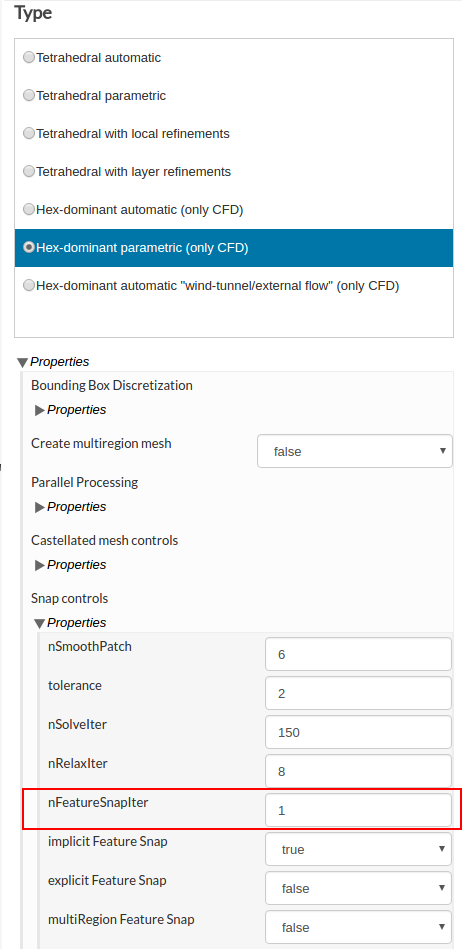
.
- So , please making the above change, click Save and Start again the meshing job.
(this time it would also finish quicker than before)
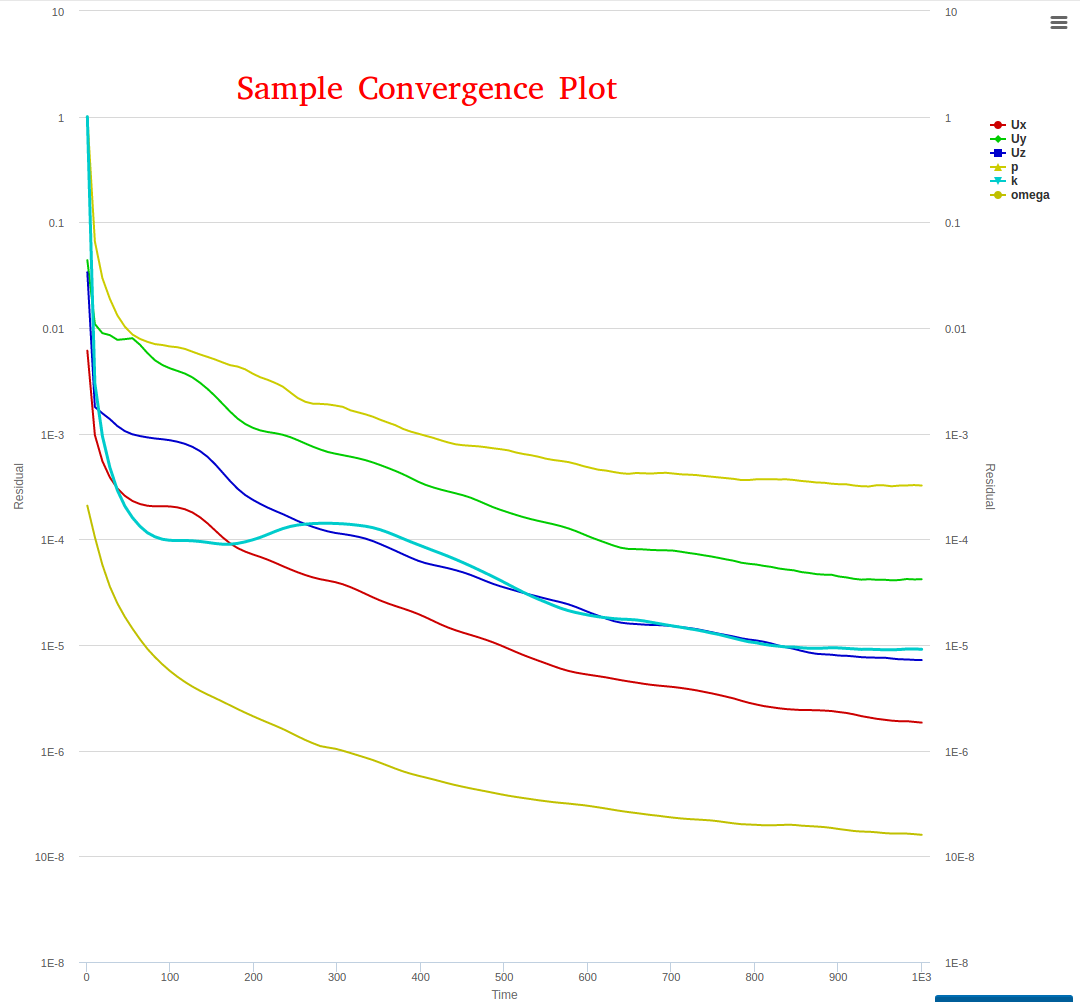
By doing so, the number of illegal cells should be reduced to less than 50 which is fine for the solver. Then the simulation would converge to the correct result in 1500 iterations/time and should show a convergence plot similar to below:
NOTE: If you have already done a simulation with the current mesh for 6,000 iterations and have the correct results, then that is also fine and your homework is accepted.
This should solve the issue, and if you face further problems please let me know by tagging me.
Best,
Ali Arafat
CFD Simulations Engineer
Hello Everyone,
Further to clear some things regarding the Homework the Task description has been updated,additionally please note the following:
- Your task is to investigate the Full car model " Model-Conf-1-2 " only. This is with Radiator and MRFzones for wheels.
[The imported project should only have the model named " Model-Conf-1-2 ", so please ignore the names (Model-Conf-3) used else where in the figures for the tutorial]
- You are required to do only 1 Meshing task and 1 Simulation setup.
- Also, post processing is to be done for this Model-Conf-1-2 Run only
Best,
Ali
Hi,
I have a problem at the beginning of the whole task - creating first mesh. The names that you give in the tutorial do not match the ones that are in the mesh creator. I can’t find any of the features that I am supposed to change up from “number of computing cores”. Even"MaxlocalCells" is changed to “Max number of cells per processor”.
I have the same issue with user “zplocke” above. Did the platform receive a server-side update that changed the names of the fields on the mesh creator? Thanks in advance.