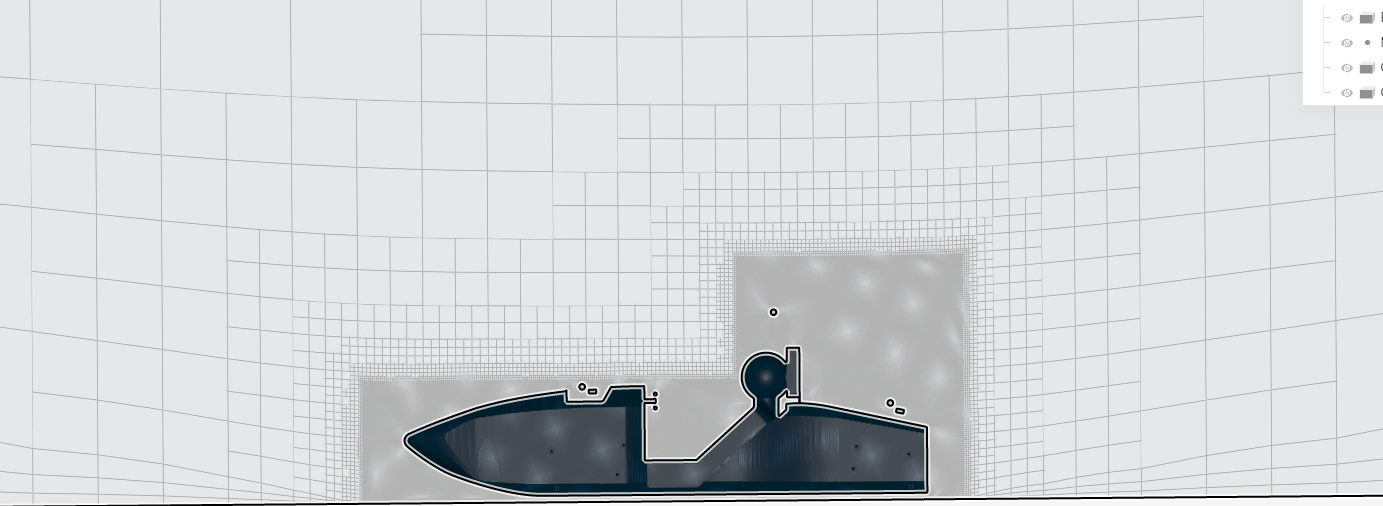
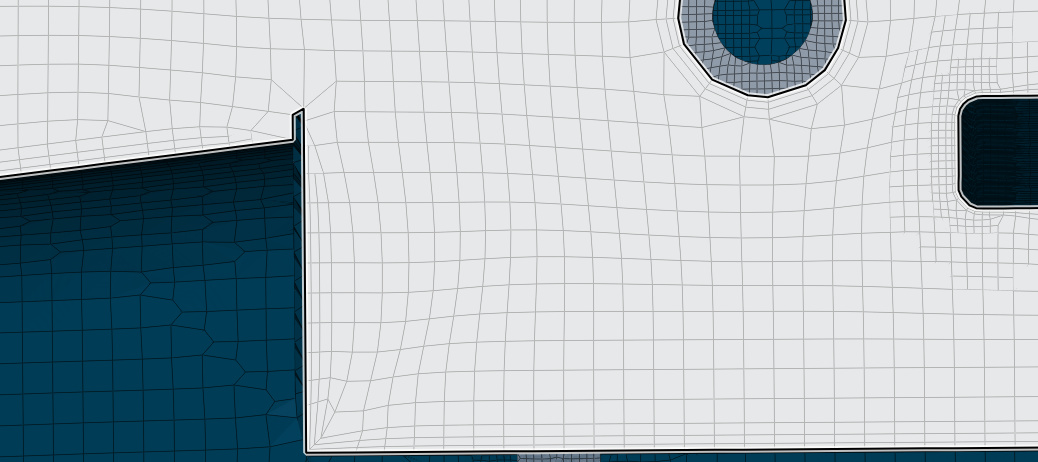
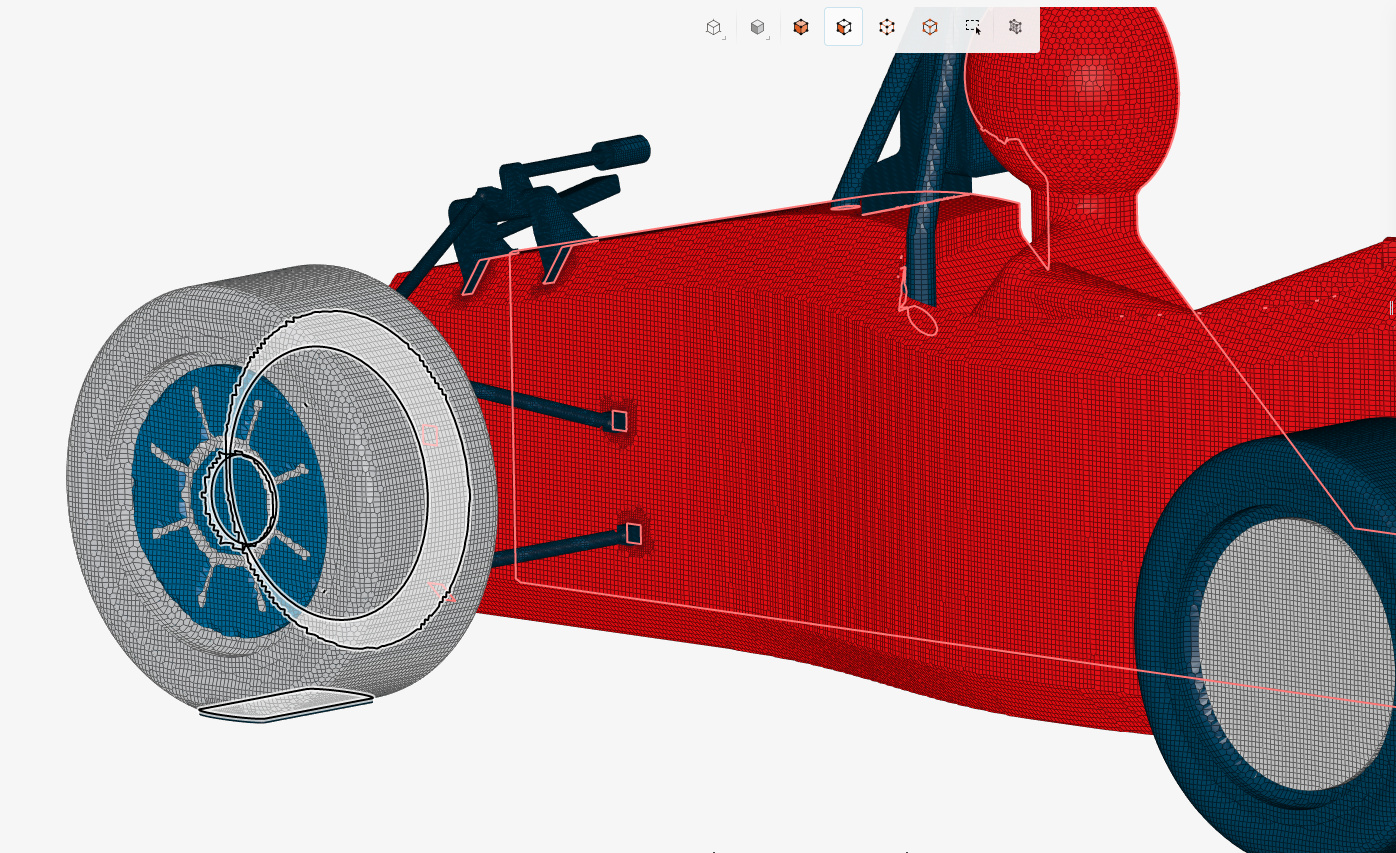
Ok so here is the first sim with the two surface refinements.
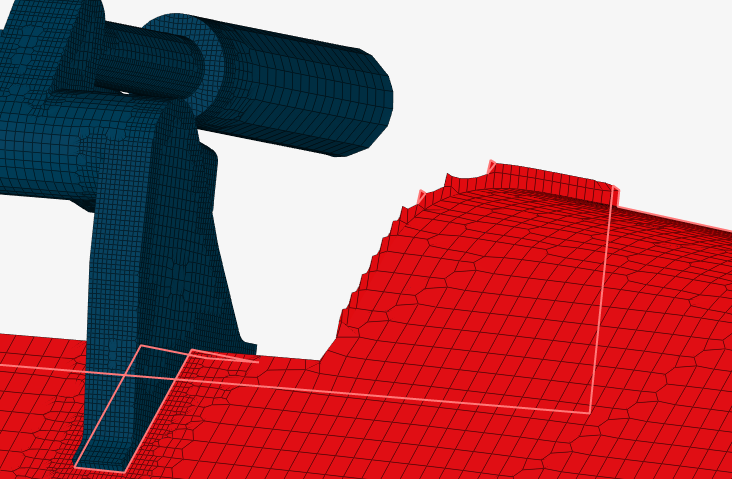
as you suspected the single level surface refinement was not fine enough to mesh the smaller faces. the foot pedal flap is messed up
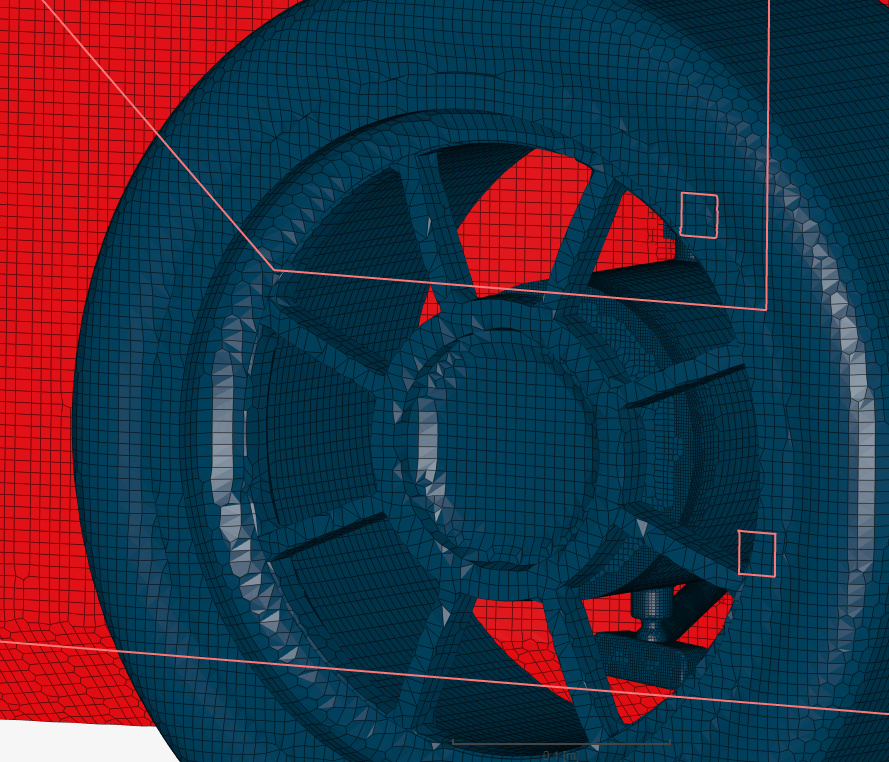
wheel spokes are not that good. i would increase it a level
for some reason the front MRF zone meshed fine but the rear did not
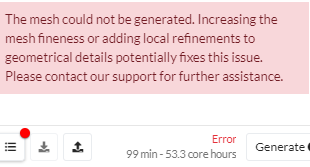
And the second mesh failed. It had only one level 7 surface refinement and one feature refinement at distance of 0 going to level 10
I wish that the geometry was setup to handle your method dale. so i could add Separate refinements to faces such as the foot pedal cover. If i want this area to be meshed correctly, using a higher, unequal level, it would apply to the whole mono, changing the levels around sharp edges and changing the size of the BL in relation to these new cells.
This leads me to (in my case) use absolute layering.
the other option, is to continue using relative layering, with unequal surface refinements and wherever the BL is reduced, to just leave it. The goal here is to get accurate Y+ layering but this is not needed on every surface. Inaccurate layering is acceptable where it doesnt greatly effect the overall results, as in, the whole base mono without areo that i have been meshing so far. I need to add the aero package soon so that i can start optimizing the wing surfaces, which are most important.
It would be nice to have the option of having relative or absolute layering with respect to the specific geometry selected. Not sure if this is even possible.
-
My other problem is reducing the cell count. How would you suggest i do the region refinements Dale? This is where a lot of cells are used and i need to reduce this.
-
I think my next mesh runs will be with absolute layering and unequal min max
-
Would you recommend doing (and i think you might have suggested this) to having two different boundary layer refinements for different areas?
For example,
- keep the current surface refinement for the mono and wheels (level 7) matched to the surface refinement cell size to get the 0.4 thickness ratio.
- Then create a second boundary layer refinement for all the smaller areas like suspension, by relating the finer cell level surface refinement (lets say 8 or 9) to the same Y+ =50 first layer thickness by recalculating the final layer thickness RATIO to match.
How does that plan sound?
Hey all,
Just quickly tagging along here to say that I really like your enthusiasm, @dschroeder !
About your first question on region refinements, assuming you’re talking about the wake region, they’re definitely important. The wake region is an area with high gradients. You need a good mesh resolution in these areas in order to capture and resolve the flow correctly.
Failing to do so will increase the so called discretization errors. That’s where mesh independence studies/error assessment come in 
Keep it up!
/Ric
Thanks for adding!
Yea i agree they are important, but i will be unable to run a 30 million plus simulation with only 32 cores. I know other teams using simscale will only be able to use this amount of cores so i want to optimize for this. I will sacrifice quality for this goal because more cells = more core hours and that is a factor too.
Dan
Hi Dan,
Sorry I have been very busy with other things and I will be for a while now, so I will seem to disappear and give shorter guidance until my time frees up again.
I think you have lots of weapons in your layering arsenal now, use them wisely.
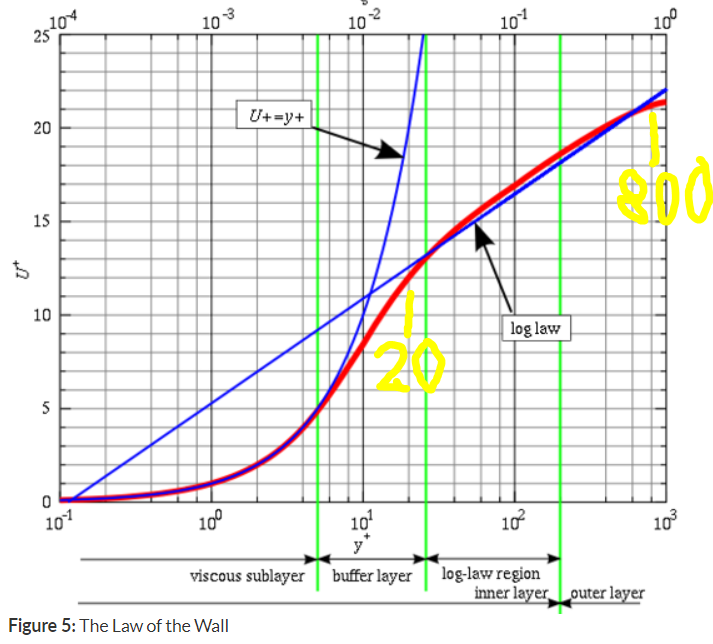
Never forget what you are trying to achieve, in my case that nirvana for wall function analysis is 100% layering with respect to the surface area of the total geometry within a y+ range of 20-800 AND the resultant mesh would not fail any normal quality checks (and perhaps some harder to implement quality checks that I am seeking at the moment  )
)
I have never achieved my nirvana on a real world problem of mine
Proper layering is one of the hardest things to achieve and I personally can not give you a good measuring stick as to when to say your layering is good enough for the purposes of your simulation…
We have some good tools to actually verify that your y+ surface mapping is indeed inside the range that you seek…
I will be very interested in analyzing the mesh that you decide to use…
But, if it were me, I would split some faces on the body and elsewhere to continue with relative layering, possibly use even 100 or higher as my desired y+ in the calculators
After ALL that you should also determine whether the total thickness of your boundary layers adequately encompasses the actual physical boundary layer by looking at sim run results, but that is a whole other topic…
Dale
Thanks Dale!
Yea i definitely understand a whole lot more of how this works because of your help. Im not expecting to get this perfect either, just close enough to say i can stand by the results.
For the Y+ distance. You have suggested 50, and now maybe 100, which i assume is so that i can successfully have a mesh and some kind of layering, but this is what i had before with the tutorial settings. I think it is crucial to have the following:
- layering in the log-law 20- 800 region. That is a main goal for this, even at the expense of loosing accurate layers in some areas.
- Total cells at or below 25 million. so that i can run on 32 cores without memory problems
- Wing BL accuracy -I will compromise on layering for the base model but not on the wings where accuracy is most important
I think i will need to export to Para view because i dont understand how the simscale Y+ viewer works with the (what seems to me) like a backwards Y+ display with 0 farthest from the wall
y+ is seen in the results as a SURFACE parameter, there is no need to look at anything but a surface mapping on the geometry, y+ is 0 EVERYWHERE in the volume mesh cells…
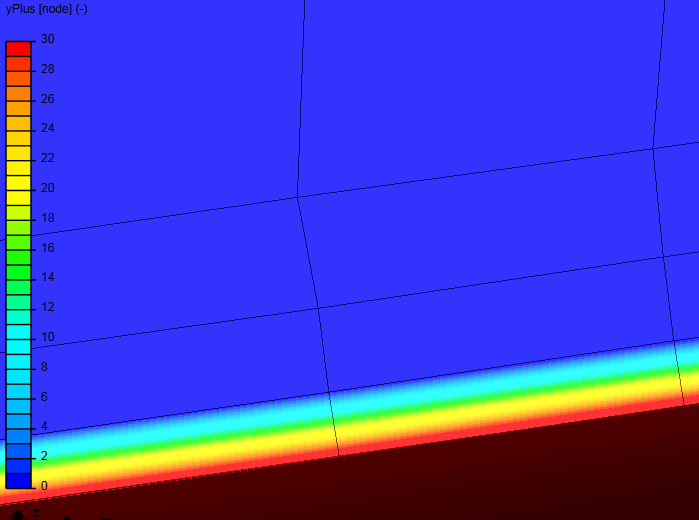
ah ok cause im looking at the symmetry plane on my model and trying to see the progressively thicker boundary layer size in relation to the Y+ mapping. Is this unimportant to have correct? i would think the BL needs to be accurate perpendicular to the desired surface
That is a slice type view showing volume mesh cells, not a surface mapping view…
That rainbow does not exist, the only two values on that screen is the darkest red at the surface and 0 everywhere else…
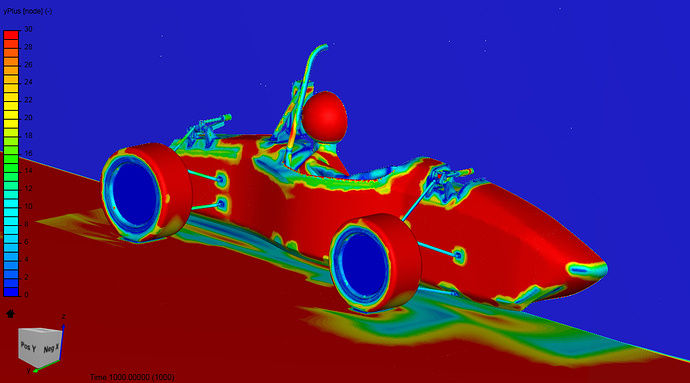
ok so i should be analyzing this result and checking that most surfaces are at 30
YES that is correct  (20-800 for log law (wall function) use)
There is nothing to see with regard to the y+ results parameter, anywhere in the volume mesh cells… so there is nothing that can be correct or incorrect in them except that their y+ results value will be 0…
ah ok, i think the only thing i need now is advice on the region refinements to reduce total cell size. then i feel confident that i can get some good meshes myself. any advice?
A good way to potentially get rid of some of the y+ <20 AND reduce cell count in that last y+ surface map (green and blue areas in your image), would be to set your target y+ HIGHER in the y+ calculators… That is why I suggested maybe 100 OR HIGHER for you…
ok i understand the relation between the Y+ value and its relation to needed surface refinement size. but wouldnt that give inaccurate results? i though it was critical to draw data at the lower Y+ levels and 100 would be to large a 1st layer size
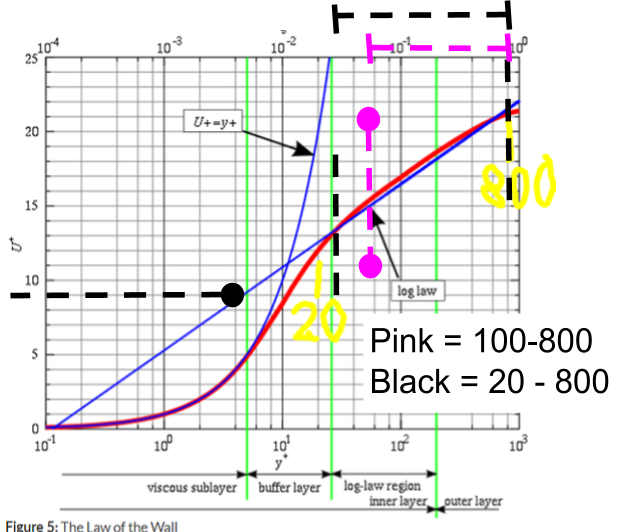
Looking at this plot and if the red line truly represents the value we try to achieve, then I see little difference in the log law straight blue line ‘calculation error’ from the red line, for y+ 800 and y+20, do you 
Ok i think i understand your reasoning. the Y+ <1 (viscous sublayer) must be fully measured because the values here are exponential (a curve) which means they change unproportionally as the distance increases from 0-1. Where we are measuring is a line, so the values are proportional to the increasing wall distance, which means if we take data from 20-800 or 100-800 is irreverent, we are just taking a smaller data pool with 100-800 but results should be very close to the same
I think i will also use the Y+ calculator to find 100 and 800 values so i can have the correct espansion rate from the first cell size to give me close to 800 Y+ at the last cell size
I think you are close, but I was talking simply about the error between the blue log law line and the red line (assumed actual target value) for y+ between 20 and 800…
ah yes i see that too, that the difference between red and blue is almost non-existent so error is also low
I know the recommendations are generally max 300 (and on that plot, it is 200) but now you see why I think 800 is OK
yea i always heard 30-300 too. The problem is that i have no idea if using 100-800 is ok, or if it will give about the same results as 30-300. I also read something that over 300 starts to give inaccurate results. i think i should do more research on this.