Can anybody tell me how to use the probe tool in ParaView?
It sounds like a simple question but I’ve always found probing problematic. Here is my current method:
With a results file loaded in ParaView I select the Probe Location filter and click apply.
In ParaView V5 a spreadsheet window automatically opens to show the probe results. In previous versions the spreadsheet windows must be opened manually.
Hovering over the model I use the P key to probe an area of interest.
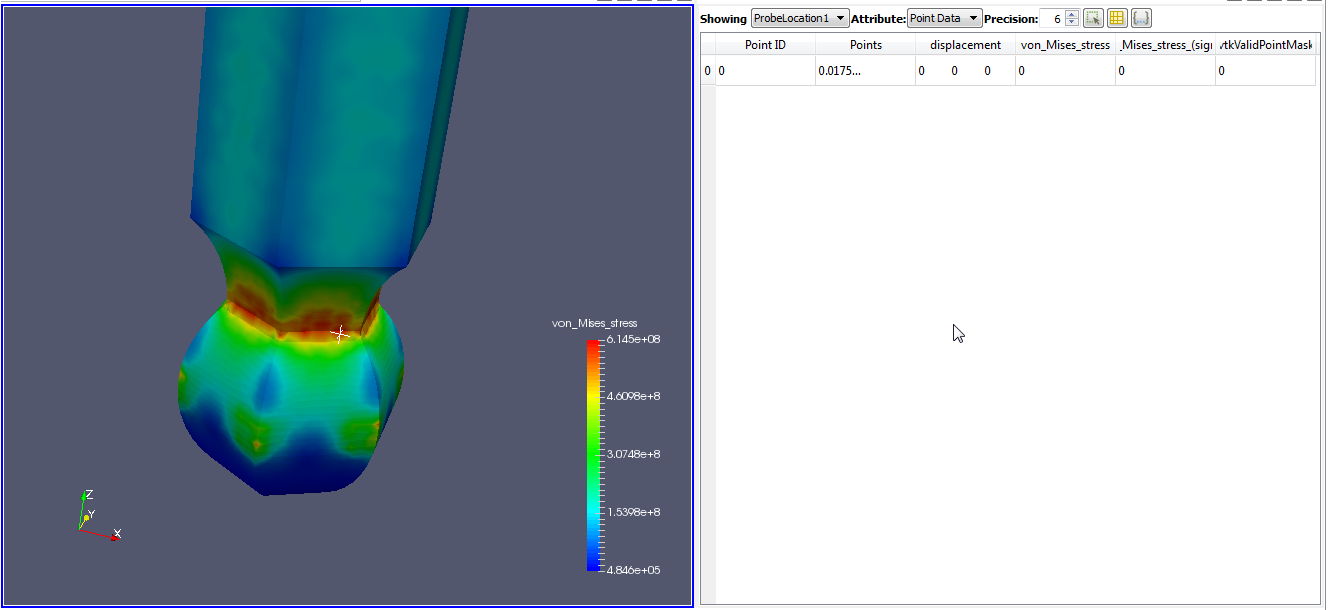
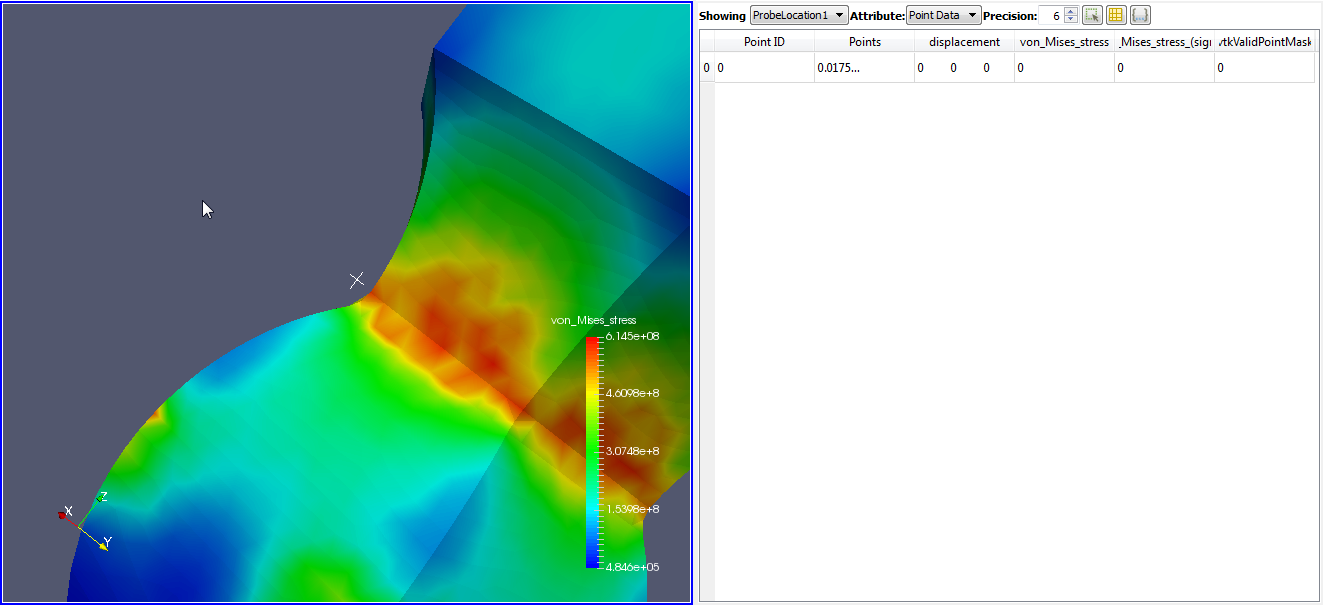
If I’m lucky, the results will appear in the spreadsheet view. More often than not the results will be zero as shown below.
Ok, I think I have a solution to your problem. – BTW we already have a very first post for our blog!
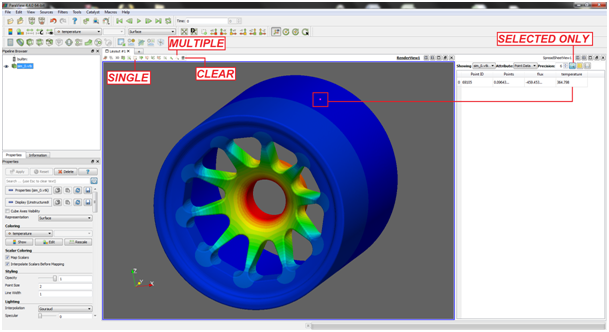
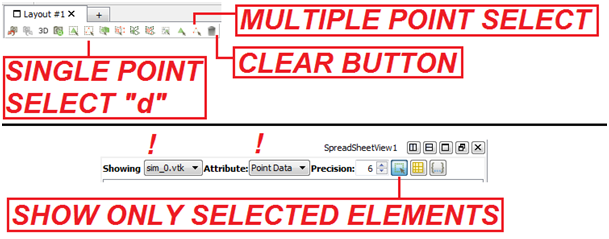
Please have a look at the picture below. Firstly, split your screen into Render view and SpreadSheet view. Next make sure that spreadsheet is Showing domain (volume) you want to investigate and Attribute is set to Point Data. Further, click Show only selected elements (icon highlighted on the top right side of the picture).
From now on you have two possibilities. The first one: you can pick up single points and get readouts of all simulated parameters (exactly like in the picture). This is in my opinion the most convenient approach. You click “d” button on your keyboard (shortcut key), select mesh point on a surface and all relevant data will display in a SpreadSheet view. Then “d” again and next point appears.
The second possibility is to use a multiple selection. This allows selecting more points at the same time. All relevant data will appear in the table window. However, readouts will be sorted according to nodes’ ID numbers (!). For greater number of points it’s difficult to identify which one was the last you selected. Also, you have to click “clear” button if you want to start afresh.
Naturally these methods work with any kind of cuts such as Clip, Slice etc. Just remember to change Showing to Clip, Slice and so on.
Hi @Maciek, thank you for a great solution! It was exactly what I was looking for and your instructions worked perfectly. What I find surprising is that probing works best when not using the probe tool at all.
I am trying to do a similar thing. I am simulating the flow over a circular cylinder in OpenFOAM and I want to find out the pressure and the surface shear stress values on the cylinder surface. How can I do this? OpenFOAM is giving me the field values of pressure and shear stress. But how can I use the probe locations in ParaView to find the pressure and shear stress values at specified points? Any and all help will be appreciated. I am using ParaView 4.2.
Hi @angkanh494, its a bit complicated if you want to query a set location but if you just want to query upon click, you need to import the surfaces of interest, and do as the above, otherwise you need to do a complex query where you go edit>find>nearest to>add location and then Paraview will find the and query the values of the nearest point to that location.