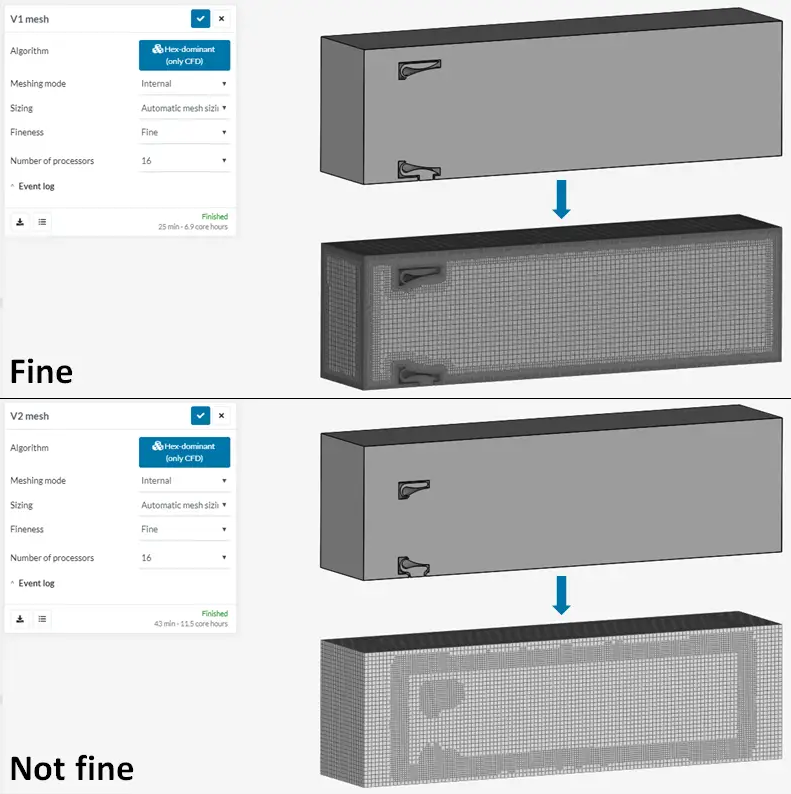
I believe that I’m fine running the simulation once I’ve got the right mesh, and have been successful for the first version that I ran. However, after some geometry changes following my first set of results I just can’t get a mesh that’s anything like what I’m looking for. Demonstration below.
As you can see it’s not really showing any of the geometry I was going for in the mesh! Pretty confident all the settings are the same, any advice?
Hi @LADransfield,
Could you post your project link? So we can better identify what the issue is?
Cheers.
Regards,
Barry
Hi @Get_Barried, of course, I’ve updated the question to make it easier to find
1 Like
Hi @LADransfield,
I see you’ve started remeshing. Did you change anything in particular?
@Get_Barried, just changed it from “fine” to “very fine” as it’s what I’d originally intended anyway. Nothing too special.
Hi @LADransfield,
The issue is that the mesher is not able to differentiate between inside and outside the geometry for V2. This is likely due to your geometry not being watertight. There is some minor hole or something that will you need to close in the CAD.
If the geometery is watertight like V1, then it should have no problems. If not, then like the V2 mesh you will see it not really meshing properly and also the background box will appear.
Cheers.
Regards,
Barry
1 Like
Thanks @Get_Barried, do you have any tips on trying to find the holes in the geometry?
I’m not sure if either OnShape or SimScale have tools to check for that automatically.
Hi @LADransfield,
Not that I know of unfortunately. I believe maybe software like SolidWorks does have tools to check for holes in geometries. Maybe you can try that.
OnShape doesn’t have that as far as I know. If it does it would be a custom script. SimScale definitely does not have a way to check for that.
Cheers.
Regards,
Barry
1 Like