Documentation
Organizing your SimScale content is critical to allowing you and your colleagues to quickly and easily find the correct project while ensuring that only the correct people can access it. This can be done within your SimScale Dashboard. There are two core features of content organization at SimScale: Spaces and Folders.
These features allow you to organize your content as well as allow your organization to efficiently manage groups of users and the simulation content they produce and access.
An organization is a group of users on the SimScale platform with common goals, typically colleagues at a company. You and the other users will have common goals but will typically work on different internal projects or within different business units or groups. It is therefore important to be able to segregate the simulation content you produce so it is easier to find and possible to restrict access when needed. This can be referred to as space (section or area).
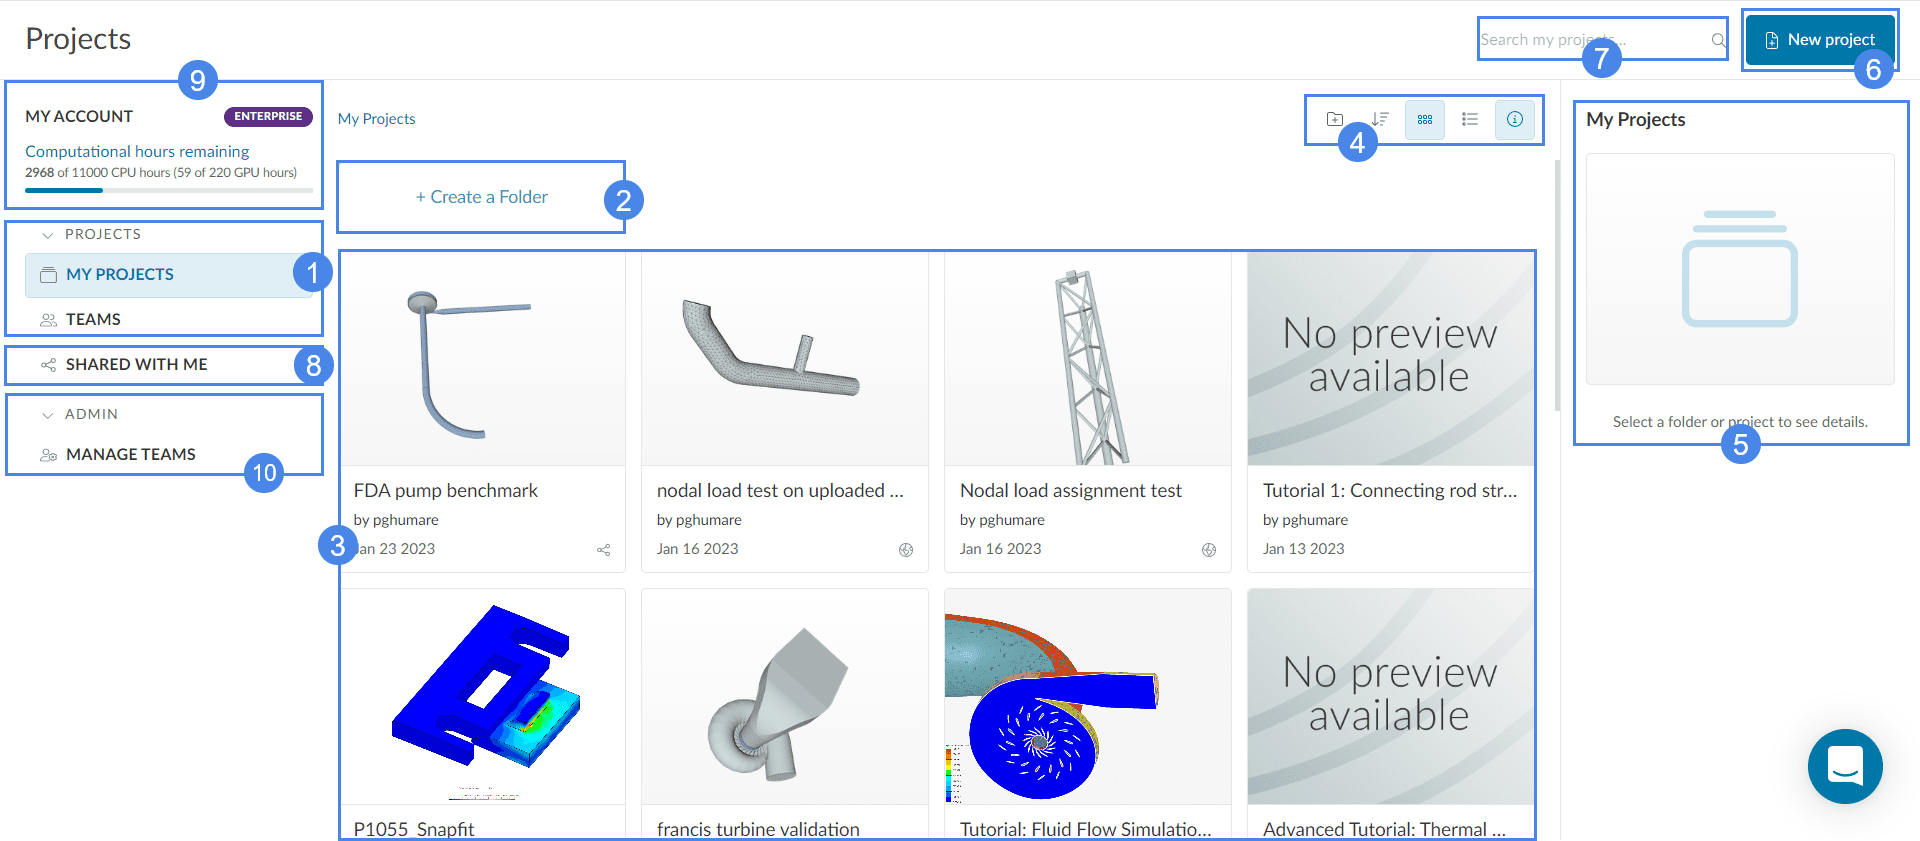
The Dashboard is one of the main environments in the SimScale platform. Users can create new projects, verify their core hour balance, and access projects that have been shared with them from their dashboard.
Find below an overview of the functions available:
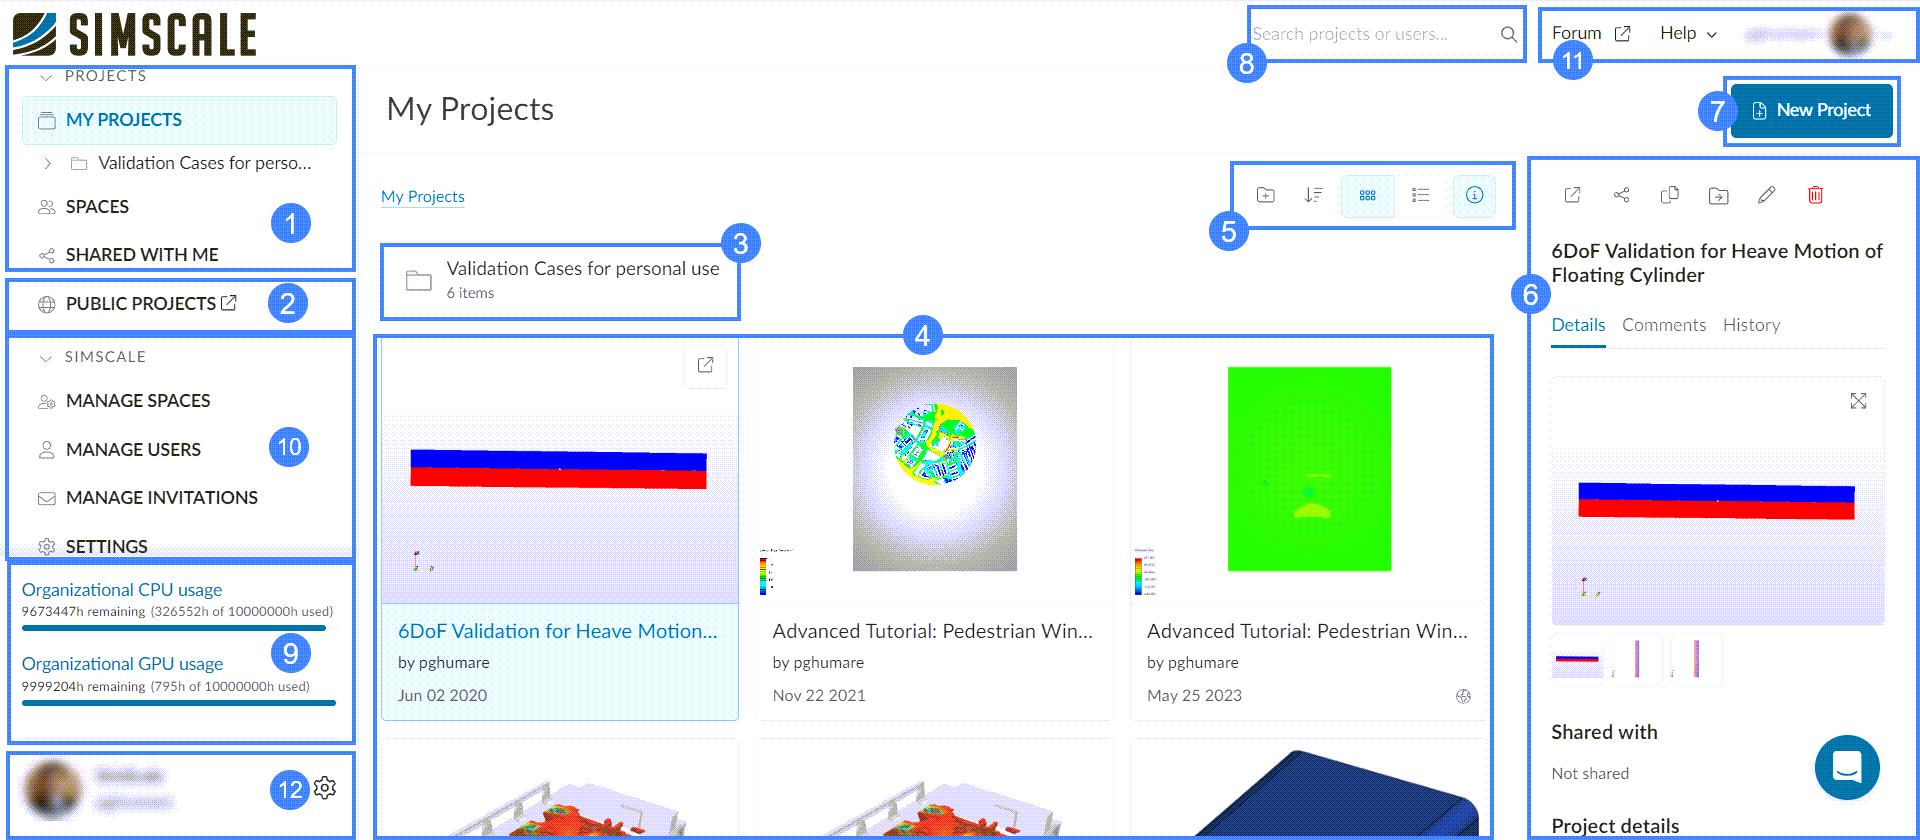
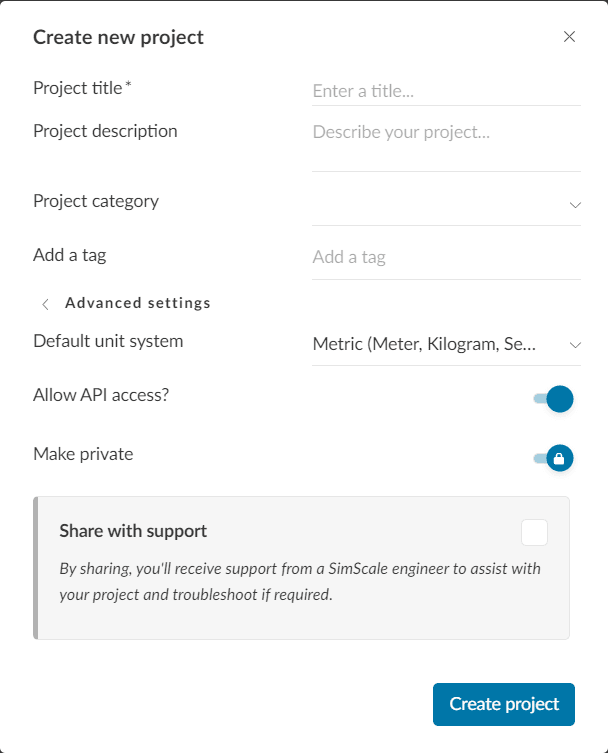
To create a new simulation project, click the ‘New Project’ button on the Dashboard. The following dialog box appears:
Once the project is created, you’ll automatically be redirected to the SimScale simulation platform i.e. the Workbench.
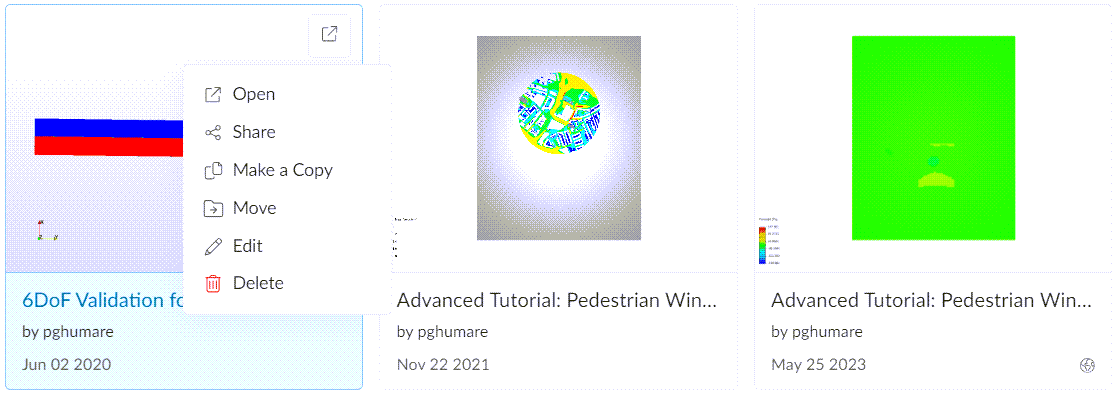
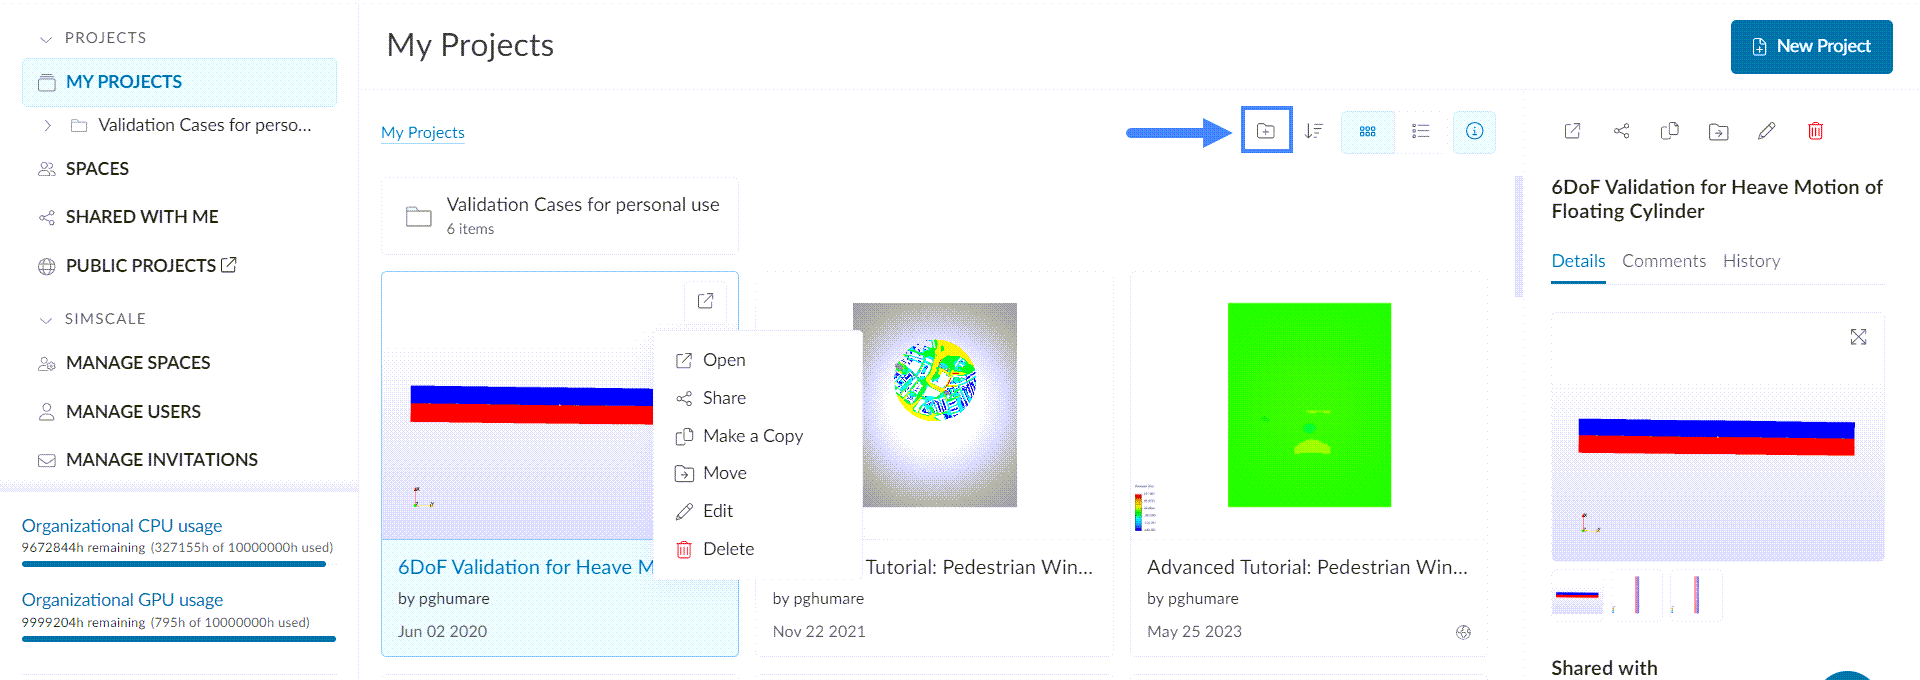
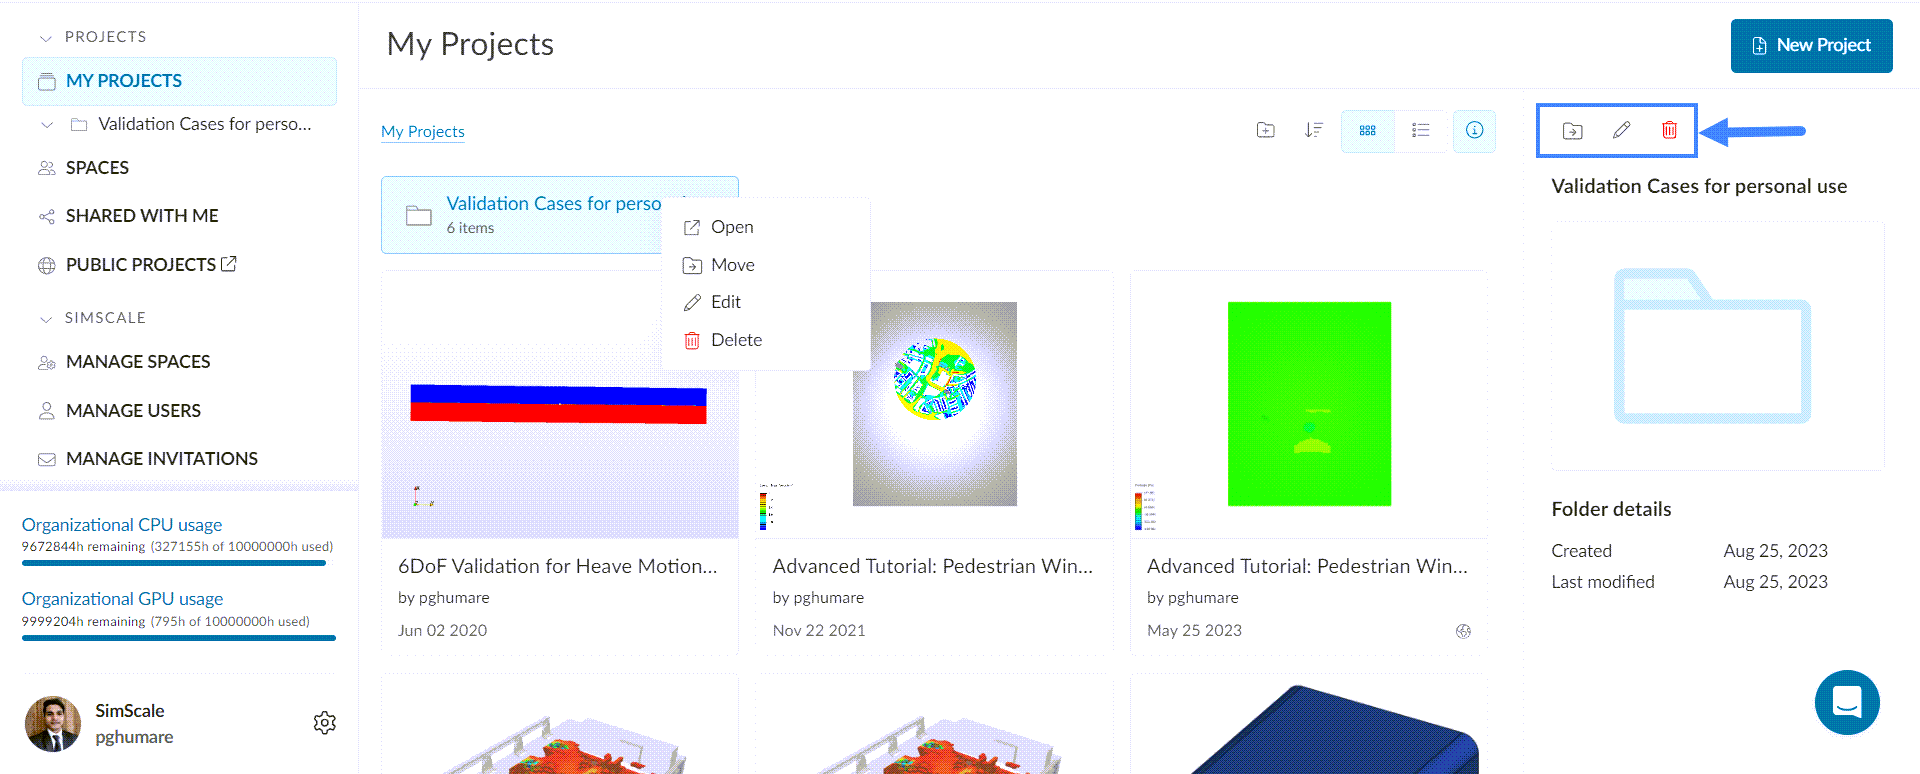
The dashboard contains functionalities that allow you to create, open, copy, move, share, edit, and delete projects. By right-clicking on a project of interest, all options are shown:
Once a project is selected, all editing options are also available on the right-hand side panel:
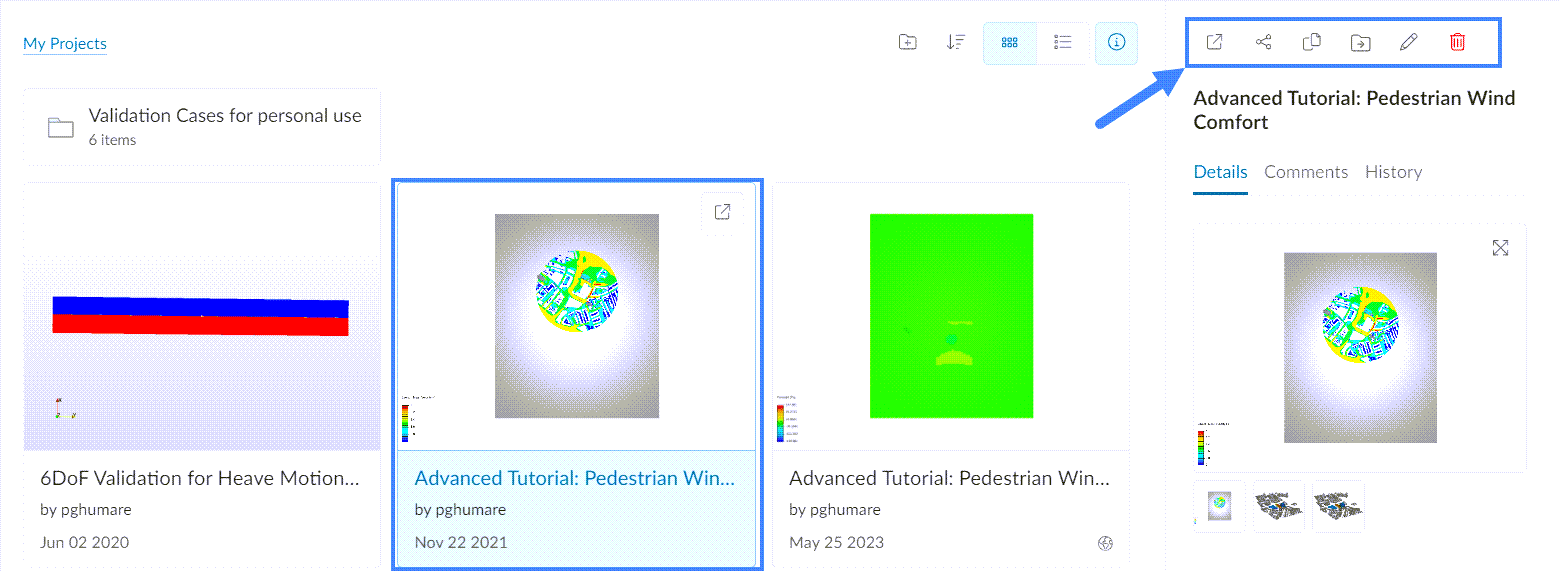
Furthermore, you can also open projects with a double left-click, or by selecting the project and clicking on the top-right icon:
Using the methods shown in figures 4 and 5, a specific project can be shared and the panel looks as follows:
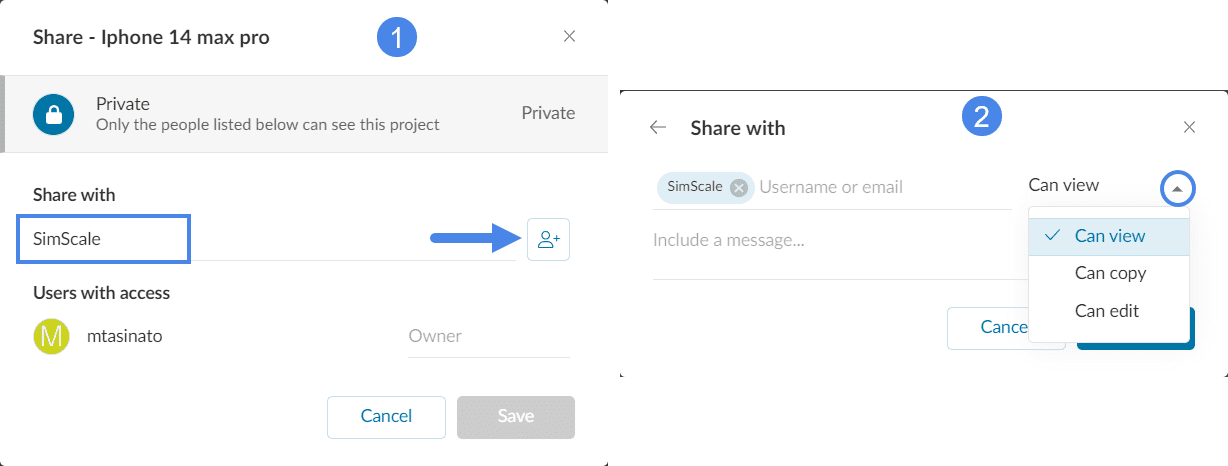
Step 1 in Figure 6 shows the current accessibility of the project (Private). Enter the username(s) you wish to share the project with and then head to the next step using the ![]() icon. Now add a sharing type that defines what the user can do with that shared project. Can view, Can copy, and Can edit are the three sharing types available in SimScale. They define how multiple users can collaborate.
icon. Now add a sharing type that defines what the user can do with that shared project. Can view, Can copy, and Can edit are the three sharing types available in SimScale. They define how multiple users can collaborate.
Sharing the project can also be done from within the Workbench. This and the different sharing types (view, copy, edit) are explained in the documentation below:
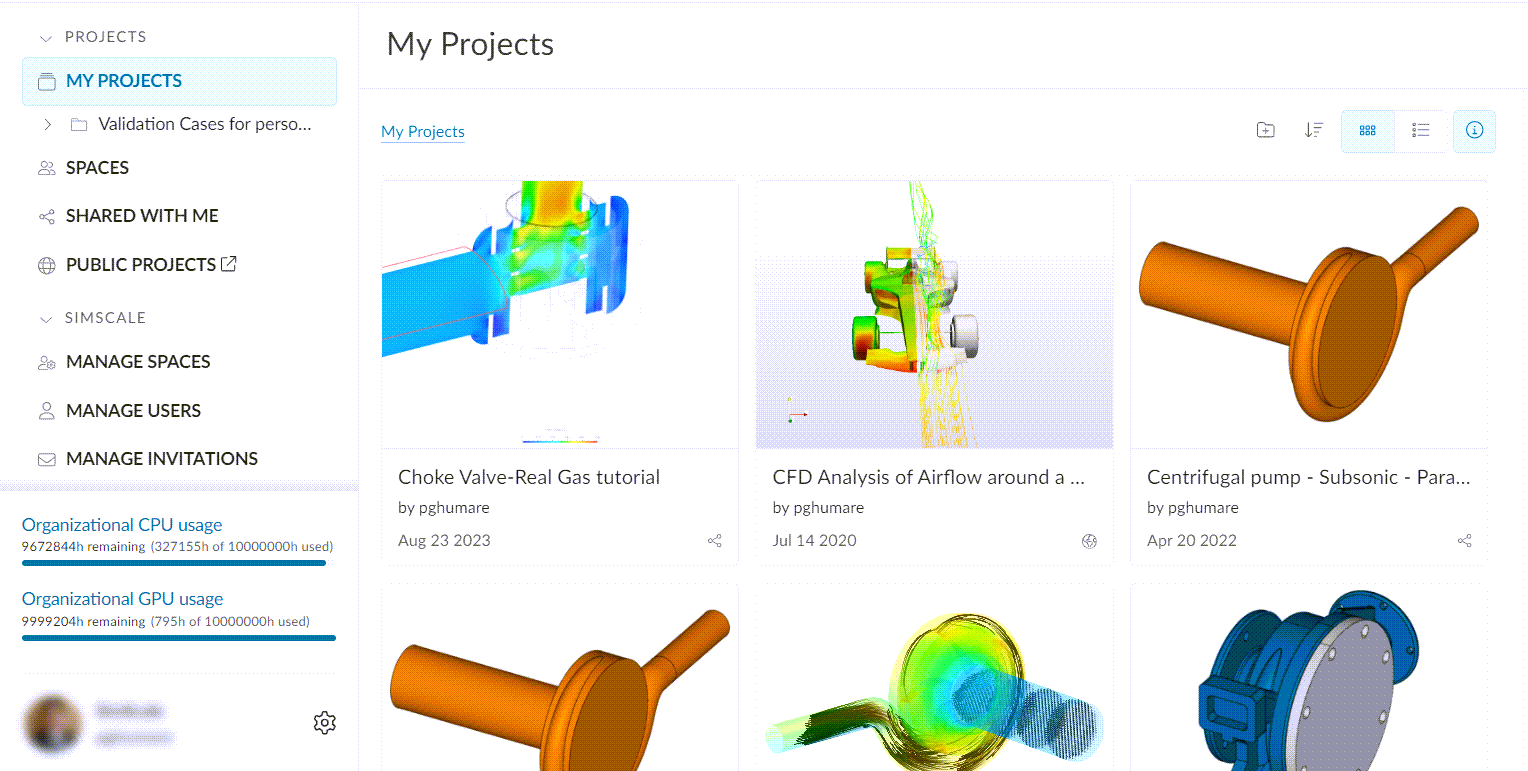
Every user has access to personal space which they can create content in. It is represented as My Projects within the Dashboard. Only you can create content within your personal space as you are the only member it contains.
The following table shows what you are permitted to do as a user in your personal space:
| Permission under ‘My Projects’ | Owner |
| Can view content and folders | |
| Can copy content | |
| Can create content and folders | |
| Can move content | |
| Can edit content | |
| Can delete content | |
| Can share content |
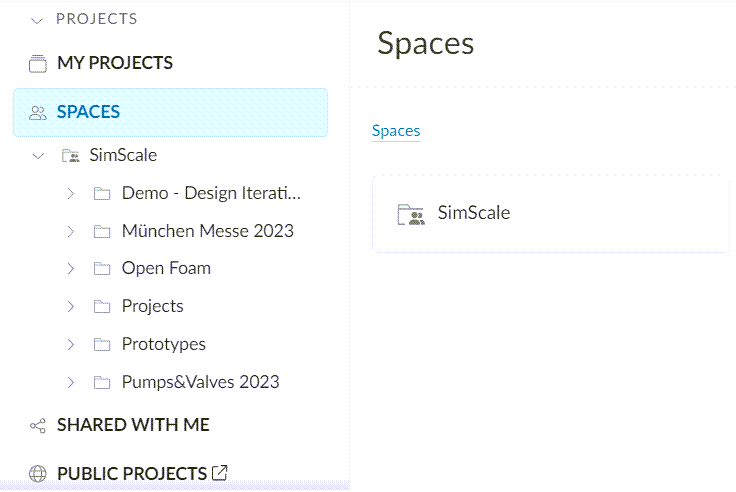
Customers with Spaces or Enterprise licenses have access to Spaces. Spaces is a section that can be seen by multiple users; its members are controlled by a company administrator.
Spaces can be used to allow only certain users to access specific content. For example, you might have a space for each customer project (Customer A – HX1B, Customer B – RM101) or for each group at your company (Product, Simulation). Any content created within or moved to a space can only be accessed by members of that space and any users it has been directly shared with.
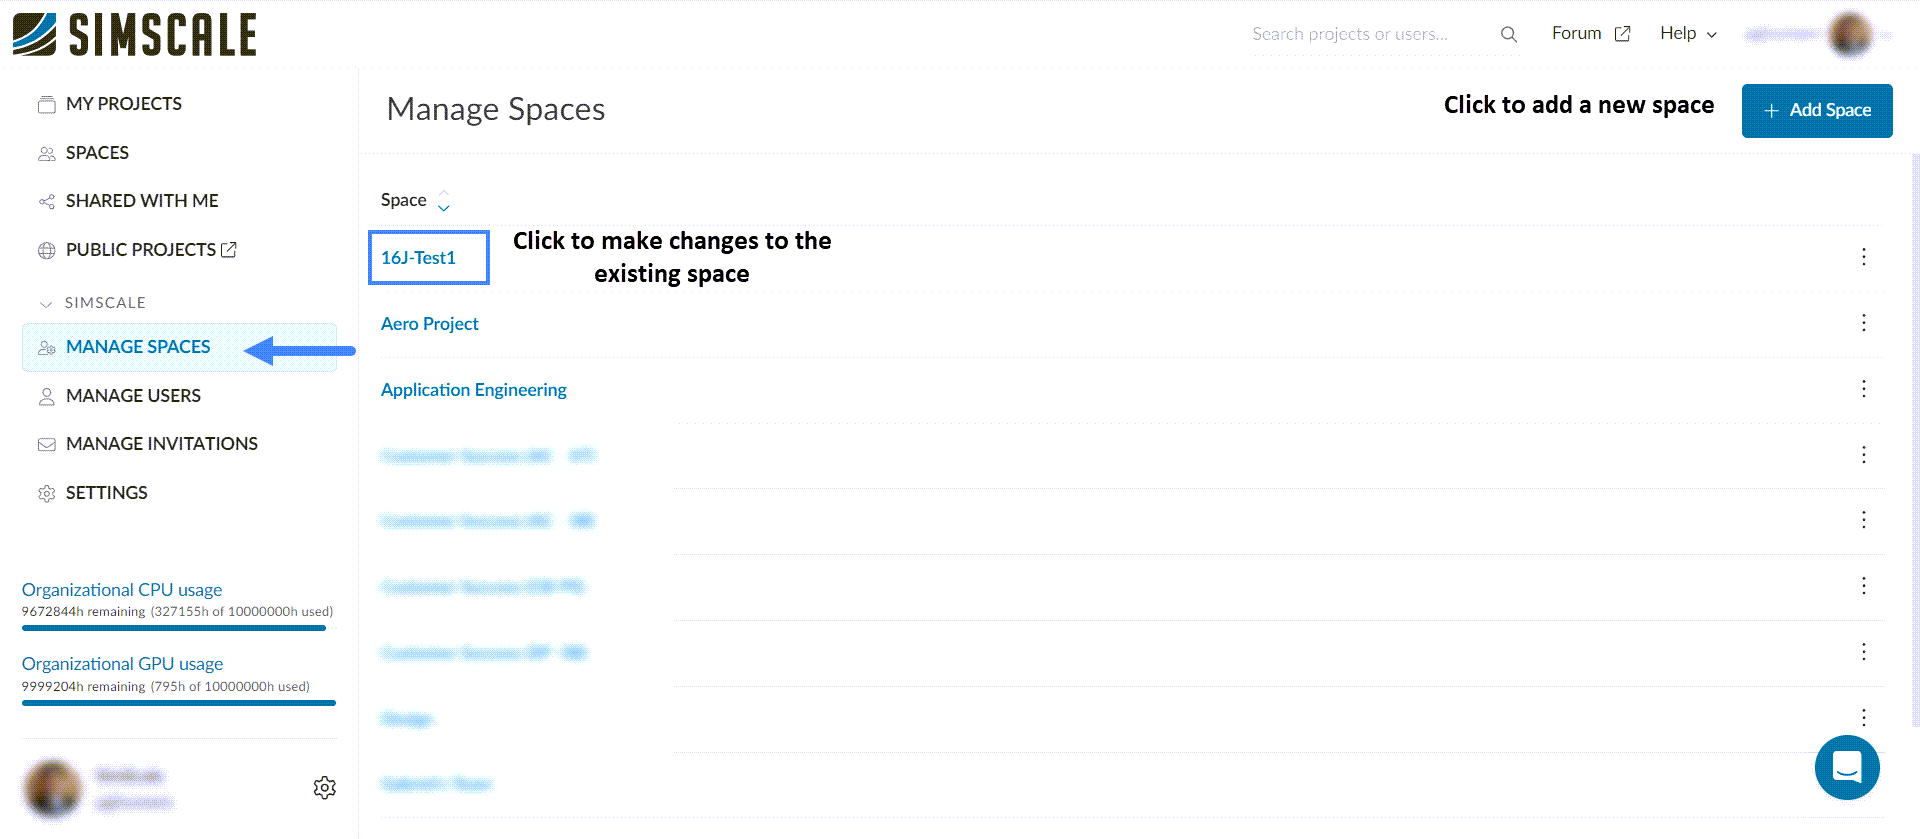
As an administrator, you can add and manage spaces. This is shown below:
Admin of an organization can set different sharing permissions which consist of No sharing, Within space, and Within organization.
Depending on the sharing permissions set by the admin individual projects can be shared with other users outside the space or your organization or made public. In this case, users will not gain access to see the folder or the space where the project is located.
To manage an already existing space select the space (see Figure 9). This will open a panel similar to Figure 10 allowing you to rename and also control the sharing permissions as well as manage the space members.
To add a space click on the ‘+ Add space’ button (see Figure 9). This will open a panel where you can name the space, control the sharing permissions, and choose the members you want the space to include. Don’t forget to save the settings.
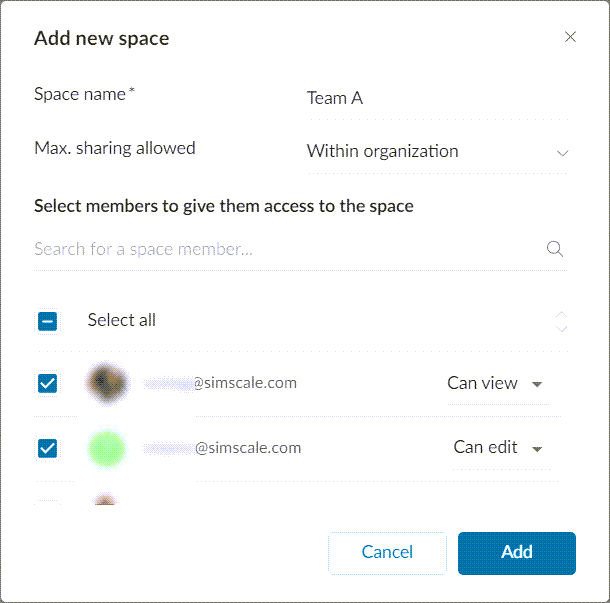
Owners or members of a space get specific permissions for all projects contained in that space. In other words, the level of permissions granted is configurable. The following table shows what a space member is permitted to do if they have Admin, Edit, Copy, and View permissions:
| Permission of a space member | Admin | Edit | Copy | View |
| Can view content | ||||
| Can copy content | ||||
| Can create content and folders | ||||
| Can move content | ||||
| Can edit content | ||||
| Can delete content | ||||
| Can share content (if allowed by space setting) | ||||
| Can add/remove users to/from space |
A folder is a location to store your content, including projects and other folders. Folders in SimScale are managed in your dashboard, as discussed in the Dashboard section within this document. Every folder has an editable name.
To create a folder, navigate to a space that you have access to and select the icon in the upper right corner as shown. You will be prompted to provide a name for the folder.
Folders can be opened, moved, edited, and deleted. To access these options, you can right-click on the folder, or use the right-hand side panel after the folder is selected:
Important
When a folder is deleted, all contained folders and projects within it will be deleted.
Under Manage Users, admins of an organization can:
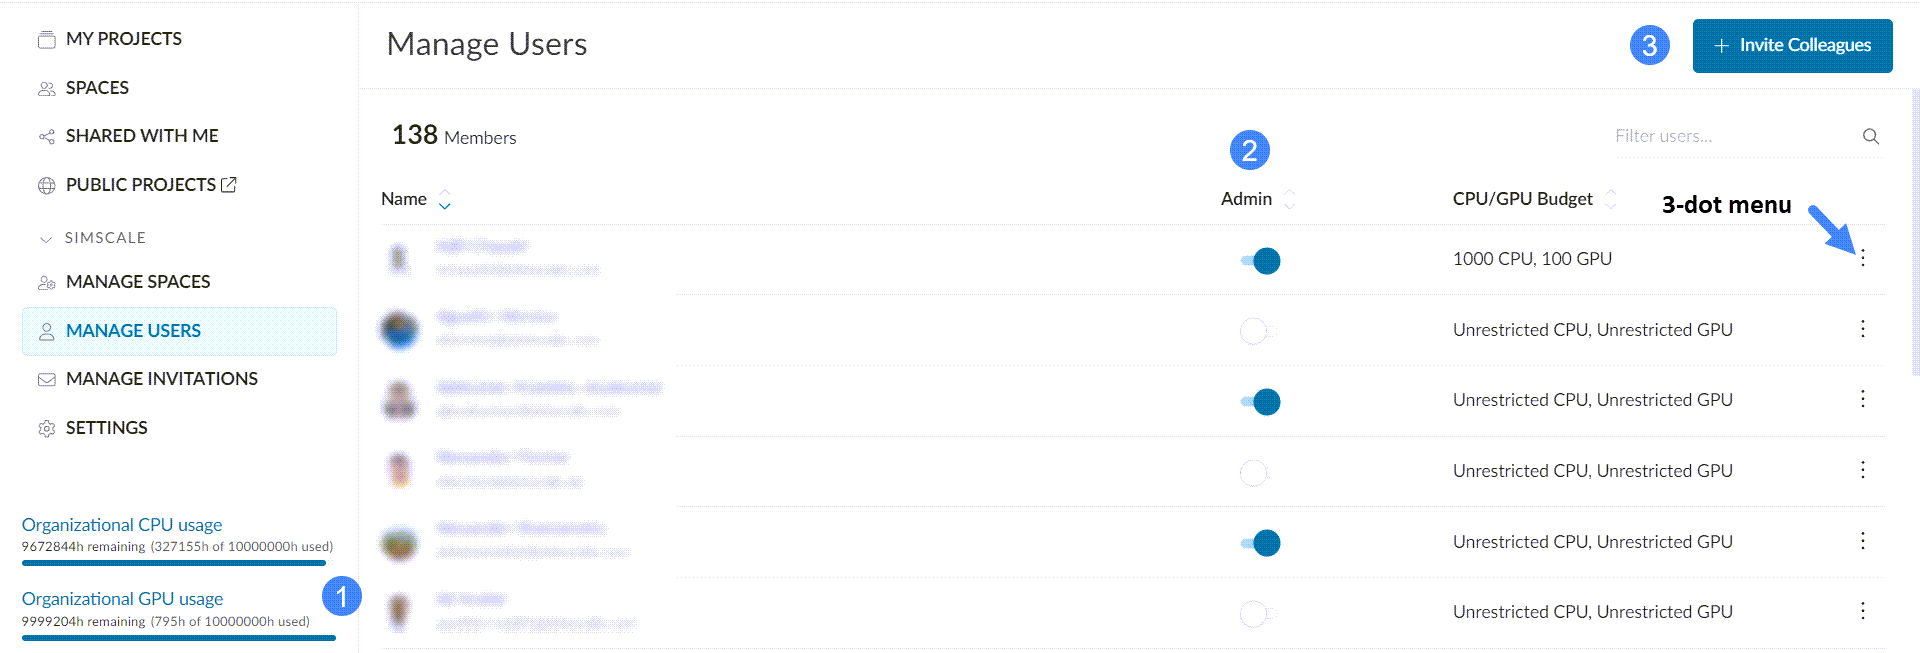
Admins have access to the 3-dot menu on the right which allows them to:

Removing a User
If a user is removed from the organization the admin should select an inheritor user for all the projects that user owned. This includes projects in spaces and in personal space (My Projects).
Last updated: April 19th, 2024
We appreciate and value your feedback.
Sign up for SimScale
and start simulating now