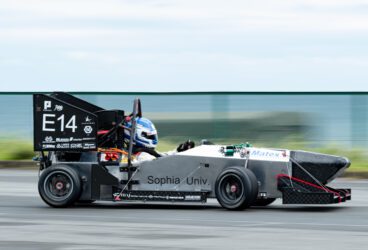
Since its establishment in 2003, the F1 in Schools STEM Challenge™ has been challenging students to create the world’s fastest miniature F1 car. Every year, more than 17,000 schools in 44 nations take part in the competition. In Australia alone, approximately 22,000 students are involved each year with more than 10 times this amount of students being exposed to the program itself.
The competition allows for teams from schools around the globe to compete by completing tests from a range of engineering and manufacturing disciplines: from the initial design to multiple analyses, testing, prototyping, and finally racing.
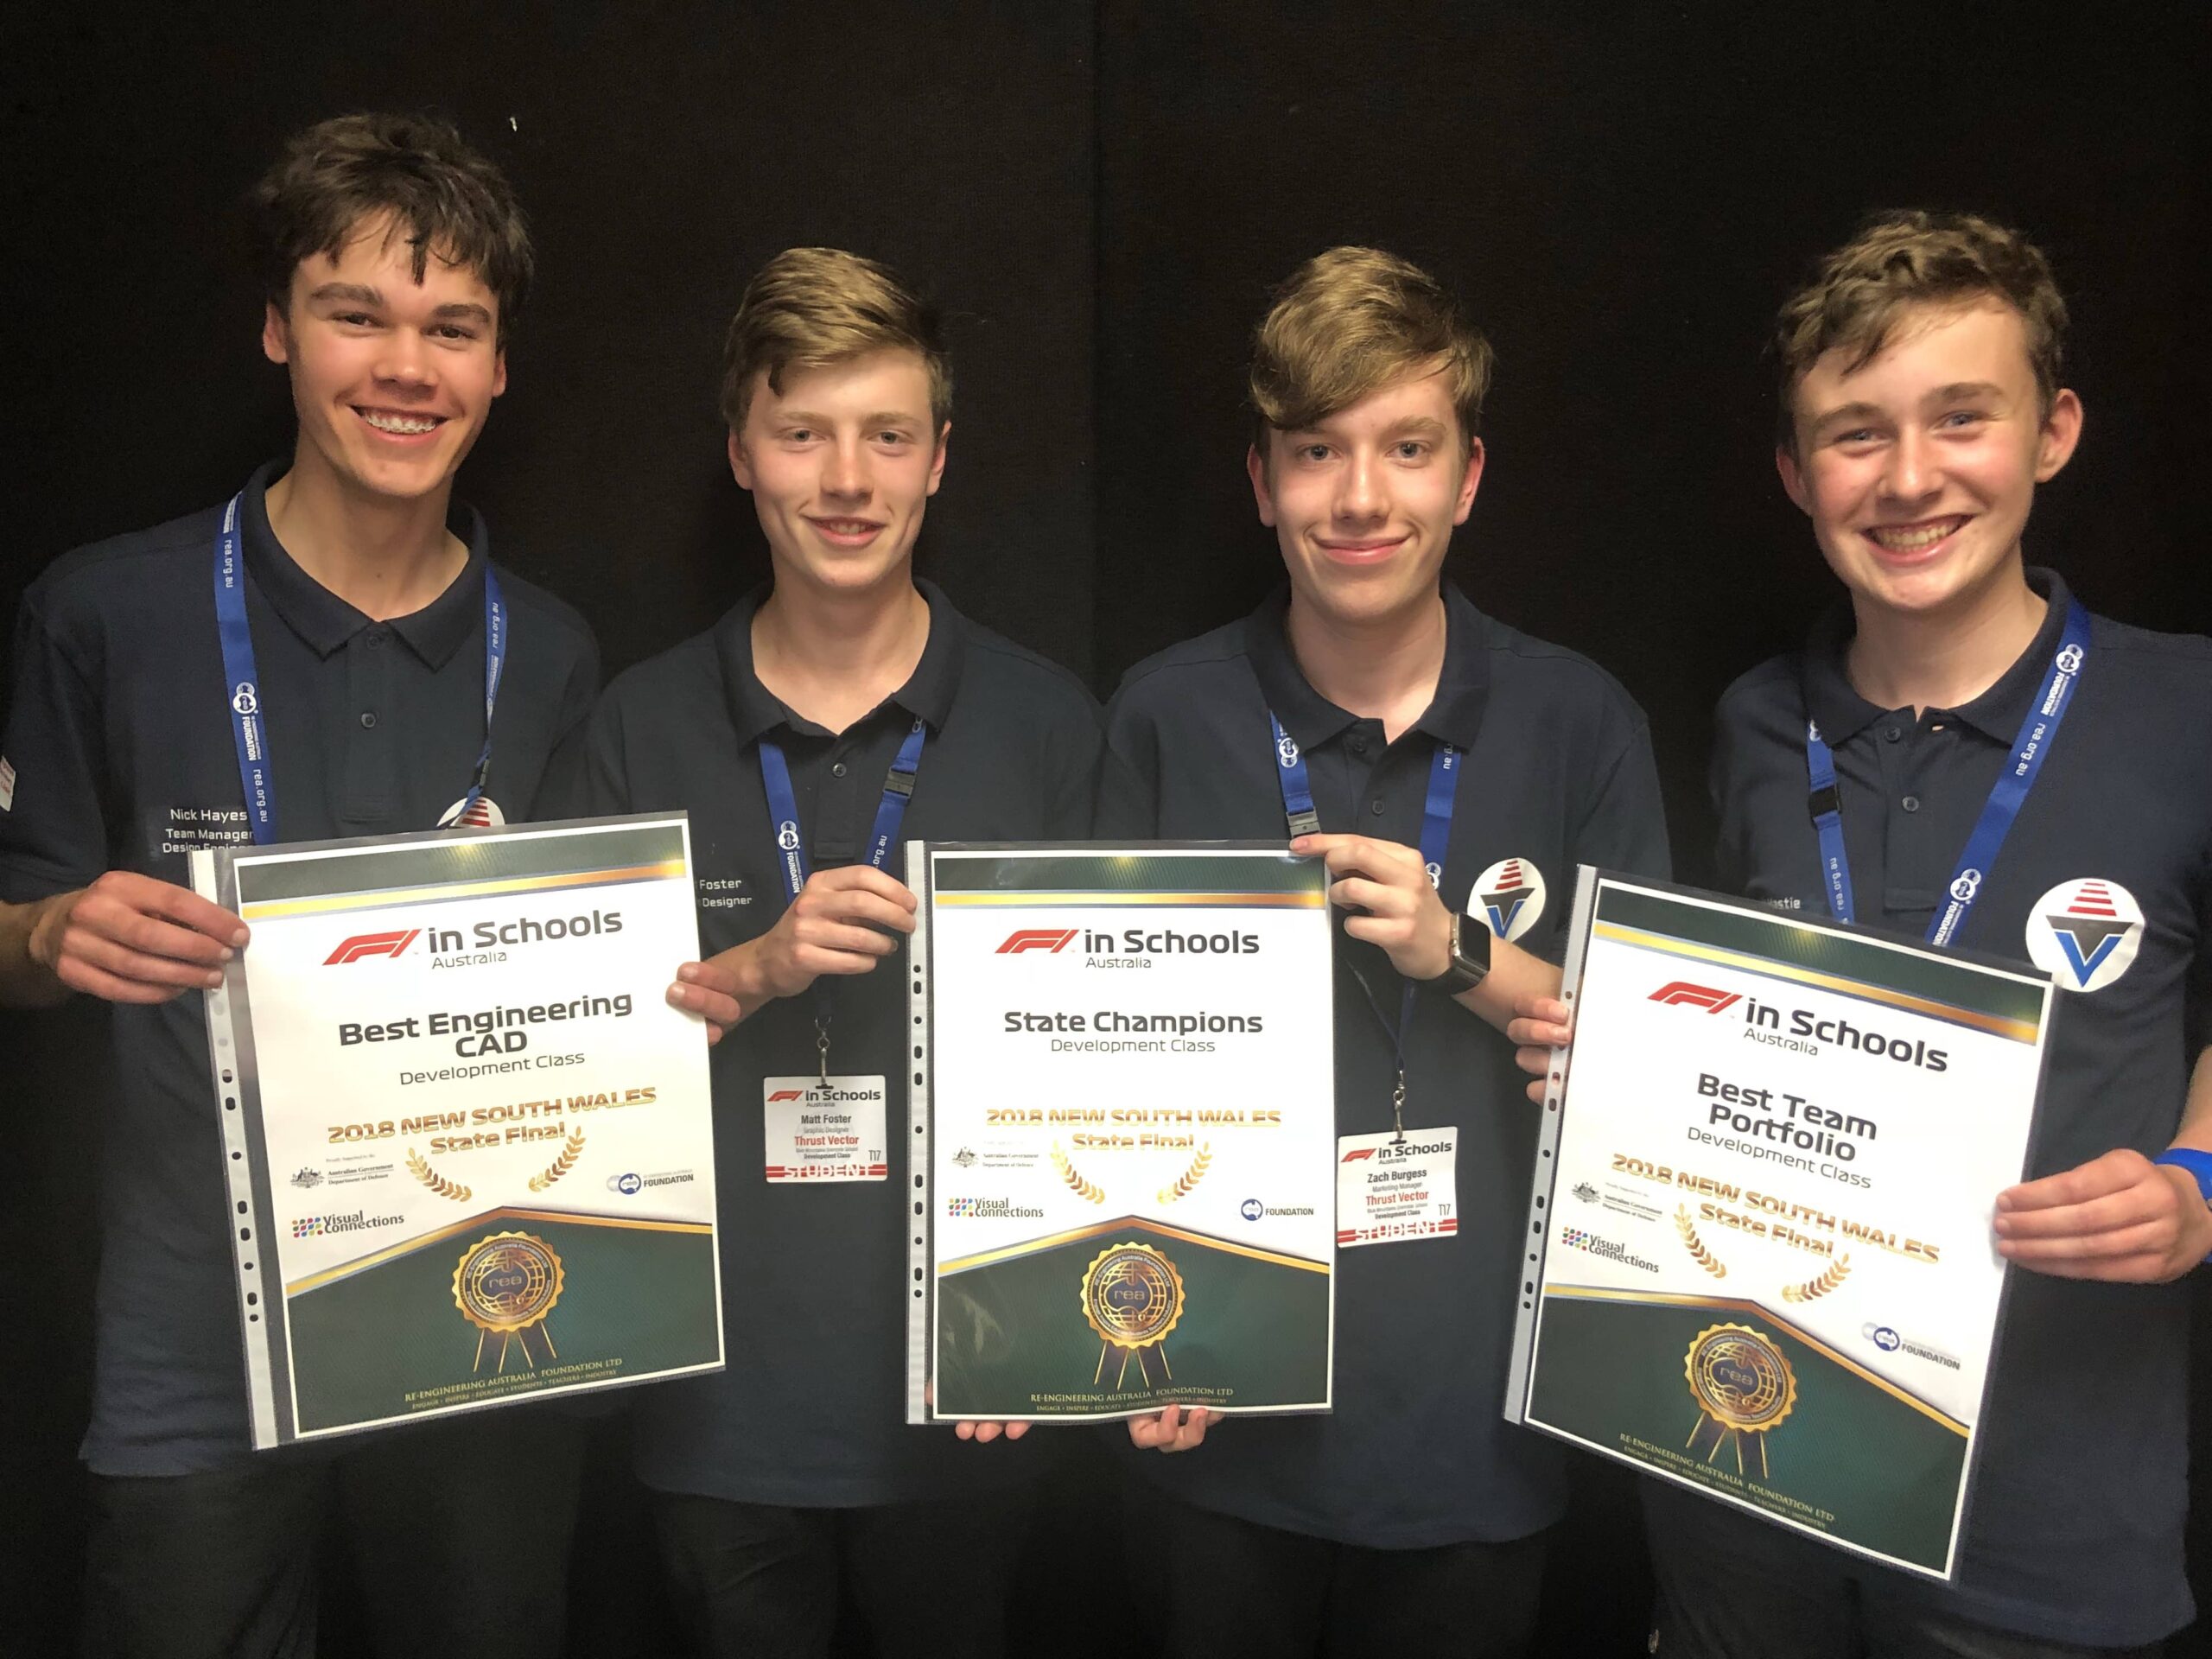
Nicholas Hayes, the team manager and design engineer of Thrust Vector—a team comprised of 4 from New South Wales—explains the nature of the project, how his team worked together, and ultimately how the team used SimScale to simulate for success.
“I competed in the F1 in Schools Australia, New South Wales State Final, as part of team Thrust Vector. We came first overall in our class, being crowned the NSW State Champions, as well as being awarded Best Team Portfolio and Best CAD Engineering. Since we came first in the NSW State Final, we will be progressing into the F1 in Schools Australian National Final in March 2019.” (Nicholas Hayes)
The STEM Challenge
The analysis and development of the F1 car design required using simulations, in order to identify where the designs could be improved or modified. The students were provided with access to real-world technology such as 3D CAD, CAM, and CAE software and soon became proficient in areas such as coding, computational fluid dynamics, finite element analysis. Team Thrust Vector chose SimScale to test their design.
The Team: Thrust Vector
Nicholas Hayes: Team manager and design engineer (responsibilities included leading the team through the design and execution process).
Finley Hastie: Manufacturing engineer (responsibilities included creating the car using a variety of processes, including CNC, 3D printing, and by hand to match the CAD design as well as comply with competition regulations)
Matt Foster: Graphic designer (responsibilities included designing and formatting the team’s marketing and branding materials, namely the display, and the official team documents)
Zach Burgess: Marketing manager (responsibilities included managing the team’s social media promotion and sponsorship seeking)
The purpose of a helmet is to protect the person who wears it from a head injury during impact. In this project, the impact of a human skull with and without a helmet was simulated with a nonlinear dynamic analysis. Download this case study for free.

How Did They Use SimScale?
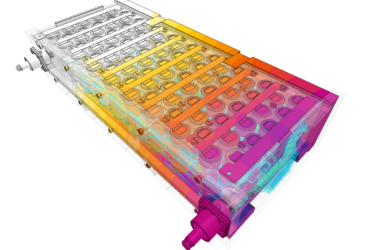
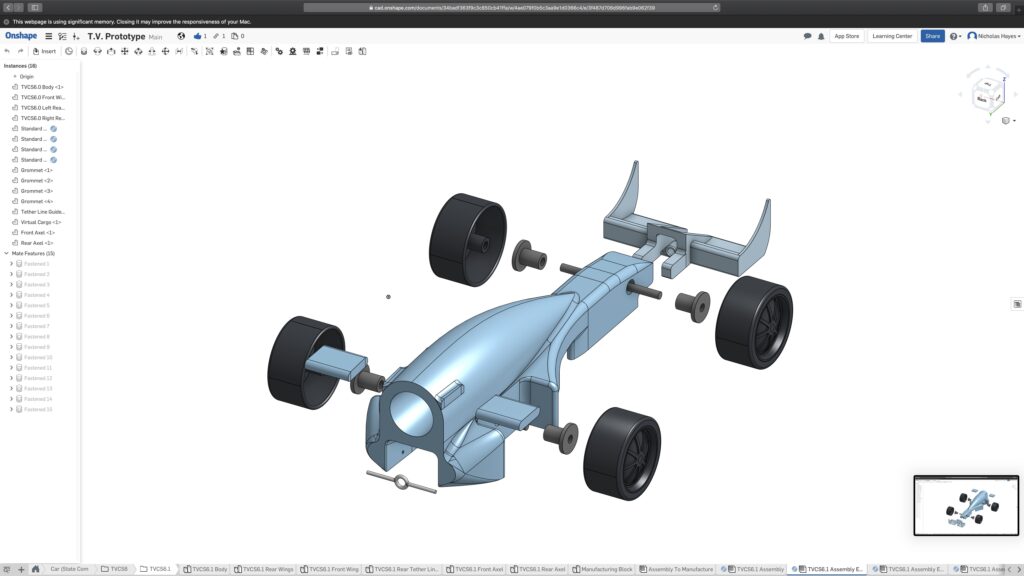
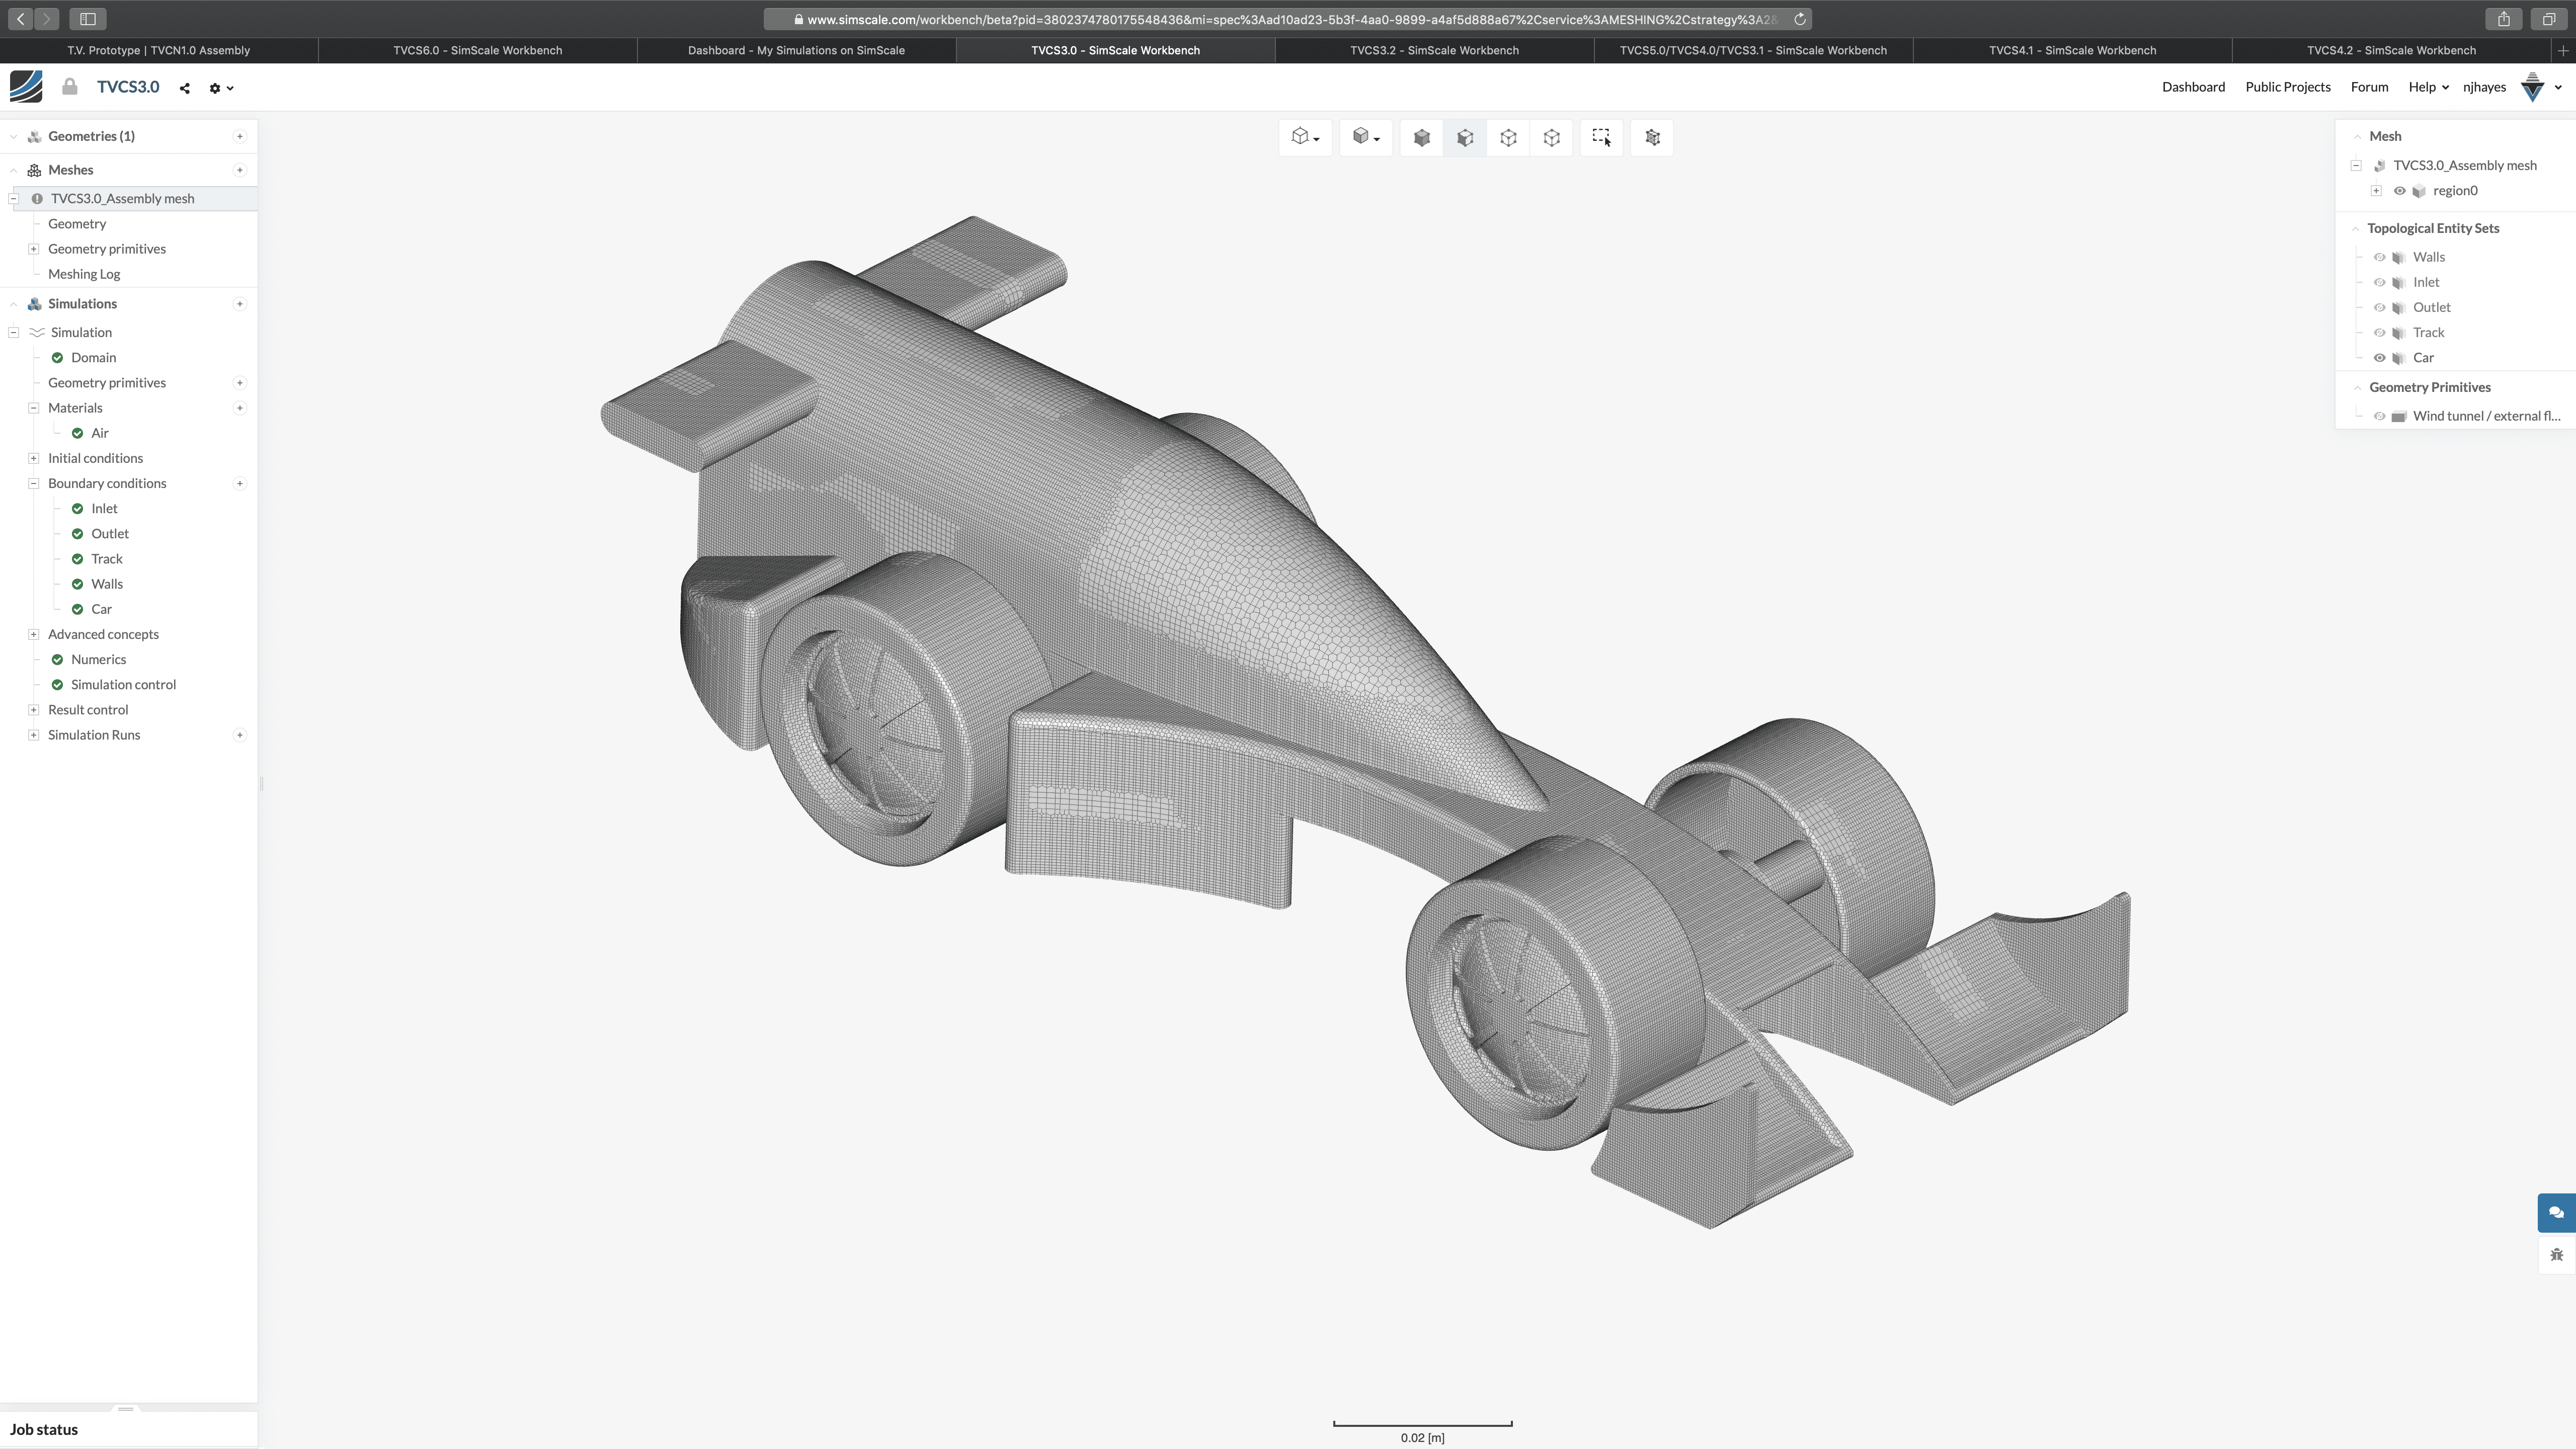
After the team decided to use SimScale to simulate their design, they imported their car design from an assembly in Onshape. From there, they generated a hex-dominant automatic mesh, with a widened wind tunnel/external flow domain and a moderate fineness, using 32 cores.
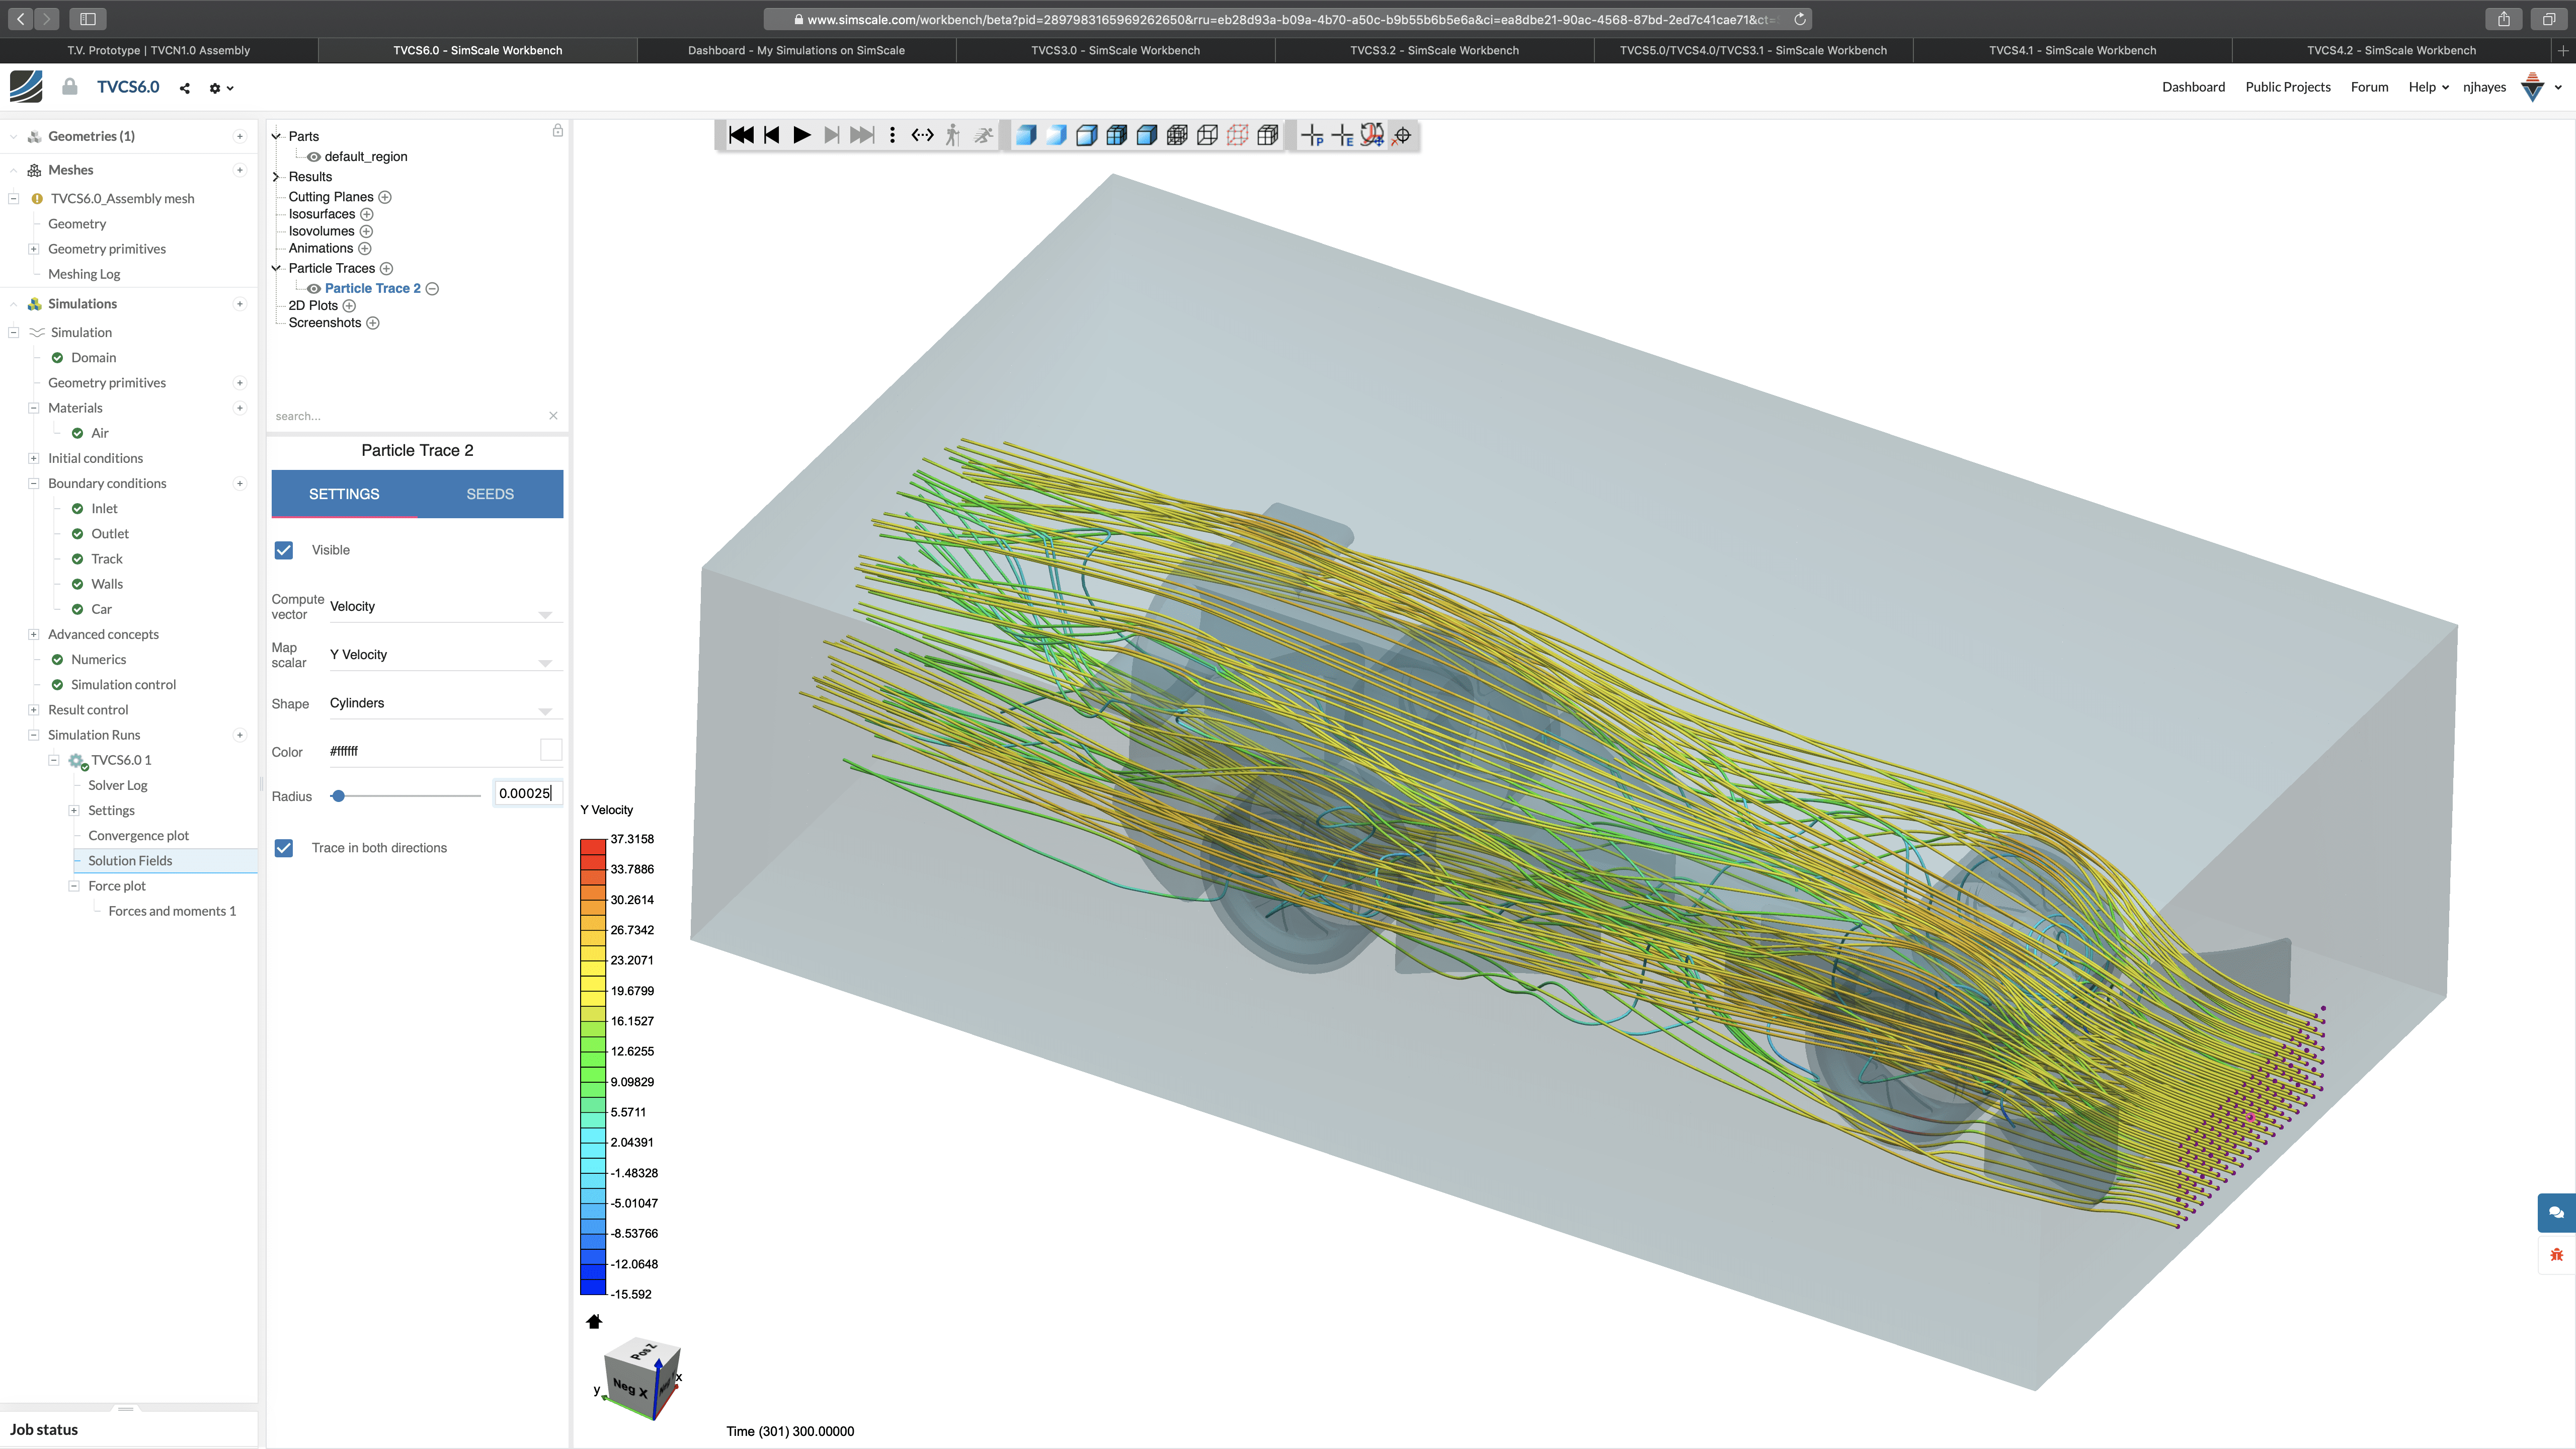
Once the mesh had finished generating, it was then imported into an incompressible fluid dynamics simulation. The settings were: k-omega SST turbulence model, steady state, and SIMPLE solver. For the topological entity sets, ‘air’ was used for the material in the simulation. The front face of the mesh was set to a velocity inlet, with a value of 20 m/s for the y-axis, so the air would flow over the car, and the back face of the mesh was set to a pressure outlet. The side faces and the top were set to slip walls, and the bottom face to a moving wall velocity with a value of 20 m/s for the y-axis to match the air inlet. Finally, the car was set to a no-slip wall.
What Was the Goal?
The team explained that the main goal of using simulation software was to gather data about the car’s different designs in order to compare and choose the best design to move forward. Another objective was to use the post-processing images of the simulation to identify the surfaces and shapes on the car that were reducing its performance, so that they could adjust or remove them to make the car design better. Running simulations and providing data on those to the judges of the F1 in Schools competition also increased their engineering score for the challenge, giving Thrust Vector a competitive edge.
What’s Next for the Team?
As Thrust Vector came first in the F1 in Schools NSW State Final, they will be representing the state of New South Wales (NSW) in the F1 in Schools Australian National Final in March 2019. In preparation for this competition, they will be further modifying the design, using SimScale CFD for testing.
Learn how to use fluid flow simulation (CFD) to understand the behavior of airflow around a F1 car.